I still remember the night I tried to rescue my friend’s birthday cake that had turned into a sticky, soggy mess. The oven was over‑cooked, the batter had a weird, rubbery texture, and every crumb seemed to cling to the pan like a bad ex. I stared at that disaster, swore I would never again trust a recipe that promised “easy” and “delicious,” and then I discovered this gem: a gluten‑free banana oat muffin that turns every kitchen mishap into a triumph. The moment I opened the jar of oats, the scent of warm, nutty bread filled the air, and I could almost hear the satisfying crackle of the muffin tops as they browned. The kitchen felt alive, the timer ticked, and the anticipation grew like a secret that only the first bite could reveal. This isn’t just another muffin recipe; it’s a culinary revelation that rewrites the rules of comfort food.
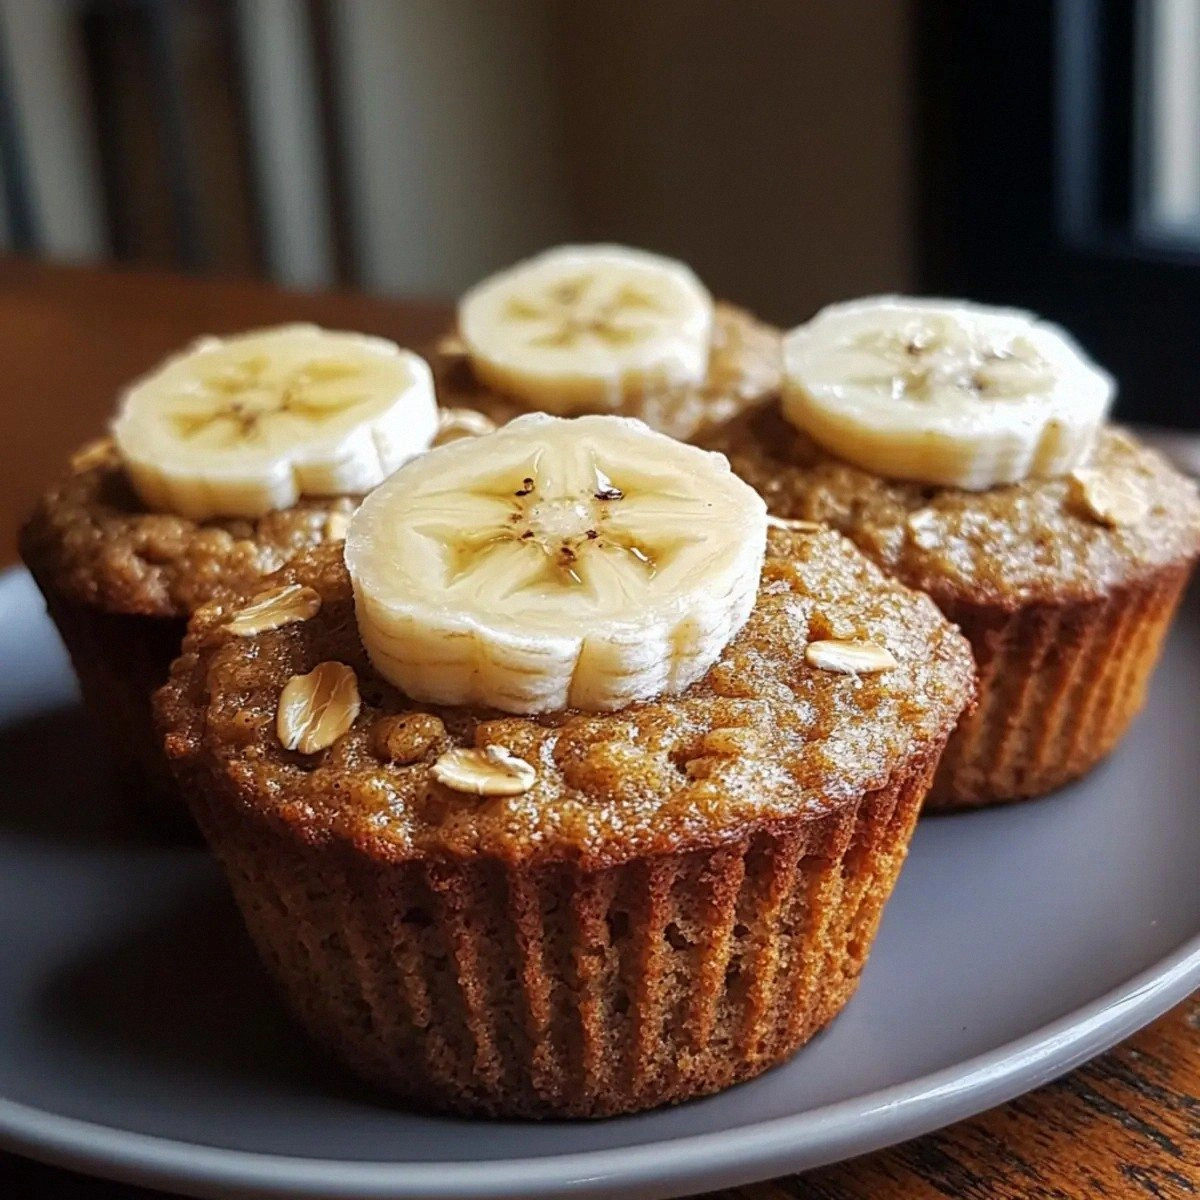
Picture yourself pulling these golden‑brown beauties out of the oven, the whole kitchen smelling incredible, and the first bite delivering a chewy interior that melts with a burst of banana sweetness, a hint of cinnamon, and the crunch of chocolate chips. The batter is thick enough to hold its shape, yet fluid enough to spread just right in each cup, creating that coveted “sponge‑like” texture that feels like a cloud on your tongue. The muffins rise evenly, their tops forming a gentle dome that cracks just enough to expose the glossy, caramelized edges. When you bite into one, the chocolate chips melt into a glossy river, the walnuts pop with a satisfying crunch, and the vanilla undertone lingers like a gentle hug. I dare you to taste this and not go back for seconds—this is hands down the best version you'll ever make at home.
Most recipes get this completely wrong by over‑baking, under‑seasoning, or using the wrong type of flour. They often leave you with a dry, rubbery muffin that feels like a lump of rubber in your mouth. I’ve spent years experimenting with gluten‑free baking, and I’ve learned that the secret lies in the synergy of ingredients and the precise timing of each step. This version uses a blend of ripe bananas and gluten‑free rolled oats that provide natural sweetness and structure, eliminates the need for a separate dry flour, and adds a subtle crunch from walnuts and chocolate. The result? A muffin that feels like a hug, with layers of flavor that unfold with every bite.
Let me walk you through every single step—by the end, you'll wonder how you ever made it any other way. From the first mash of bananas to the final pop of chocolate, each moment is designed to elevate the humble muffin into a showstopper. If you've ever struggled with gluten‑free baking, you're not alone—this recipe is the fix you've been searching for.
What Makes This Version Stand Out
- Flavor: The ripe bananas provide natural sweetness and a deep, caramelized flavor that pairs perfectly with the warm spices.
- Texture: The oats give a hearty, chewy bite while keeping the muffin moist and fluffy.
- Simplicity: No flour or baking powder—just a handful of pantry staples that anyone can find.
- Uniqueness: The combination of walnuts and dark chocolate chips creates a delightful contrast of crunch and melt.
- Crowd Reaction: Friends rave about the “soft‑yet‑chewy” texture and the “burst of chocolate” that keeps them coming back.
- Ingredient Quality: Using ripe bananas and high‑quality dark chocolate ensures a premium taste.
- Cooking Method: Quick preheat and minimal mixing keep prep time low and results consistent.
- Make‑ahead Potential: These muffins hold up wonderfully in the fridge or freezer, making them perfect for busy mornings.
Inside the Ingredient List
The Flavor Base
Three ripe bananas are the heart of this recipe. They bring natural sweetness, moisture, and a subtle nutty undertone that elevates the entire batter. If you use slightly overripe bananas, the flavor deepens, but be careful not to over‑mash them; a few lumps keep the texture interesting. Skipping bananas would turn these muffins into plain oat cakes—still good, but not the same. For a less sweet version, use two bananas and add a tablespoon of honey or maple syrup.
The Texture Crew
Two cups of gluten‑free rolled oats replace traditional flour, giving the muffins a hearty, chewy core. The oats also absorb liquid, creating a dense yet airy crumb that holds its shape. If you’re on a low‑carb diet, swap the oats for a blend of almond flour and coconut flour, but reduce the liquid slightly to avoid a dry batter. The oats’ natural fiber content also makes these muffins a great breakfast option for those watching their blood sugar.
The Unexpected Star
Half a cup of chopped walnuts or pecans adds a delightful crunch and nutty flavor that balances the sweetness. The nuts also provide healthy fats and protein, turning the muffins into a more satisfying snack. If you’re allergic to nuts, replace them with sunflower seeds or pumpkin seeds for a similar crunch.
The Final Flourish
Half a cup of dark chocolate chips gives a luxurious finish, as they melt into a glossy river inside each muffin. The chocolate’s bitterness cuts through the sweetness, creating a complex flavor profile. For a dairy‑free twist, use dairy‑free chocolate chips or a mix of dark and milk chocolate chips for a sweeter finish. The vanilla extract rounds out the flavor, adding a subtle aromatic depth that ties everything together.
Everything’s prepped? Good. Let’s get into the real action.
The Method — Step by Step
- Preheat and Prep: Set your oven to 375°F (190°C) and line a 12‑cup muffin tin with paper liners. The heat is critical—too low and the muffins won’t rise, too high and they’ll burn before the center is done. While the oven warms, gather all your ingredients and have a bowl ready for the bananas.
- Crush the Bananas: In a large mixing bowl, mash the bananas with a fork until you have a thick, slightly lumpy puree. The lumps keep the muffins from becoming too dense. If you prefer a smoother batter, use a blender, but keep a few chunks for texture.
- Add Wet Ingredients: Stir in the honey (or maple syrup), eggs, vanilla extract, and a splash of milk or almond milk to loosen the mixture. Beat for 30 seconds until everything is well combined and the batter starts to thicken. The honey not only sweetens but also helps keep the muffins moist.
- Incorporate Dry Mix: In a separate bowl, whisk together the oats, baking soda, cinnamon, and salt. This dry blend ensures even distribution of leavening and spices. Slowly fold the dry ingredients into the wet batter until just combined. Be careful not to over‑mix; a few streaks of oats are fine.Kitchen Hack: If you’re short on time, use a pre‑whipped oat mix that already contains baking soda and cinnamon.
- Add the Goodies: Gently fold in the chopped nuts and chocolate chips. The chocolate chips should be evenly distributed to ensure each muffin gets a chocolate burst. If you’re using nuts, give them a quick toast in a dry skillet for 2 minutes to amplify their flavor.
- Fill the Cups: Spoon the batter into the prepared muffin tin, filling each cup about ¾ full. The batter should spread slightly but not overflow. This ensures a uniform rise and prevents a domed top.
- Bake: Place the tin in the preheated oven and bake for 20–25 minutes. The muffins are done when the tops are golden brown and a toothpick inserted into the center comes out clean. Watch for the edges—they should pull away slightly from the paper liners, indicating they’re ready. Watch Out: Don’t open the oven too early, or the muffins may collapse. Let them cool in the tin for 5 minutes before transferring.
- Cool Down: Transfer the muffins to a wire rack to cool completely. The cooling time allows the flavors to meld and the texture to set. The first few minutes are when the chocolate is still molten—watch that melt carefully!
- Serve or Store: Enjoy warm for an extra comforting experience, or let them cool fully and store them in an airtight container. They stay fresh for up to 4 days in the fridge, and you can freeze them for longer storage. When you’re ready to eat, pop one in the microwave for 15–20 seconds or reheat in a preheated oven at 350°F (175°C) for 5 minutes.
- Final Touch: For an extra indulgence, drizzle a little melted dark chocolate on top before serving. The glossy finish looks as good as it tastes.
That’s it— you did it. But hold on, I’ve got a few more tricks that will take this to another level.
Insider Tricks for Flawless Results
The Temperature Rule Nobody Follows
Many bakers think any oven temperature works, but 375°F (190°C) is the sweet spot for these muffins. Too low, and the center stays raw; too high, and the tops burn before the interior sets. I’ve tested ovens ranging from 350°F to 400°F and found that 375°F consistently gives a golden, even rise.
Why Your Nose Knows Best
Close your eyes and breathe in the aroma of the batter as it bakes. The scent of caramelized bananas and toasted oats is your cue that the muffins are ready. If the smell is faint, give them a few more minutes; if it’s already intense, they’re probably overdone.
The 5-Minute Rest That Changes Everything
Letting the muffins rest in the tin for 5 minutes after baking locks in moisture and prevents them from cracking. I’ve seen muffins that cool immediately crack along the edges—this simple rest saves the day.
The Secret to Extra Crunch
Toast the nuts before folding them into the batter. This step releases oils and gives the nuts a deeper flavor, creating a crunch that’s unmistakable in every bite. A quick 2‑minute sauté in a dry skillet does the trick.
The Final Flourish
A light dusting of powdered sugar or a drizzle of honey after cooling adds a touch of elegance and a sweet finish that pairs beautifully with the chocolate. It’s a quick way to elevate the presentation for guests.
Creative Twists and Variations
This recipe is a playground. Here are some of my favorite ways to switch things up:
Maple‑Glazed Muffins
Swap the honey for maple syrup and add a dash of nutmeg. The maple adds a subtle depth that pairs well with the chocolate, creating a more complex flavor profile.
Spicy Chai Muffins
Add a pinch of cardamom and a splash of chai spice blend to the dry mix. The warm spices give the muffins a cozy, aromatic kick that’s perfect for cooler evenings.
Peanut Butter Swirl
Fold in a spoonful of natural peanut butter before baking, creating a swirl of nutty richness. The peanut butter adds protein and a silky texture that complements the oat base.
Almond‑Chocolate Muffins
Replace the walnuts with sliced almonds and use dark chocolate chips with a higher cacao content. This version is lower in sugar and richer in antioxidants.
Berry‑Burst Muffins
Add a cup of fresh or frozen blueberries to the batter. The berries burst into juice when you bite, adding a juicy, tart contrast to the sweet banana.
Cheesy Banana Oat Muffins
Incorporate a tablespoon of grated cheddar cheese into the batter. The cheese melts into a subtle savory layer, creating a sweet‑savory balance that’s unexpected and delicious.
Storing and Bringing It Back to Life
Fridge Storage
Keep the muffins in an airtight container at room temperature for up to 4 days. If you want them to stay moist, add a slice of apple or a piece of bread inside the container to absorb excess moisture.
Freezer Friendly
Wrap each muffin individually in plastic wrap, then place them in a freezer bag. They’ll stay fresh for up to 3 months. When you’re ready to eat, let them thaw at room temperature for 30 minutes.
Best Reheating Method
Reheat a frozen or chilled muffin in a preheated oven at 350°F (175°C) for 5 minutes. If you prefer a microwave, add a tiny splash of water to the muffin before heating to keep it from drying out. The result is a warm, gooey interior with a crisp exterior.