Picture this: it’s a rainy Thursday evening, the kind of night that makes you crave comfort food that feels like a warm hug. I’m standing in my tiny kitchen, a half‑filled bottle of olive oil, a jar of garlic, and a handful of mozzarella staring back at me. The oven is already preheated, the timer set, and my taste buds are in a frenzy. I’ve tried countless versions of garlic knots—some too dry, some too greasy, some that crumble under the weight of the cheese. But then I stumbled upon a recipe that turned the ordinary into extraordinary, and I haven’t looked back.
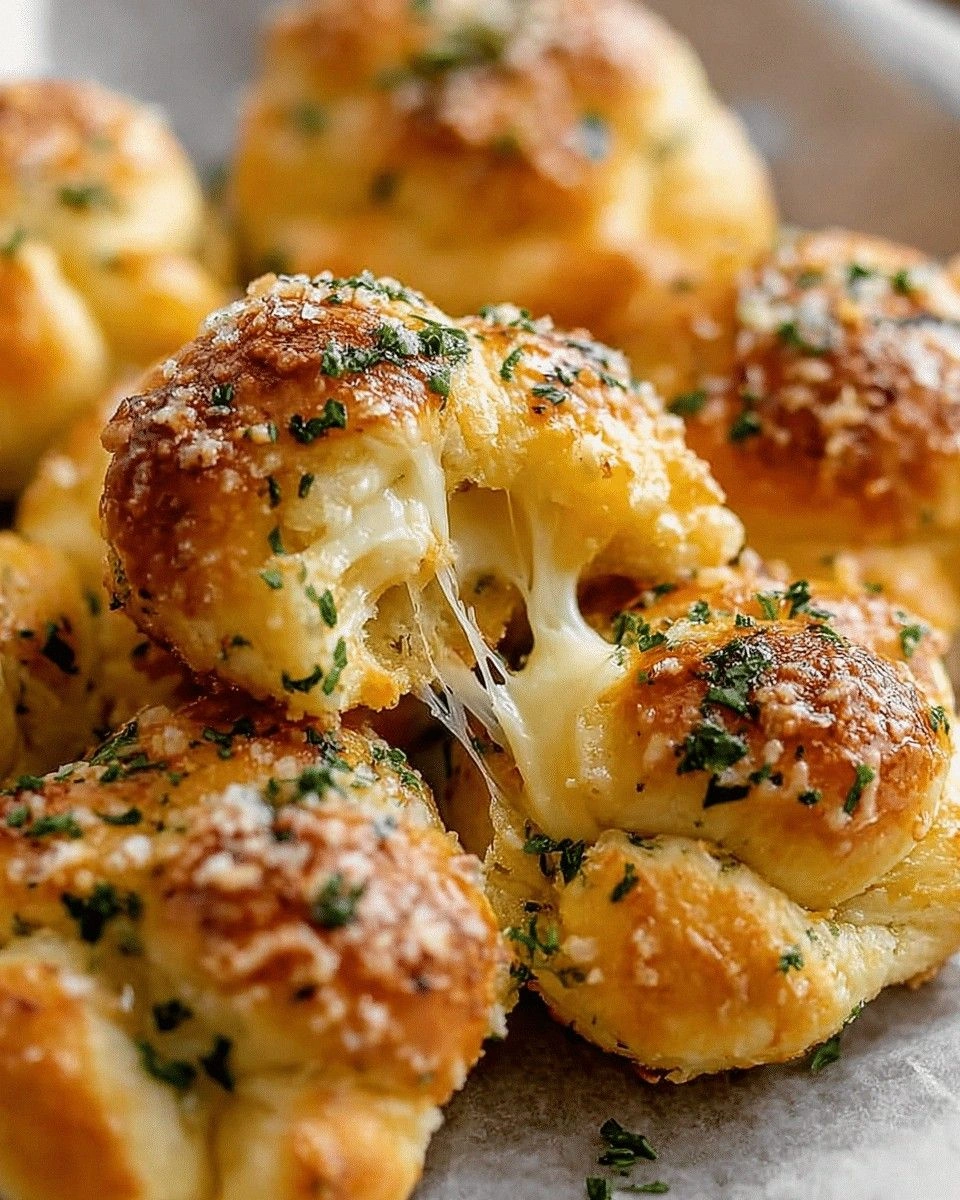
The first bite was a revelation: a golden crust that crackled like a small fireworks display, a molten center of mozzarella and parmesan that oozed out like a cheesy river, and a garlic‑infused butter that coated the dough like velvet. The aroma that wafted from the oven was so intoxicating it could have convinced a cat to jump onto the counter. The sound of the knots popping in the oven was the soundtrack of pure culinary bliss, and the texture—crispy outside, airy inside—was a perfect marriage of contrast and harmony. If you’ve ever struggled to get the dough just right, you’re not alone, and I’ve got the fix.
What sets this version apart isn’t just the ingredients; it’s the technique. I discovered that a small amount of butter in the dough not only adds flavor but also creates a tender crumb that holds the cheese filling without tearing. I also learned that letting the dough rise twice, once in a warm spot and once after shaping, gives the knots a lightness that’s hard to replicate. The secret is in the balance—too little yeast and the knots are dense; too much and they puff up and lose that classic knot shape. I dare you to taste this and not go back for seconds.
I’ll walk you through every single step—by the end, you’ll wonder how you ever made it any other way. From the first whisk of flour to the final drizzle of garlic butter, every moment is a chance to elevate the dish. And trust me, this is hands down the best version you’ll ever make at home. Let’s dive in.
What Makes This Version Stand Out
- Flavor: The combination of mozzarella and parmesan creates a creamy, savory center that’s balanced by a subtle garlic undertone. The cheese melts into a silky sauce that coats each bite, like a velvety blanket.
- Texture: The double rise technique yields a light, airy interior while the crust remains crisp and buttery, providing a satisfying crunch that shatters like thin ice.
- Simplicity: Only 12 ingredients, all pantry staples, mean you can whip up a batch in under an hour, even if you’re a kitchen novice.
- Uniqueness: A splash of fresh basil and parsley in the dough adds a herbal freshness that elevates the traditional garlic knot to gourmet territory.
- Crowd Reaction: Friends who’ve tried this say it’s “the best garlic knot I’ve ever had.” They’re so hooked they order it at parties, and you’ll be the hero of every gathering.
- Ingredient Quality: Using high‑quality mozzarella and parmesan ensures a melt that’s rich and not too sharp, while the olive oil gives the dough a subtle fruity note.
- Cooking Method: Baking at 425°F with a preheated pan guarantees a perfect crust while keeping the interior moist.
- Make‑ahead Potential: The dough can be shaped and frozen, and the knots can be baked fresh when you’re ready—no need for a last‑minute rush.
Alright, let's break down exactly what goes into this masterpiece…
Inside the Ingredient List
The Flour Factor
All-purpose flour is the backbone of our knots. It provides the structure that holds the dough together while still allowing for a tender crumb. If you’re craving a lighter texture, swap in bread flour for a slightly chewier bite. However, keep in mind that bread flour has more protein, which can make the dough a bit tougher if not handled carefully. When selecting flour, choose a brand that’s fresh and has a consistent texture to avoid clumps in your dough.
The Yeast and Sweetness
Active dry yeast is the engine that propels the dough upward. The sugar acts as fuel for the yeast, ensuring a robust rise. If you don’t have yeast on hand, you can use instant yeast, but reduce the liquid by about ¼ cup to compensate. A pinch of salt is essential to balance the sweetness and to activate the yeast, but don’t overdo it—too much salt can stifle the rise.
The Garlic and Herb Symphony
Fresh garlic, minced finely, gives the knots that unmistakable kick. The basil and parsley add a bright, herbal note that cuts through the richness of the cheese. If you’re a fan of a more pronounced herb flavor, double the amount of basil. Conversely, if you prefer a subtle herb presence, reduce the parsley to half a tablespoon.
The Cheese Core
Mozzarella provides the meltiness, while parmesan adds a sharp, nutty depth. The ratio of mozzarella to parmesan is key; too much mozzarella can make the knots too soft, while too much parmesan can overpower the dough. A good rule of thumb is 75% mozzarella to 25% parmesan. For a vegan twist, substitute a plant‑based cheese that melts well, such as a cashew‑based mozzarella alternative.
Everything's prepped? Good. Let's get into the real action…
The Method — Step by Step
- Step 1: Activate the Yeast. In a small bowl, combine 1 ½ cups warm water (about 110°F), 1 teaspoon sugar, and 1 ½ teaspoons active dry yeast. Let sit for 5–7 minutes until frothy, like a miniature bubble bath. This indicates the yeast is alive and ready to work its magic. If it doesn’t froth, you may have expired yeast and should start over.
- Step 2: Mix the Dry Ingredients. In a large mixing bowl, whisk together 4 cups all-purpose flour, 1 teaspoon salt, and 1 tablespoon Italian seasoning. The flour is the foundation, so make sure there are no lumps. This dry mix will be the canvas for the flavor layers we’ll add next.
- Step 3: Combine Wet and Dry. Pour the activated yeast mixture into the dry ingredients. Add 2 tablespoons olive oil and 2 tablespoons melted butter. Stir with a wooden spoon until the dough starts to come together. The butter will create a tender crumb, and the olive oil adds a subtle fruity note.
- Step 4: First Rise. Turn the dough onto a floured surface and knead for 8–10 minutes until smooth and elastic. Form the dough into a ball and place it in a lightly oiled bowl, turning it once to coat. Cover with plastic wrap or a damp towel and let rise in a warm spot for 1 hour, or until doubled in size. This first rise is critical for developing flavor and structure.
- Step 5: Prepare the Cheese Filling. While the dough rises, combine 1 cup shredded mozzarella, ½ cup grated parmesan, 1 tablespoon chopped fresh basil, 1 tablespoon chopped parsley, and 4 minced garlic cloves in a small bowl. Mix until the cheeses are evenly distributed. This filling will be the heart of each knot, so make sure it’s well blended.
- Step 6: Shape the Knots. Punch down the dough to release air. Divide it into 12 equal pieces. Roll each piece into a long rope, about 12 inches long. Place a heaping teaspoon of the cheese filling in the center of each rope. Fold the ends together and pinch to seal. Then twist the rope into a knot and place it on a parchment‑lined baking sheet. Repeat until all knots are formed.
- Step 7: Second Rise. Cover the shaped knots with a clean kitchen towel and let rise for another 30 minutes. This second rise gives them a lighter, more airy interior. If you’re in a hurry, you can skip this step, but the texture will be noticeably denser.
- Step 8: Preheat the Oven. While the knots are rising, preheat the oven to 425°F (220°C). Place a cast‑iron skillet in the oven to preheat as well; this will help the knots develop a crisp crust.
- Step 9: Bake. Carefully remove the hot skillet and place the parchment‑lined sheet inside. Bake the knots for 12–15 minutes, or until golden brown and the cheese is bubbling. The oven’s high heat ensures a crispy exterior while keeping the interior tender.
- Step 10: Finish with Garlic Butter. While the knots are still hot, melt 4 tablespoons of butter in a small saucepan. Add 2 minced garlic cloves and cook until fragrant, about 30 seconds. Brush the garlic butter over each knot, then sprinkle with a pinch of salt and freshly ground pepper. Serve immediately, and watch the smiles appear.
That's it — you did it. But hold on, I've got a few more tricks that'll take this to another level...
Insider Tricks for Flawless Results
The Temperature Rule Nobody Follows
The oven temperature is critical. Baking at 425°F ensures a rapid crust formation while the interior remains moist. If you’re using a convection oven, reduce the temperature by 25°F to avoid over‑browning. A well‑preheated cast‑iron skillet also helps achieve that perfect, caramelized crust.
Why Your Nose Knows Best
During the second rise, pause and inhale the dough’s scent. A subtle, yeasty aroma indicates a good rise. If the dough smells flat or sour, it may need more time or a warm spot to finish rising. Trust your nose—your senses are the best judge of readiness.
The 5-Minute Rest That Changes Everything
After baking, let the knots rest on a wire rack for 5 minutes. This allows the steam to escape and the cheese to set, preventing a gooey mess that could soak into the crust. It also lets the flavors meld, giving the knots a deeper, more cohesive taste.
Add a Splash of Water Before Reheating
If you’re reheating leftovers, add a tablespoon of water to the skillet before adding the knots. The steam will revive the crust’s crispness while keeping the interior moist. This trick is especially useful if you’ve frozen the knots and thawed them at room temperature.
Keep the Knots Fresh with a Damp Towel
When storing freshly baked knots, wrap them loosely in a damp kitchen towel before placing them in an airtight container. The towel keeps them from drying out while the container prevents them from becoming soggy. This method works wonders for maintaining the knots’ texture for up to 48 hours.
Creative Twists and Variations
This recipe is a playground. Here are some of my favorite ways to switch things up:
Spicy Sriracha Knots
Swap out half of the mozzarella for a blend of mozzarella and cheddar, and stir in a tablespoon of sriracha into the cheese filling. The heat pairs beautifully with the garlic, creating a fiery kick that’s sure to impress.
Mediterranean Olive Knots
Add chopped kalamata olives and sun‑dried tomatoes to the cheese mixture. The briny olives and sweet tomatoes add depth, while the olive oil in the dough enhances the Mediterranean vibe.
Herb‑Infused Pesto Knots
Blend a quarter cup of basil pesto into the cheese filling. The pesto adds a burst of fresh basil flavor and a green, glossy finish that’s visually stunning.
Cheddar & Jalapeño Knots
Replace mozzarella with sharp cheddar and fold in diced jalapeños. The sharp cheddar gives a robust flavor, while the jalapeños add a pleasant heat that’s balanced by the buttery crust.
Garlic Parmesan Knots
Omit the mozzarella entirely and double the parmesan. The result is a crisp, cheesy knot with a pronounced parmesan flavor that’s reminiscent of a pizza crust.
Vegan Cheese Knots
Use a plant‑based mozzarella alternative and nutritional yeast for a cheesy, savory flavor. Keep the rest of the recipe unchanged for a vegan version that still delivers on taste and texture.
Storing and Bringing It Back to Life
Fridge Storage
Place freshly baked knots in an airtight container at room temperature for up to 48 hours. If you prefer a crispier crust, reheat them in a preheated oven at 350°F for 5 minutes before serving. The dough will keep the cheese filling intact while maintaining its flavor.
Freezer Friendly
After the second rise, shape the knots and place them on a parchment‑lined tray. Freeze until solid, then transfer to a freezer bag. Store for up to 3 months. When ready to bake, let them thaw at room temperature for 30 minutes, then bake directly from frozen at 425°F for 15 minutes.
Best Reheating Method
Reheating in a skillet or oven is the best way to preserve the crust’s crispness. If using a skillet, melt a tablespoon of butter and add the knots, cooking for 2–3 minutes on each side. This method also allows you to add a fresh garlic butter glaze for extra flavor.
Add a tiny splash of water before reheating to create steam, which keeps the interior moist while the crust remains crunchy. This simple trick ensures that each bite feels freshly baked.