Picture this: it is 11:37 p.m., the house is finally quiet, and the only thing louder than the hum of the refrigerator is the voice in your head chanting, “You deserve something scandalously good.” I had already raided the pantry twice, sighed at the half-eaten bag of pretzels, and was thiiis close to settling for a spoonful of peanut butter when I remembered the emergency stash of butter I keep in the freezer for moments exactly like this. Ten minutes later I was creaming brown sugar and butter together, breathing in that sweet, almost boozy aroma that makes time slow down. By midnight I was staring at a slab of Chocolate Chip Cookie Dough Bars so gorgeous I actually did a slow-motion victory lap around the kitchen island. I dare you to taste this and not go back for seconds—actually, I double-dog dare you, because resistance is futile once you hit that cool, creamy cheesecake ripple hiding between two layers of safe-to-eat cookie dough.
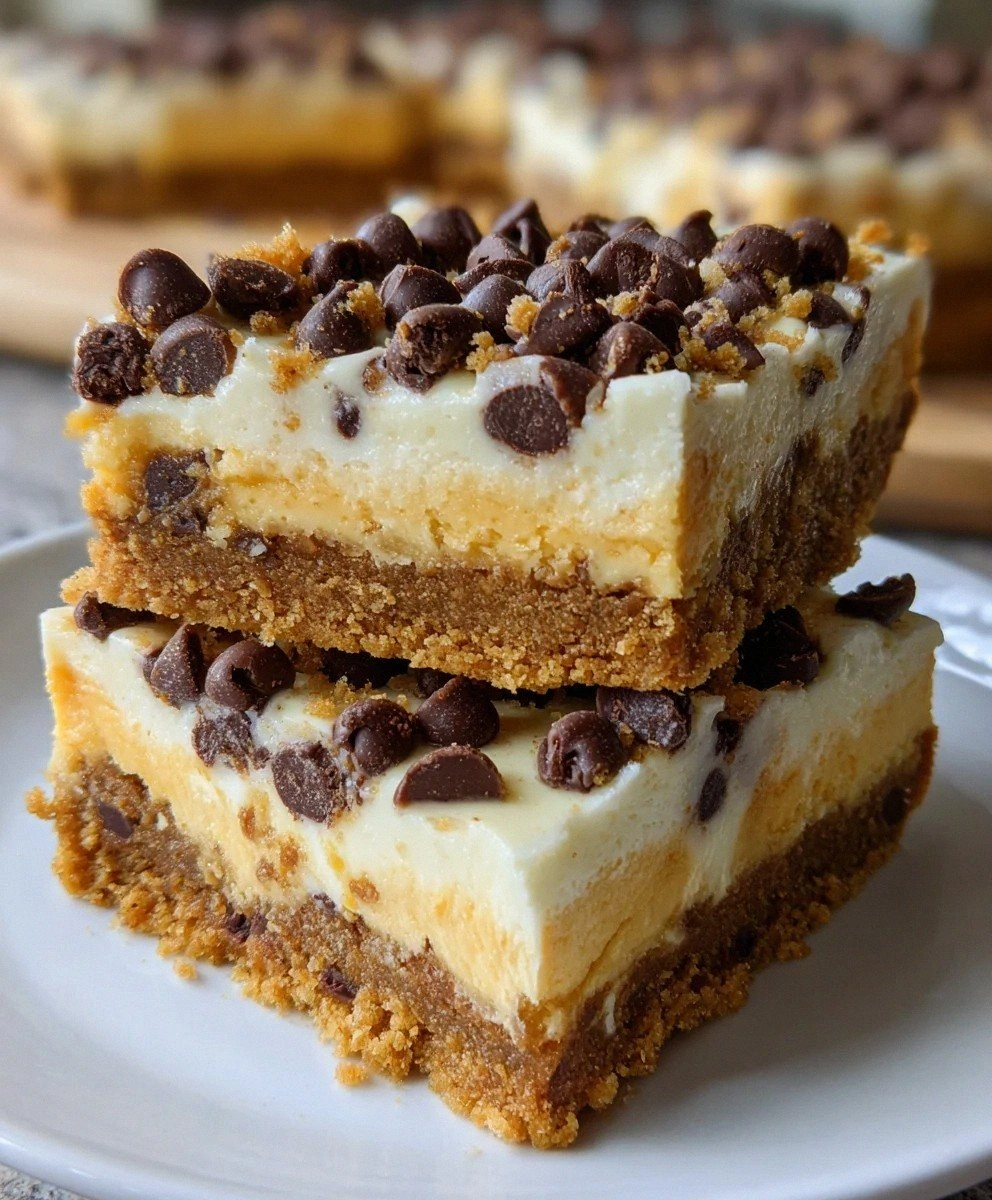
Most recipes get this completely wrong. They either bake the cookie dough into a dry brick, or they leave it raw and you end up with a gritty, floury aftertaste that clings to your molars like wet sand. Here is what actually works: we toast the flour first—yes, on the stove top—until it smells like toasted hazelnuts and your kitchen feels like a French patisserie. Then we fold in mini chocolate chips so every bite has these tiny pockets of melty cocoa bliss. The middle layer is not just cream cheese mixed with sugar; it is cream cheese lightened with a single egg and a splash of vanilla, baked just long enough to set like a satin pillow. The result is a three-layer bar that eats like a cross between refrigerated cookie dough and cheesecake, with crispy edges that shatter like thin ice and a gooey center that sighs when you slice it.
If you have ever struggled with dessert bars that crack on top, sink in the middle, or taste one-note sweet, you are not alone—and I have got the fix. This is hands down the best version you will ever make at home, and I say that having fed these to picky kids, fitness-obsessed cousins, and one grandmother who swears she “doesn’t do sugar” yet asked for the recipe in all caps. Picture yourself pulling this out of the fridge, the whole kitchen smelling like a chocolate chip cookie just took a luxurious bubble bath. Stay with me here—this is worth it.
Let me walk you through every single step—by the end, you will wonder how you ever made it any other way.
What Makes This Version Stand Out
- Safe-to-eat dough: We nix the eggs in the dough and heat-treat the flour, so you can lick the bowl without playing gastrointestinal roulette. The flavor is pure nostalgic cookie dough, minus the E. coli anxiety.
- Triple-texture magic: A crunchy graham base, silky cheesecake center, and soft cookie dough top create a bar that crackles, melts, and chews all in one bite. Most recipes give you one texture; we give you a symphony.
- One bowl, one pan: No stand mixer, no food processor, no twenty-step custard. If you can stir and press, you can pull this off in pajamas while binge-listening to true-crime podcasts.
- Fridge-stable: These bars actually improve after a night in the cold. The flavors meld, the chocolate firms up, and you get that snappy contrast between hard chip and soft dough. Good luck keeping them longer than three days.
- Make-ahead hero: Slice, stack with parchment, freeze, and boom—instant dessert for surprise guests or midnight cravings. They thaw on the counter in fifteen minutes, which is roughly how long it takes to decide you have earned dessert.
- Crowd confusion: People cannot figure out what they are eating. “Is it cookie? Cheesecake? Candy?” Watching them argue is half the fun; watching them surrender to a second bar is the other half.
Alright, let us break down exactly what goes into this masterpiece...
Inside the Ingredient List
The Flavor Base
Graham cracker crumbs are the buttery, slightly honeyed foundation that holds everything together like a reliable best friend who never hogs the spotlight. When mixed with melted unsalted butter and a kiss of granulated sugar, they morph into a crust that tastes like the edge of a cheesecake had a fling with a shortbread cookie. Skip the sugar and your base will taste like cardboard that gave up on life; skip the butter and you will need a chisel to extract the bars from the pan. I blitz whole crackers in a zip-top bag with a rolling pin because the irregular crumbs create air pockets that bake up crispier than store-bought pre-crushed dust.
Dark brown sugar is the molasses-heavy rebel that deepens the cookie dough layer with caramel notes and keeps it moist even after refrigeration. Light brown sugar works in a pinch, but it is like swapping a velvet dress for rayon—close, but you will feel the difference. Pack it firmly when measuring; think of it as a cozy blanket for your butter. If you only have white sugar, add a tablespoon of dark corn syrup and nobody will know you improvised.
The Texture Crew
Plain flour gets toasted until it turns a pale almond color and your kitchen smells like a Sunday morning at grandma’s house. This step kills any potential bacteria and removes the raw, dusty taste that haunts no-bake doughs. Fine salt is the unsung hero that amplifies chocolate and tames sweetness without screaming “I am salty!” If you accidentally leave it out, the bars taste flat, like pop music without bass. Use kosher salt only if you cut the quantity by half; the bigger crystals can make bites taste like a pretzel in a bad way.
Chocolate chips are the star, but not all chips are created equal. Semi-sweet delivers that classic cafeteria-cookie nostalgia, while dark chocolate (60–70 %) gives you a sophisticated bitterness that makes grown-ups close their eyes in approval. Mini chips disperse like freckles so every nibble has chocolate; giant chips create lava pockets that ooze when you slice. Feel free to swap in butterscotch, peanut butter chips, or chopped candy bars—this dough is an equal-opportunity mix-in paradise.
The Unexpected Star
Cream cheese is what turns a regular cookie-dough square into a legitimate showstopper. It must be full-fat and softened to the point where a gentle poke leaves a divot that slowly fills back in. Low-fat cream cheese contains stabilizers that turn gummy when baked, giving you a rubber layer that bounces off the fork. Let it sit on the counter for at least an hour; microwaving creates hot edges and a cold center that will never blend smoothly no matter how fiercely you whisk.
One single egg is the insurance policy that sets the cheesecake layer into a satin pillow rather than a runny puddle. Beat it just enough to incorporate; over-mixing whips in air that will rise, collapse, and leave a moon-crater surface. Room-temperature eggs mix more evenly, so drop yours in a bowl of warm tap water for five minutes while you scroll Instagram.
The Final Flourish
Vanilla extract is the aromatic ribbon that ties the cookie dough and cheesecake together. Use the real stuff; imitation vanilla smells like a candle shop clearance rack and leaves a metallic aftertaste. A full teaspoon may seem excessive, but remember we are not baking the dough, so the alcohol never cooks off. Splurge on Madagascar bourbon vanilla if you want floral notes that make people ask, “Why do these taste like vacation?”
Everything is prepped? Good. Let us get into the real action...
The Method — Step by Step
- Preheat your oven to 325 °F (160 °C) and line an 8-inch square pan with parchment paper, leaving wings on two sides so you can lift the bars out like a golden raft. Blitz your graham crackers into coarse crumbs; you want some sandy bits and some pea-size pebbles for textural intrigue. Stir in 3 tablespoons of granulated sugar and 6 tablespoons of melted unsalted butter until the mixture feels like wet sand at the beach where you can squeeze a clump and it holds together like a shy handshake. Press this into the bottom of the pan using the flat base of a measuring cup, pushing a ½-inch lip up the sides to create a tiny edible fortress.
- Slide the crust into the oven for 12 minutes—no more, no less—until it smells like toasted cereal and the edges turn one shade darker than golden brown. While it bakes, heat-treat 1 cup of plain flour in a dry skillet over medium heat, stirring constantly with a silicone spatula for about 5 minutes. The flour will steam, clump slightly, and take on the nutty aroma of hazelnut skin; that sizzle when it hits the pan? Absolute perfection. Transfer it to a plate immediately so it does not keep cooking from residual heat and turn into sawdust.
- In a medium bowl, cream ½ cup of softened unsalted butter with ¾ cup of packed dark brown sugar until the mixture looks like fluffy peanut butter and the color morphs into a sun-kissed caramel. Add 2 tablespoons of milk and 1 teaspoon of vanilla extract; beat just enough to combine—over-milking will cause the dough to break and weep like a toddler past nap time. Stir in the cooled, toasted flour and ¼ teaspoon of fine salt until you have a soft, play-dough consistency that you could roll into truffles if you were feeling fancy.
- Fold in ½ cup of mini semi-sweet chocolate chips using a rubber spatula and a gentle scoop-lift-turn motion that feels like fluffing a pillow. The dough should be studded but not overwhelmed; think of chocolate chips as sequins on a cocktail dress—enough to catch the light, not so many that the fabric disappears. Reserve ⅓ cup of this dough for the top layer and press the remaining dough evenly over the baked graham crust while it is still warm; the residual heat helps the bottom of the dough melt slightly and glue itself in place so you do not get sliding layers later.
- Okay, ready for the game-changer? In a separate bowl, beat 8 oz of softened full-fat cream cheese with ¼ cup of granulated sugar until the mixture is smooth and glossy like fresh icing. Add 1 large egg and another ½ teaspoon of vanilla extract; beat on low just until the egg disappears and the batter looks like satin ribbon. Pour this cheesecake blanket over the cookie-dough layer, tapping the pan gently on a towel-covered counter to nudge air bubbles to the surface where they will pop and leave a glassy finish.
- Bake the assembled bars for 18–20 minutes, rotating the pan halfway through so the cheesecake sets evenly. You are looking for edges that barely pull away from the parchment and a center that jiggles like Jell-O when you nudge the pan—not waves like the ocean, just a confident wiggle. Over-bake and the cream cheese will soufflé and crack; under-bake and you will have a sloppy mess that refuses to slice into Instagram-worthy squares. Cool on a wire rack for 30 minutes, then chill at least 2 hours so the layers firm up and the chocolate chips snap when you bite.
- While the bars chill, roll the reserved cookie dough into marble-size balls and freeze them for 15 minutes; this keeps them from smearing when you press them onto the set cheesecake later. Once the pan is cold, scatter the frozen dough pearls across the surface like snowy boulders on a moonscape. Press them down gently so they adhere but still peek out like secret treasure. Refrigerate another 30 minutes to fuse everything into one cohesive slab that slices like a dream.
- To serve, lift the parchment wings and transfer the entire block to a cutting board. Use a sharp chef’s knife dipped in hot water and wiped dry between cuts; this melts through the chocolate chips instead of shattering them, giving you clean, café-worthy edges. Wipe the knife after every slice—yes, every single slice—because patience here is the difference between rustic homestyle bars and bakery-window perfection. Serve chilled for a firmer, candy-like bite, or let them sit at room temp for ten minutes for a softer, doughier experience that feels like sneaking spoonfuls from the mixing bowl.
That is it—you did it. But hold on, I have got a few more tricks that will take this to another level...
Insider Tricks for Flawless Results
The Temperature Rule Nobody Follows
Every ingredient that says “softened” or “room temperature” needs to be exactly that, not straight-from-the-fridge cold and not microwaved into a half-melted mess. Cold cream cheese will never emulsify with the egg, leaving you with tiny white flecks that look like cottage cheese. Cold butter will not trap air when you cream it, so your dough will be dense and greasy. Set everything on the counter at least an hour before you start; if you forgot, submerge eggs in warm tap water for 5 minutes and cube the cream cheese onto a plate so more surface area warms faster. Your future self—who gets perfect, lump-free layers—will high-five you.
Why Your Nose Knows Best
Trust aroma checkpoints more than timers. When the graham crust smells like caramelized cereal and the edges have gone one shade darker, pull it out even if the timer still has a minute left. When the toasting flour smells like roasted nuts and you see faint steam, yank it off the heat immediately; it keeps cooking from residual heat and can turn bitter fast. Ovens, skillets, and even climates vary, but your nose is calibrated to delicious. A friend tried skipping this step once—let us just say it did not end well, and her kitchen smelled like burnt popcorn for days.
The 5-Minute Rest That Changes Everything
After you add the egg to the cream cheese, let the batter sit undisturbed for 5 minutes. This allows the protein networks to relax so they do not tense up and crack in the oven. During this mini spa moment, the air bubbles you accidentally whisked in will rise and pop, giving you a smoother surface. Use the time to wash the spatula and wipe the counter so you feel like a tidy pro instead of a flour-dusted tornado. Those five minutes feel eternal when you want instant gratification, but they are the difference between Instagram glory and cheesecake fault lines.
The Slice-and-Flip Secret
For the cleanest cuts, flip the chilled slab upside down onto a second piece of parchment, then peel the original parchment away. The bottom is usually smoother than the top, so your presentation side becomes flawlessly flat. Trim a whisper-thin slice from all four edges—yes, you get to nibble those chef’s treats—and the remaining block looks like it came from a professional bakery. Wipe your knife on a damp towel between cuts, not a dry one; a damp towel cools the blade and prevents chocolate smears that look like toddler art.
Creative Twists and Variations
This recipe is a playground. Here are some of my favorite ways to switch things up:
Peanut Butter Cup Remix
Swap half the butter in the dough for creamy peanut butter and fold in chopped mini peanut butter cups instead of chocolate chips. The cheesecake layer stays the same, but top the finished bars with a drizzle of melted milk chocolate and a snowfall of crushed peanuts. Salty-sweet fanatics will propose marriage.
Salted Caramel Pretzel
Replace graham crumbs with crushed pretzel sticks and add an extra tablespoon of sugar to balance the salt. Once the bars are chilled, swirl store-bought caramel sauce over the top and sprinkle with flaky sea salt. The contrast between crunchy pretzel, gooey caramel, and cool cheesecake will make your taste buds do backflips.
Triple Chocolate Darkness
Use Dutch-process cocoa powder plus melted bittersweet chocolate in the dough, and fold in white chocolate chips for visual pop. The cheesecake layer gets 2 tablespoons of cocoa sifted in with the sugar. Serve with raspberries to cut through the richness and feel like you are dining in a European café.
Oatmeal Scotchie
Sub ⅓ cup of the flour for quick oats and swap butterscotch chips for chocolate chips. Add ½ teaspoon of cinnamon and a pinch of nutmeg to the dough. The oats hydrate while chilling, giving you a chewy texture reminiscent of those classic oatmeal scotchies from the church bake sale—only way cooler.
Mocha Hazelnut
Dissolve 1 teaspoon of instant espresso powder in the milk before adding it to the dough, and fold in toasted chopped hazelnuts along with the chocolate chips. Brush the cooled bars with a thin glaze of Nutella thinned with a touch of heavy cream. Coffee lovers will name their firstborn after you.
Funfetti Birthday Cake
Omit the chocolate chips and stir in ½ cup of rainbow sprinkles plus ¼ teaspoon of almond extract. The cheesecake layer stays vanilla, but top the finished bars with a swirl of buttercream frosting and more sprinkles. Kids will lose their minds, and grown-ups will pretend they are only eating it “for the children.”
Storing and Bringing It Back to Life
Fridge Storage
Line an airtight container with parchment, place the sliced bars in a single layer, and slip another sheet of parchment on top before snapping on the lid. They will keep for up to 5 days, though I have never seen them survive past day 3 in any household that contains humans. Keep them toward the front of the fridge so you remember they exist every time you reach for milk—consider it built-in portion control that you will absolutely ignore.
Freezer Friendly
Flash-freeze individual bars on a parchment-lined sheet pan for 2 hours, then transfer to a zip-top bag with as much air sucked out as possible. They will keep for 2 months, which is basically forever in dessert years. Thaw overnight in the fridge or 30 minutes on the counter for a chilled, fudgy bite that tastes freshly made. For grab-and-go snacking, wrap each bar in plastic wrap before freezing; you can munch on it like an ice-cream candy bar while binge-watching your latest obsession.
Best Reheating Method
These bars are designed to be eaten cold, but if you want that fresh-from-the-oven gooeyness, warm a bar in the microwave on 50 % power for 8–10 seconds. Anything longer and the cheesecake layer turns to soup while the chocolate seizes into tiny lava rocks. Alternatively, place a bar on a piece of foil in a 300 °F oven for 4 minutes; the gentle heat revives the graham crust without melting the chips into abstract art. Add a tiny splash of water to the foil before closing it into a loose tent; the steam brings back that just-baked softness without drying the edges.