I still remember the year I tried to impress my future in-laws with a fancy holiday dessert that required a candy thermometer, three types of chocolate, and nerves of steel. The result looked like something that had melted, cried, and then given up on life. Fast forward to Christmas Eve, when my mother-in-law pulled out a simple bowl of what looked like regular popcorn, tossed with some red and green bits. One bite and I was done for — sweet, salty, crunchy, and gone in minutes. That was the moment I realized the best holiday treats don't need a culinary degree; they need heart, timing, and a little bit of magic.
Christmas Popcorn became my obsession after that night. I spent every December trying to crack the code — why did hers taste like childhood wonder while mine tasted like cardboard sadness? I tested dozens of versions, burned through bags of candy melts, and may have permanently stained my kitchen counter with rogue sprinkles. But finally, after what felt like a thousand batches and a few sugar-induced hallucinations, I landed on the version that makes my friends cancel their dinner plans just to come over when they smell it in the oven.
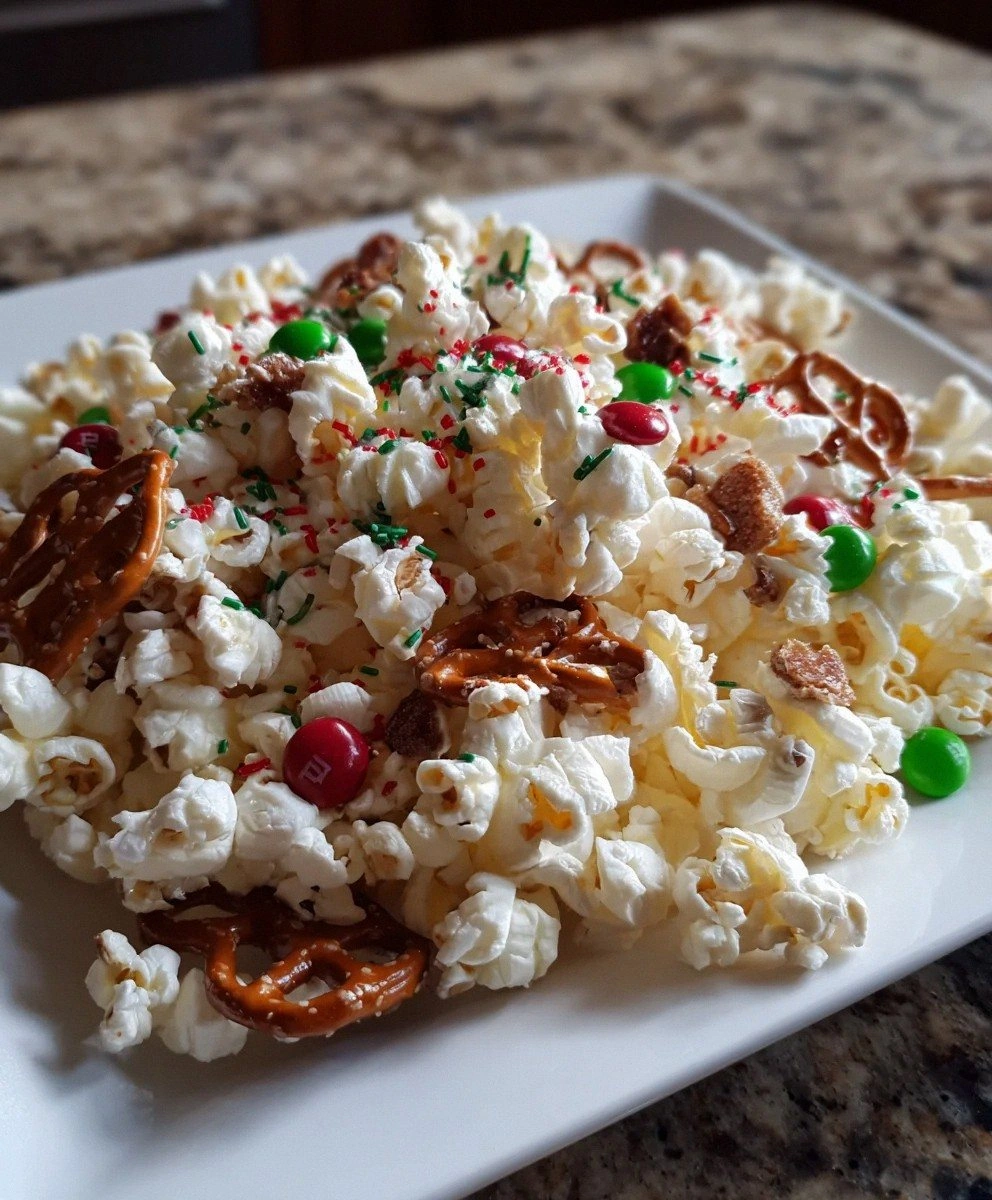
This isn't just popcorn with some candy thrown on top. This is the kind of snack that disappears faster than your willpower at a holiday cookie exchange. The white chocolate coating creates these delicate shells around each kernel, the pretzels add that satisfying snap, and those red and green M&Ms? They're like little edible ornaments that make everyone feel like a kid again. The best part? You can make this in fifteen minutes flat, even after you've had a few eggnogs.
What makes this version different is the technique — and yes, there's a technique to popcorn that doesn't taste like regret. Most recipes just dump everything together and hope for the best. But if you've ever ended up with a soggy, clumpy mess that sticks to your teeth like candy cement, you know that method matters. Let me walk you through every single step — by the end, you'll wonder how you ever made it any other way.
What Makes This Version Stand Out
Perfectly Balanced Sweetness: The white candy coating adds just enough sweetness without overwhelming the natural corn flavor. It's like the difference between a whisper and a shout — this version knows when to let the other players shine.
Texture That Makes Noise: We're talking about the kind of crunch that echoes through the room when you bite down. The combination of airy popcorn, crisp pretzels, and those candy shells creates a symphony of snap, crackle, and pop that'll have everyone reaching for more.
Color That Pops on Camera: Those red and green M&Ms don't just taste good — they photograph like a dream. Your Instagram will thank you, and your aunt who still uses Facebook will finally have something new to share besides political memes.
Zero Skill Required: If you can microwave popcorn and stir with a spoon, you can nail this recipe. No candy thermometers, no timing stress, no watching sugar like a hawk. This is stress-free holiday cooking at its finest.
Kid-Approved, Adult-Adored: Little hands love helping with the sprinkles, and grown-up palates appreciate the sophisticated balance of sweet and salty. It's the rare treat that bridges generational divides at holiday gatherings.
Make-Ahead Magic: This stuff stays fresh for days in an airtight container, which means you can prep your holiday snacking situation well before the relatives arrive and the chaos begins.
Customizable Canvas: Once you master the base, you can swap in different candies, add nuts, or even spike it with a little peppermint extract. This recipe is your holiday playground.
Alright, let's break down exactly what goes into this masterpiece...
Inside the Ingredient List
The Flavor Foundation
Popcorn is the canvas we're painting on, and not all kernels are created equal. Air-popped gives you that pure corn flavor without any oil interference, but microwave works in a pinch. The key is getting 6 cups of perfectly popped corn — no burnt bits, no sad unpopped kernels hiding at the bottom like party crashers. If you're using microwave popcorn, go for the plain or lightly salted variety. Buttered popcorn here is like wearing perfume to a wine tasting — it just muddles everything up.
White candy wafers are the secret weapon that most recipes mess up. These aren't white chocolate chips that refuse to melt properly, leaving you with chunky disasters. Candy wafers are specifically designed to melt into silky smoothness, creating that perfect coating that dries to a crisp shell. Choose high-quality wafers — the cheap ones taste like sweetened wax and will ruin everything they touch. You're looking for something that smells like vanilla and dreams, not chemicals and disappointment.
The Texture Crew
Pretzels are where most people go wrong — they grab those thick, doughy twists that fight back when you bite them. You want the thin, crispy mini pretzels or pretzel sticks that shatter between your teeth. They should add crunch, not a jaw workout. If you're gluten-free, there are some surprisingly good rice-based pretzels that'll work here, though they'll absorb moisture faster, so plan to eat within a day or two.
The Color Pop
Red and green M&Ms aren't just about looking pretty — they add that candy shell crunch that makes each bite interesting. The colors bleed slightly into the white coating, creating these beautiful watercolor effects that look like Christmas ornaments in snow. If you can't find the holiday colors, regular M&Ms work fine, but you'll lose that festive magic. I've seen people try to substitute other candies, but nothing quite matches that perfect candy-to-chocolate ratio that M&Ms nail.
The Final Flourish
Sprinkles are where you can let your personality shine. Red and green jimmies are classic, but sugar crystals catch the light like tiny disco balls. Avoid the nonpareils — those little round balls that taste like chalk and roll away when you try to eat them. You want sprinkles that stick to the coating and add a little crunch, not ones that bounce off and end up in your carpet until July.
Everything's prepped? Good. Let's get into the real action...
The Method — Step by Step
- Start with a kitchen that's not too humid — moisture is the enemy of crispy popcorn. If it's raining outside, crank up your air conditioning or wait for a drier day. Spread your 6 cups of popped popcorn on a large baking sheet and pick out any unpopped kernels. These little dental disasters are like landmines in your lovely treat, and trust me, nothing ruins holiday cheer like an emergency dentist visit.
- Melt your white candy wafers in a microwave-safe bowl at 50% power for 30-second bursts. Stir between each burst — and I mean really stir, not just a lazy swirl. The residual heat will finish melting the last bits, so stop when there are still a few small chunks. Overheated candy wafers seize up like a toddler denied cookies, and there's no coming back from that tantrum.
- Drizzle the melted candy coating over your popcorn like you're Jackson Pollock having a good day. Don't dump it all in one spot — you're looking for a gentle rain, not a candy tsunami. Use a rubber spatula to fold the popcorn gently, coating each piece without crushing it. This isn't a wrestling match; treat those kernels like delicate flowers that bruise easily.
- Now comes the fun part — add your pretzels and give everything another gentle toss. The pretzels should get a light coating of the candy mixture, which acts like glue for the next additions. Work quickly here — the coating starts setting faster than you'd think, especially if your kitchen is cool.
- Let the coated popcorn rest for about 3 minutes — long enough for the coating to cool slightly but not so long that it sets completely. You want it tacky like good gossip, not hard like last year's fruitcake. This is the perfect time to line another baking sheet with parchment paper for the next step.
- Sprinkle in your M&Ms and give everything one final, gentle toss. The candy coating should be sticky enough to grab some of them but not so wet that they sink to the bottom. Think of it like introducing new friends — you want them to mingle, not drown in awkward conversation.
- Now shower everything with your festive sprinkles while the coating is still tacky. Don't be shy here — sprinkles are like confidence, you need enough to make a statement but not so many that you look desperate. Aim for an even distribution that makes every handful look like Christmas exploded in the best possible way.
- Let everything set for at least 30 minutes before serving. I know, I know — the smell is driving you crazy and you've already picked out the perfect pieces. But proper setting time means the difference between a sticky mess and those perfect candy shells that shatter between your teeth. If you live somewhere humid, pop the tray in the fridge for 10 minutes to speed things up.
That's it — you did it. But hold on, I've got a few more tricks that'll take this to another level...
Insider Tricks for Flawless Results
The Temperature Rule Nobody Follows
Room temperature is everything in this recipe. Cold popcorn will cause your candy coating to seize up faster than you can say "holiday stress," while warm popcorn melts your M&Ms into sad, streaky ghosts of their former glory. Pop your corn at least an hour ahead and let it sit uncovered. This isn't just busy work — stale popcorn has less moisture, which means better coating adhesion and longer shelf life. Your future self, sneaking midnight handfuls three days later, will thank you.
Why Your Nose Knows Best
Smell is your secret weapon here. When the candy coating is perfectly melted, it should smell like sweet vanilla and childhood memories. If it starts smelling like burnt sugar or taking on a yellow tinge, you've gone too far and need to start over. There's no rescuing overheated candy wafers — they're divas that way. The same goes for your popcorn — it should smell toasty, not burnt. Trust your nose; it's been keeping you alive this long for a reason.
The 5-Minute Rest That Changes Everything
After you coat the popcorn but before you add the M&Ms, walk away for exactly five minutes. Set a timer, scroll through social media, practice your acceptance speech for "Best Holiday Host." This brief pause lets the coating cool just enough to grab the candies without melting them, but not so long that it loses its sticky power. It's like the difference between a first date that's too eager and one that plays it perfectly cool.
The Storage Secret That Doubles Shelf Life
Most people shove this into plastic containers and wonder why it's soggy by day two. The pros know better. After your popcorn has set completely, divide it into brown paper lunch bags. These magical bags absorb excess moisture while letting just enough air circulate to keep everything crisp. When you're ready to serve, transfer to a pretty bowl. If you need longer storage, pop the paper bags into an airtight container, but never skip the paper step — it's the difference between day-one crunch and day-three sadness.
The Serving Size Reality Check
Here's the thing nobody tells you — this recipe multiplies like holiday gossip. What starts as a modest batch somehow feeds a crowd, then mysteriously doubles overnight. Plan for about 2 cups per person if it's part of a dessert spread, or 1 cup each if you're serving it during a movie. But always, always make extra. People will take handfuls "for the road," stuff some in their pockets "for later," and you'll find yourself hiding the last bit in your bedroom closet so there's something left for you. This isn't paranoia — it's holiday survival.
Creative Twists and Variations
This recipe is a playground. Here are some of my favorite ways to switch things up:
The Winter Wonderland
Swap the red and green M&Ms for white chocolate and silver candy-coated chocolates. Add a teaspoon of peppermint extract to your melted candy wafers, but go easy — peppermint is like that friend who gets overwhelming if you let them dominate the conversation. Top with white sugar crystals that look like fresh snow. This version tastes like December in a bowl and pairs beautifully with hot cocoa after sledding.
The Santa's Workshop
Add mini marshmallows and chopped candy canes for a rocky road vibe. The marshmallows should go in at the very end, just before serving, so they stay soft and pillowy. Crush your candy canes finely — nobody wants to break a tooth on Santa's watch. This version is like eating Christmas morning, complete with the excitement and sugar high.
The Hanukkah Hybrid
Use blue and white M&Ms with silver dragees for a Hanukkah celebration. Add some gelt (those chocolate coins) broken into pieces, and use coconut oil in your candy coating for a subtle tropical note. The sweet symbolism of oil lasting eight days meets the perfect holiday snack. Your Jewish friends will kvell, and your goyish friends will ask for the recipe.
The New Year's Eve Glam
Replace M&Ms with gold and silver dragées, add some edible glitter (the kind that doesn't taste like aluminum foil), and swap pretzels for potato chips. Yes, potato chips. The salt and crunch create this sophisticated sweet-salty thing that tastes like midnight countdowns and resolutions you'll break by February. Serve in champagne flutes for extra fancy points.
The Valentine's Day Makeover
Use pink and red M&Ms with conversation hearts for a February twist. Add a few drops of strawberry oil to your candy coating, but taste as you go — too much and you'll feel like you're eating perfume. Shape into heart-shaped mounds on parchment paper instead of mixing in a bowl. Nothing says "I love you" like homemade snacks that didn't come from the drugstore clearance rack.
The Summer Festival Flip
Fourth of July version uses red, white, and blue M&Ms with patriotic sprinkles. Add some freeze-dried strawberry pieces for pops of color that won't add moisture. The tartness cuts through the sweetness like fireworks in your mouth. This is what you make when it's too hot to bake but you still need to bring something to the barbecue.
Storing and Bringing It Back to Life
Fridge Storage
Don't do it. Just don't. The fridge is where Christmas Popcorn goes to die a slow, soggy death. The humidity turns your crispy masterpiece into something that tastes like it was left in the rain. If you live somewhere hot and humid, store in the coolest room of your house, but never the fridge. Trust me on this — I've made this mistake so you don't have to.
Freezer Friendly
Here's a surprise — this actually freezes beautifully. Spread it on a baking sheet, freeze for an hour, then transfer to freezer bags. When you're ready to serve, let it come to room temperature for 15 minutes. The candy coating might look slightly cloudy at first, but it'll clear up as it warms. This is perfect for making ahead for holiday gifts or surviving the annual family invasion. Frozen popcorn keeps for up to two months, though I've never had any last more than a week before mysteriously disappearing.
Best Reheating Method
If your popcorn has lost its crunch (and honestly, this rarely happens because people devour it), spread it on a baking sheet and pop it in a 200°F oven for 5-7 minutes. Let it cool completely before serving. This isn't ideal — fresh is always best — but it'll rescue batch that's gone slightly soft from humidity. Whatever you do, don't microwave it unless you enjoy the taste of burnt sugar and disappointment.