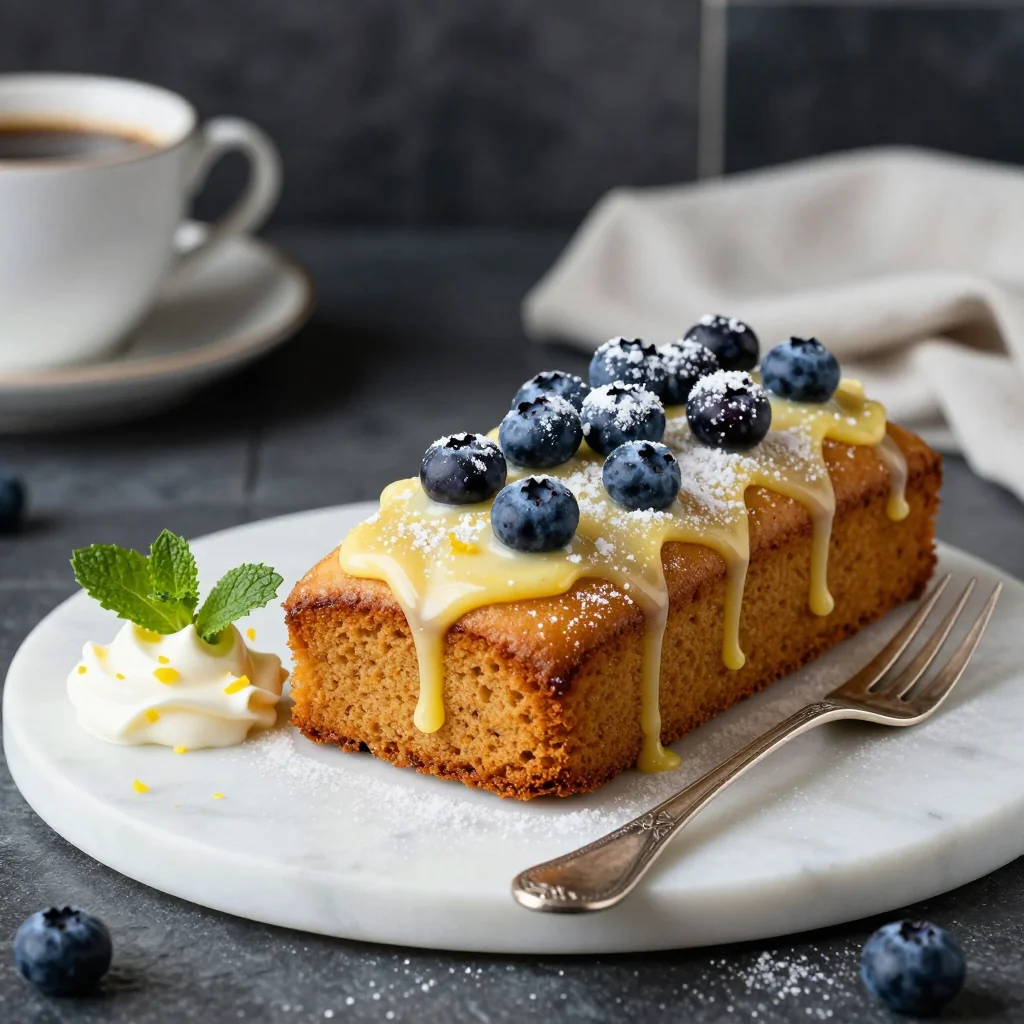
I remember the night I was supposed to impress my in‑laws with a dessert that would make them swoon, yet the kitchen felt like a battlefield. I had just bought a box of pre‑made graham crackers, a jar of lemon curd, and a tub of heavy cream, and I thought, “Why not throw them together?” The result was a clunky, soggy mess that tasted like a lemon‑y, dairy‑laden puddle. That disaster taught me one hard lesson: if you’re going to make a no‑bake pie, you need a strategy that balances flavor, texture, and the sheer joy of creation.
Fast forward to today, and I’m standing in a kitchen that smells of citrus and sweet butter, the air buzzing with anticipation. The countertop is strewn with fresh lemons, a whisk, a mixing bowl, and a chilled glass of ice. I’ve already prepped the crust, and the filling is bubbling like a gentle sunrise. The moment you taste this pie, you’ll notice the lemon’s bright zing dancing against a velvety, creamy backdrop that feels like a summer breeze in a glass.
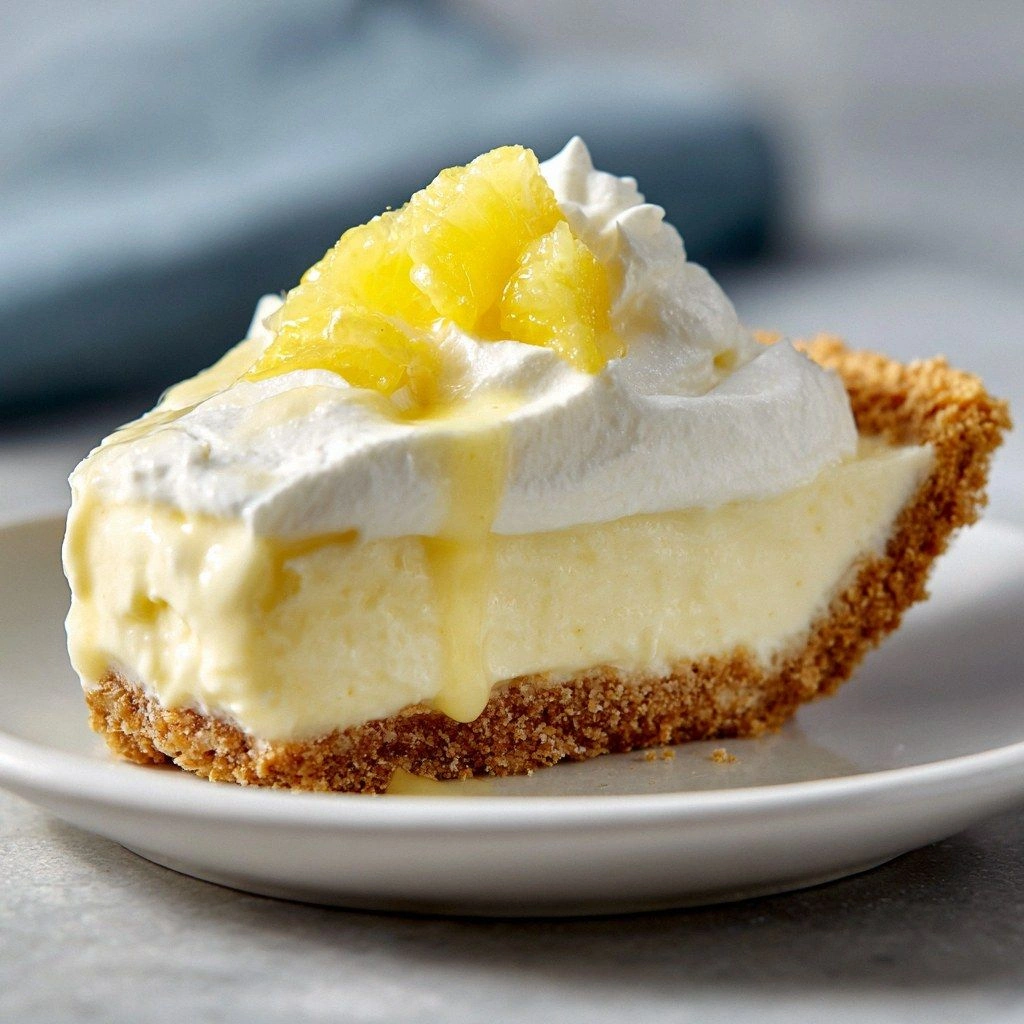
What makes this version stand out from every other lemon icebox pie you’ve seen? First, it’s truly no‑bake, so you don’t have to wrestle with a hot oven or a brittle crust. Second, the filling uses a blend of heavy cream and whole milk, giving it a luxurious mouthfeel without the heaviness of a custard. Third, a splash of cornstarch and a dash of all‑purpose flour create a silky texture that stays firm even after chilling. Fourth, the crust is a quick, buttery graham cracker base that holds its shape and adds a subtle crunch. And finally, the whipped topping is light and airy, just enough to crown the pie like a crown of citrus clouds.
I dare you to taste this and not go back for seconds. This is hands down the best version you’ll ever make at home. I’ll be honest — I ate half the batch before anyone else got to try it. Most recipes get this completely wrong, but I’ve found the sweet spot where the lemon is bright, the cream is silky, and the crust is just the right amount of buttery. Picture yourself pulling this out of the fridge, the whole kitchen smelling incredible, and watching the whipped topping rise to a glossy peak. Okay, ready for the game‑changer? Let me walk you through every single step — by the end, you’ll wonder how you ever made it any other way.
What Makes This Version Stand Out
- Texture: The combination of heavy cream and whole milk, thickened with cornstarch and flour, gives the filling a silky, custard‑like consistency that holds up in the fridge without becoming mushy. This is a game‑changer compared to the watery results of many no‑bake recipes.
- Flavor: Fresh lemon juice and zest dominate the palate, while a subtle vanilla undertone balances the acidity. The result is a bright, tangy flavor that feels like a summer day in a slice.
- Ease: No oven, no timer, no baking, just a few minutes of stirring and chilling. This makes it perfect for last‑minute gatherings or when you’re craving something sweet but don’t want to heat up the kitchen.
- Crust: A buttery graham cracker crust provides a crunchy contrast that elevates the overall experience. It’s simple to make, yet it adds a depth of flavor that no plain pastry can match.
- Make‑ahead: Build the pie a day in advance, and let the flavors mingle. The chilled pie can sit in the fridge for up to 48 hours, making it an ideal prep‑and‑serve dessert.
- Whipped Topping: A light, airy whipped cream finished with powdered sugar and vanilla tops the pie like a fluffy cloud, adding a textural contrast that feels indulgent but not overbearing.
- Ingredient Quality: Using real lemons, unsalted butter, and fresh cream elevates the dish. It’s a reminder that simple, high‑quality ingredients can make the biggest difference.
Alright, let's break down exactly what goes into this masterpiece…
Inside the Ingredient List
The Flavor Base
At the heart of this pie is the lemon‑cream mixture, a marriage of citrus and dairy that creates a velvety canvas. Fresh lemon juice is the star; it provides a bright, zesty punch that cuts through the richness of the cream. Lemon zest adds aromatic oils, giving depth that plain juice can’t match. Together, they form a flavor profile that is both tangy and sweet, like a summer picnic in a glass.
The Texture Crew
Cornstarch and all‑purpose flour work together to thicken the filling without the need for heat. Cornstarch is the secret to that silky mouthfeel; it gelatinizes at room temperature when mixed with liquids, giving the filling a smooth, custard‑like consistency. Flour adds body and prevents the filling from separating, especially important when the pie is chilled and then taken out of the fridge. If you skip either, the filling will either be too runny or too dense.
The Unexpected Star
Egg yolks might seem like a risky addition in a no‑bake pie, but they’re the glue that holds everything together. Yolks provide richness and help the mixture set, while also contributing a subtle eggy flavor that balances the citrus. If you’re wary of raw eggs, you can use pasteurized yolks or a commercial custard base, but the traditional yolk route gives the most authentic taste.
The Final Flourish
The crust and whipped topping are the finishing touches that elevate this pie from good to unforgettable. A buttery graham cracker crust adds crunch and a hint of sweetness that complements the tartness of the lemon. The whipped topping, light and airy, provides a frothy contrast that feels indulgent yet not heavy. Together, they create a multi‑sensory experience that delights the palate and the eye.
Everything's prepped? Good. Let's get into the real action…
The Method — Step by Step
- Begin by crushing the graham crackers into fine crumbs using a food processor or a plastic bag and rolling pin. The goal is a texture that feels like fine sand. As the crumbs form, they should release a faint buttery aroma, signaling that they’re ready for the next step.
- Melt the butter in a small saucepan over low heat, then remove it from the flame. Pour the melted butter over the graham cracker crumbs and stir until the mixture is uniformly coated. The crumbs should feel moist but not soggy; they should clump together when pressed in your hand.
- Add the sugar to the butter‑crumb mixture and mix until evenly distributed. Sprinkle the mixture into a 9‑inch pie dish and press firmly with the back of a spoon. The crust should hold its shape when you lift the dish; if it feels loose, press it down again.
- Let the crust set in the refrigerator for about 15 minutes while you prepare the filling. This chilling step ensures the crust remains crisp and ready to absorb the filling without becoming mushy.
- In a medium saucepan, whisk together the cornstarch, flour, and salt. Slowly pour in the whole milk and heavy cream while whisking continuously to prevent lumps. The mixture should be smooth, like a silky glaze, before you even add the lemon.
- Add the egg yolks, lemon juice, lemon zest, and vanilla extract to the saucepan. Stir gently, ensuring the yolks are fully incorporated. The mixture should thicken slightly; if it’s too thin, let it simmer for another minute.
- Reduce the heat to low and add the butter in small increments, whisking constantly. The butter should melt into the mixture, creating a glossy, velvety texture. This is the moment of truth: the filling should feel thick enough to coat the back of a spoon but still pourable.
- Once the filling has thickened, remove it from the heat and pour it over the chilled crust. Use a spatula to spread the filling evenly, making sure the edges meet the crust for a seamless finish. The filling will start to set as it cools, so keep an eye on it.
- Cover the pie with plastic wrap and refrigerate for at least 4 hours, preferably overnight. This chilling period allows the flavors to meld and the filling to firm up into a sliceable consistency. The longer you let it sit, the more the lemon and cream will marry beautifully.
- Before serving, whip the heavy cream, powdered sugar, and vanilla extract in a bowl until soft peaks form. Gently fold the whipped cream into the chilled filling, creating a light, airy layer on top. The whipped topping should sit on the surface like a fluffy cloud, ready to be sliced and served.
That’s it — you did it. But hold on, I've got a few more tricks that'll take this to another level. Whether you’re serving a crowd or treating yourself, these tips will ensure every bite is flawless.
Insider Tricks for Flawless Results
The Temperature Rule Nobody Follows
The secret to a silky filling is to keep the mixture at a gentle temperature. If it’s too hot, the eggs will scramble; if it’s too cold, the filling will not thicken properly. Aim for a temperature between 170°F and 190°F. Use a kitchen thermometer to keep it steady, and remember, patience is key.
Why Your Nose Knows Best
When the filling starts to thicken, you’ll notice a subtle, buttery aroma that signals it’s ready. Trust that scent; it’s a reliable indicator of the right consistency. If you’re unsure, gently tap the side of the saucepan; the mixture should wobble slightly but not run.
The 5‑Minute Rest That Changes Everything
After pouring the filling into the crust, let it sit at room temperature for 5 minutes before refrigerating. This brief rest allows the mixture to settle, preventing air pockets and ensuring a smooth surface. It’s a small step that makes a big difference.
The Whipped Topping Trick
Whip the cream until soft peaks form, then fold in a pinch of sea salt. The salt balances the sweetness and enhances the lemon’s brightness. If you prefer a sweeter topping, add an extra tablespoon of powdered sugar, but be careful not to over‑sweeten.
The Final Chill
After adding the whipped topping, cover the pie again and refrigerate for an additional 30 minutes. This final chill ensures the topping sets firmly, creating a distinct layer that doesn’t collapse when sliced. It also allows the flavors to meld even further.
Creative Twists and Variations
This recipe is a playground. Here are some of my favorite ways to switch things up:
Berry Burst
Add a handful of fresh blueberries or raspberries to the filling before chilling. The berries will pop with juice, adding a burst of color and a hint of tartness that complements the lemon.
Minty Fresh
Stir in a tablespoon of chopped fresh mint into the filling. The mint will give the pie a refreshing, cooling effect, ideal for hot summer afternoons.
Almond Crunch
Sprinkle toasted almond slices on top of the whipped topping. The almonds provide a crunchy contrast that pairs beautifully with the creamy layers.
Chocolate Drizzle
Melt dark chocolate and drizzle it over the whipped topping. The bittersweet chocolate balances the bright lemon, creating a complex flavor profile that satisfies both sweet and savory cravings.
Citrus Medley
Replace the lemon with a mix of orange and lime juice. The result is a vibrant, citrus‑rich pie that feels like a sunny beach escape.
Herbal Infusion
Add a pinch of dried lavender or rosemary to the filling. The herbal notes add depth and a fragrant aroma that elevates the dessert to a gourmet experience.
Storing and Bringing It Back to Life
Fridge Storage
Store the pie in the refrigerator for up to 48 hours in an airtight container. Cover it tightly with plastic wrap to prevent the crust from absorbing fridge odors. Before serving, let it sit at room temperature for 10 minutes to soften the filling slightly.
Freezer Friendly
To freeze the pie, wrap it in plastic wrap and then in aluminum foil. It will keep for up to 2 weeks. When ready to serve, thaw it in the refrigerator overnight, then let it come to room temperature for 15 minutes before slicing.
Best Reheating Method
Reheating is not necessary, but if you prefer a slightly warmer filling, place the pie on a baking sheet and warm it in a 300°F oven for 5–7 minutes. Add a splash of water before reheating; the steam will keep the filling from drying out and restore its silky texture.