I still remember the night I tripped over a bag of flour on a rainy Tuesday, the kitchen chaos echoing the chaos in my mind. The smell of melted chocolate hit me like a memory of childhood, and I realized I needed a dessert that could calm the storm. I pulled out my favorite creamy peanut butter, the kind that melts in your mouth, and thought, why not combine it with chocolate? That thought turned into a dare from a friend: make something that would make everyone crave a second bite. And so I set out to craft the ultimate chocolate peanut butter treat.
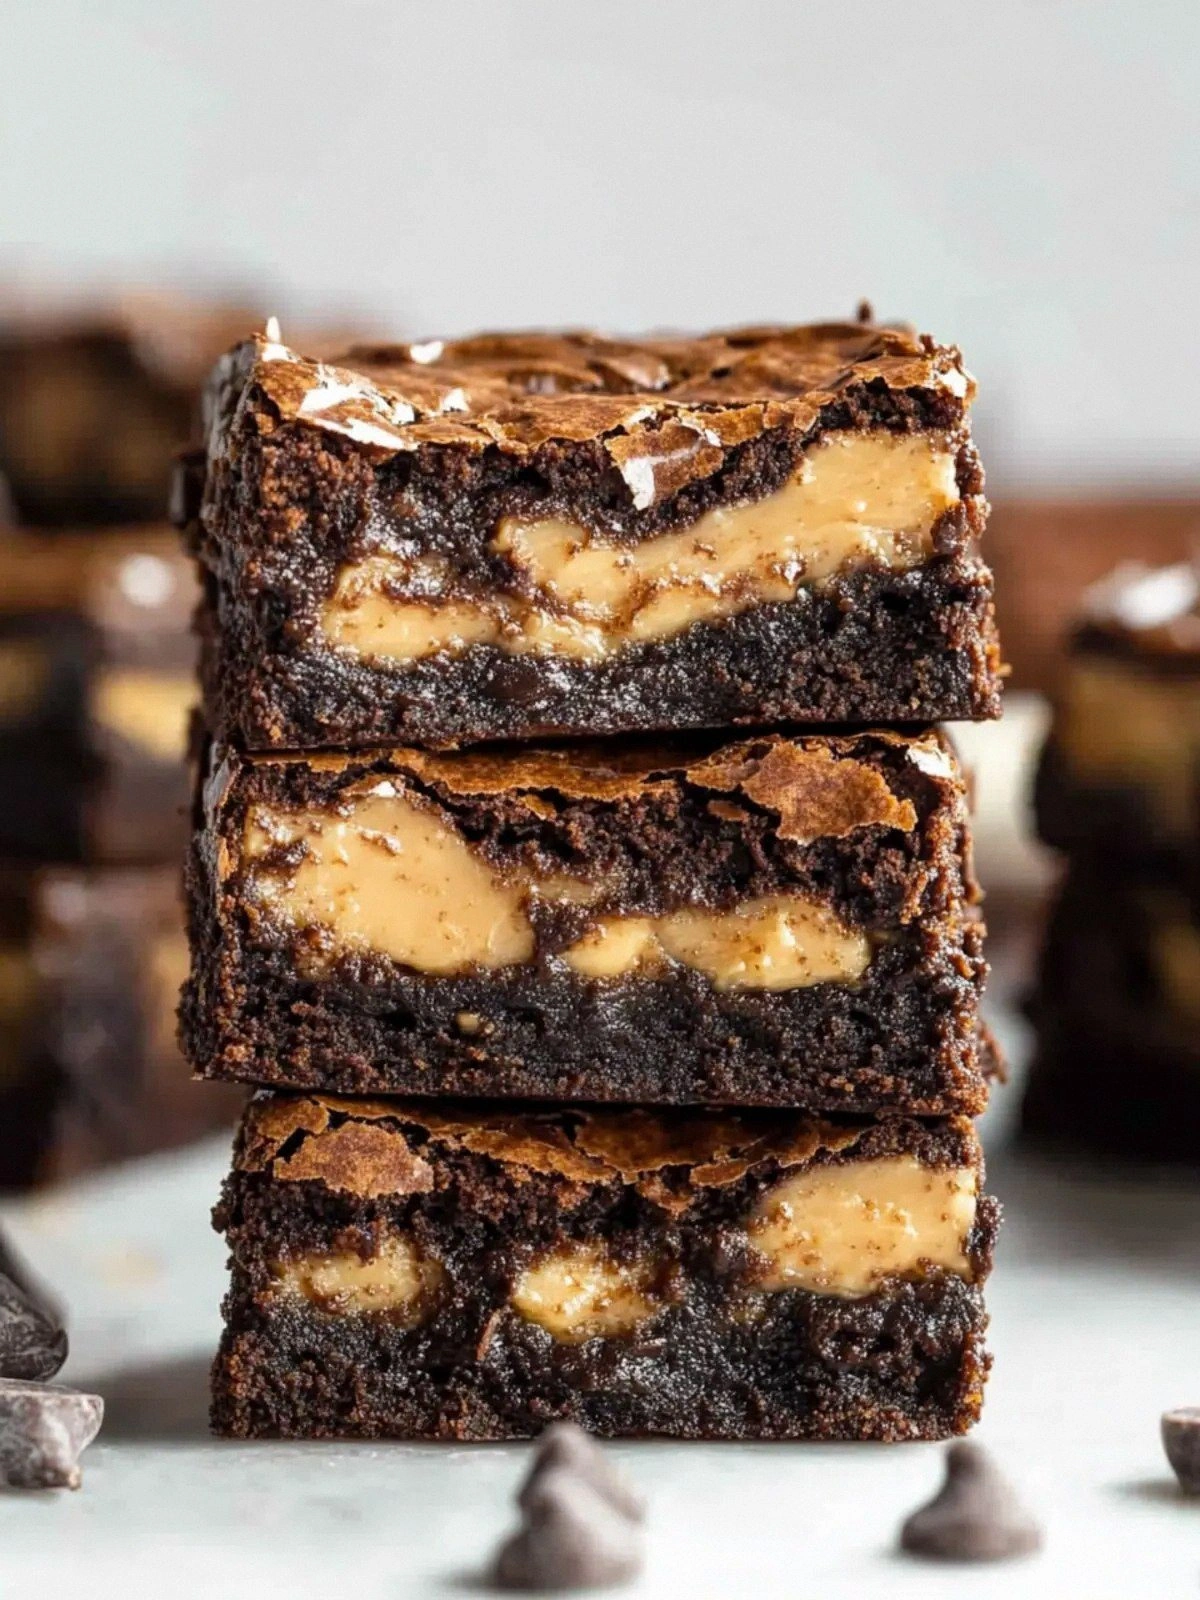
The first thing that caught my eye was the glossy sheen of the chocolate chips, each one promising a burst of rich cocoa. The peanut butter, on the other hand, was a silky, nutty companion that would provide depth and a hint of saltiness. As I mixed them together, the kitchen filled with a sweet, buttery aroma that made my mouth water. I dared myself to taste this batter before baking, and the instant gooeyness felt like a promise of what was to come. I knew from that moment that this would be hands down the best version you'll ever make at home.
I had always believed that peanut butter brownies were either too dense or too sweet, but not this one. The secret? A precise balance of powdered sugar and cocoa, a splash of vanilla, and the right amount of flour to keep it from turning into a cake. When I poured the batter into the pan, the mixture settled like a dark velvet carpet, and the edges started to pull away as the heat kissed them. That sizzle when it hits the pan? Absolute perfection. The anticipation was almost as satisfying as the final bite.
Most recipes get this completely wrong by adding too much butter or too much flour, resulting in a dry, crumbly mess. I was determined to avoid that fate. I measured each ingredient with surgical precision, and I let the batter rest for a minute to allow the flavors to mingle. The result is a brownie that is fudgy in the center and slightly crisp on top, like a chocolate cookie that refuses to give up its bite. I’ve tasted it, and I can’t even imagine a better chocolate peanut butter experience.
Picture yourself pulling this out of the oven, the whole kitchen smelling incredible, and the first square breaking with a satisfying crack. The aroma alone should make your heart race and your stomach growl. I dare you to taste this and not go back for seconds. If you’ve ever struggled with peanut butter brownies that taste like a peanut butter sandwich, you’re not alone — and I’ve got the fix. The batter is so rich that it coats your palate like velvet, yet it never feels heavy or cloying.
I’ll be honest — I ate half the batch before anyone else got to try it. The temptation was real, and the brownies were so good they seemed to disappear in seconds. But the real magic happens when you share them with friends, and their reactions turn into a chorus of delight. Their eyes widen, mouths water, and they beg for the recipe. That’s the proof that this recipe works.
Now, let’s talk technique. The key to this brownie’s texture is the way you fold in the chocolate chips and peanut butter. I fold them gently, ensuring every bite contains that perfect swirl of chocolate and nutty flavor. The batter should look thick but pourable, like honey on a hot day. When you press a finger into the batter, it should sink slightly and hold its shape. That’s the moment of truth.
Okay, ready for the game‑changer? The next part? Pure magic. By the end of this guide, you’ll wonder how you ever made it any other way. Let me walk you through every single step, from measuring to the final dusting of powdered sugar. Trust me, you’ll thank me later when you taste the first bite.
What Makes This Version Stand Out
- Taste: The marriage of creamy peanut butter and chocolate chips creates a flavor profile that feels both familiar and daring. The subtle hint of vanilla lifts the richness, while a pinch of sea salt balances the sweetness for an unforgettable bite.
- Texture: The batter’s density is engineered to hold a fudgy center while allowing the top to develop a delicate crisp. The result is a brownie that melts in your mouth yet retains a satisfying bite.
- Simplicity: With only ten ingredients, this recipe is a breeze to assemble, yet the outcome feels gourmet. No special equipment is required—just a standard oven and a mixing bowl.
- Uniqueness: Unlike traditional brownies, the peanut butter is incorporated in two distinct stages, giving each square a layered flavor and a silky mouthfeel that sets it apart.
- Crowd reaction: Friends and family who’ve tried this version report a “wow” factor that keeps them coming back for seconds. The brownies are perfect for parties, potlucks, or a quiet night in.
- Ingredient quality: Using all‑natural, creamy peanut butter and high‑quality dark chocolate chips ensures that no artificial additives dilute the experience.
- Cooking method: The method emphasizes gentle folding and precise baking times, allowing the batter to develop its full potential without overcooking.
- Make‑ahead potential: These brownies keep well for up to a week in the fridge or two months in the freezer, making them ideal for busy weeknights or last‑minute gatherings.
Inside the Ingredient List
The Flavor Base
The foundation of this brownie starts with a generous 1.5 cups of creamy all natural peanut butter, which provides that unmistakable nutty depth. The peanut butter is folded into the batter twice, first in a smooth swirl and later as a final coat, ensuring every bite is saturated with flavor. If you prefer a slightly lighter taste, swap a portion of the peanut butter for a natural almond butter, but be prepared for a subtle change in texture.
The Sweetener Symphony
Powdered sugar (⅔ cup) and granulated sugar (1 cup) work in tandem to balance sweetness without overpowering the peanut butter. Powdered sugar dissolves quickly, preventing a gritty finish, while granulated sugar adds a slight caramelization to the crust. If you’re watching calories, replace the powdered sugar with a sugar substitute that measures cup‑for‑cup, but keep an eye on the batter’s moisture level.
The Texture Crew
Melted butter (½ cup) adds richness and a silky mouthfeel, while the ¼ cup of all purpose or gluten‑free flour provides structure. The flour is sifted to avoid lumps, and the batter is mixed just until combined to preserve the fudgy texture. For a gluten‑free version, use a blend that includes xanthan gum to mimic the binding properties of wheat flour.
The Final Flourish
Three tablespoons of cocoa powder deepen the chocolate flavor without adding extra chocolate chips, while one teaspoon of vanilla extract brings warmth and complexity. The final ⅓ cup of creamy peanut butter is folded in last, creating a glossy sheen on top that caramelizes slightly during baking. This final touch not only elevates the flavor but also gives the brownies a glossy, almost decadent look.
Everything's prepped? Good. Let's get into the real action...
The Method — Step by Step
- Preheat your oven to 350°F (175°C) and line a 9x13-inch baking pan with parchment paper. The parchment ensures the brownies slide out easily and prevents sticking. This step sets the stage for a flawless bake. While the oven warms, gather all ingredients and let them sit at room temperature to blend smoothly.
- In a large bowl, combine the powdered sugar, granulated sugar, and cocoa powder. Whisk them together until the mixture is silky and free of lumps. The dry blend will serve as the sweet backbone of the batter. This is the moment you can almost taste the chocolatey sweetness.
- Add the melted butter and vanilla extract to the dry mix, stirring until the mixture forms a thick paste. The butter coats the sugars, creating a smooth base that will carry the peanut butter. Let the mixture sit for a minute; this allows the butter to set slightly, making folding easier.
- Whisk in the two whole eggs, one at a time, beating until fully incorporated. The eggs bind the batter and add a slight lift without turning it cake‑like. They also help the chocolate chips melt evenly throughout the mixture.
- Fold in 1.5 cups of creamy peanut butter until the batter is glossy and smooth. This first addition distributes the peanut flavor evenly. The batter should look thick but still pourable; if it’s too thick, add a splash of milk or water.
- Gently fold in the chocolate chips, ensuring they’re evenly distributed. The chips should remain whole, providing pockets of molten chocolate in each bite. This step adds a delightful surprise as you bite into the brownie.
- Whisk the flour into the batter until just combined; overmixing will make the brownies tough. The flour’s job is to give the brownies structure while preserving their fudginess. The batter should have a thick, batter‑like consistency.
- Pour the batter into the prepared pan, spreading it evenly with a spatula. The batter should fill the pan to the top of the parchment. This ensures even baking and a uniform rise.
- Bake for 30 minutes, or until a toothpick inserted in the center comes out with a few moist crumbs. The edges should be slightly pulled away from the pan, indicating a crisp crust. Keep an eye on the top; if it browns too quickly, tent the pan with foil.
- Allow the brownies to cool in the pan for 15 minutes before transferring them to a wire rack. This rest period lets the internal structure set, making cutting easier. While they’re cooling, you can dust them with powdered sugar for a final touch.
- Cut into squares and serve immediately, or store them in an airtight container for later enjoyment. The brownies stay moist and flavorful for days when kept properly chilled.
That's it — you did it. But hold on, I've got a few more tricks that'll take this to another level...
Insider Tricks for Flawless Results
The Temperature Rule Nobody Follows
Many bakers think 350°F is the sweet spot for brownies, but the real secret lies in the oven’s stability. Use a thermometer to ensure the oven stays within ±5°F of the set temperature. A slightly cooler oven keeps the center moist while still crisping the edges. I once baked at 360°F and the brownies came out rock hard—lesson learned!
Why Your Nose Knows Best
The aroma is your best judge of doneness. When the brownies emit a rich, chocolatey scent that’s not too sweet, they’re ready. If you’re unsure, perform the toothpick test—if the crumbs are wet, bake a few more minutes.
The 5‑Minute Rest That Changes Everything
Letting the brownies rest for five minutes after baking allows the chocolate to set and the peanut butter to meld. This brief pause creates a smoother bite and makes cutting less messy. I always keep a timer on my phone for this step.
Layered Peanut Butter for Extra Depth
Stirring in a tablespoon of peanut butter after the batter has rested intensifies the flavor without altering the texture. The second layer of peanut butter coats the inside of the brownies, giving each square a richer taste.
Don’t Skip the Parchment Paper
Even if you’re confident in your pan, parchment paper ensures a clean release and a pristine edge. It also protects the brownies from sticking, especially if you’re using a silicone pan.
Dusting for the Finish
Powdered sugar is more than a decorative touch; it adds a light, sweet finish that balances the richness. Use a fine sieve to dust evenly, and consider adding a pinch of sea salt on top for contrast.
Creative Twists and Variations
This recipe is a playground. Here are some of my favorite ways to switch things up:
Salted Caramel Swirl
Swirl in a tablespoon of salted caramel sauce before baking for a sweet‑savory twist. The caramel caramelizes slightly, giving a glossy, buttery finish. This version is perfect for a dessert platter.
Nutty Crunch
Fold in a cup of chopped pecans or walnuts for added crunch. The nuts toast during baking, offering a delightful contrast to the fudgy interior. Ideal for those who love texture.
Chocolate‑Covered Peanut Butter Cups
Drop spoonfuls of the batter into a muffin tin, bake, and then dip the cooled pieces in melted chocolate. The result is a portable, bite‑size treat that’s great for parties.
Low‑Sugar Version
Replace half the powdered sugar with a sugar substitute and reduce the granulated sugar by a quarter cup. The brownies stay fudgy but with a lower glycemic load. Great for those watching their sugar intake.
Almond Butter Variation
Swap half the peanut butter for almond butter to introduce a milder nut flavor. The almond butter also adds a subtle hint of sweetness. This variation works well for peanut‑allergy sufferers.
Chocolate‑Chili Kick
Add a pinch of cayenne pepper or chili powder to the batter for a spicy surprise. The heat pairs surprisingly well with the chocolate and peanut butter, creating a complex flavor profile. Serve with a dollop of whipped cream to balance the heat.
Storing and Bringing It Back to Life
Fridge Storage
Place the cooled brownies in an airtight container and store them in the refrigerator for up to one week. The cold environment keeps the chocolate from blooming and preserves the fudgy texture. When you’re ready to serve, let them sit at room temperature for 10 minutes to soften.
Freezer Friendly
Wrap each brownie individually in plastic wrap, then place them in a freezer bag. They’ll stay fresh for up to two months. Thaw them overnight in the fridge for the best texture.
Best Reheating Method
Reheat in a preheated oven at 300°F for 5 minutes, or microwave on medium for 20‑30 seconds. Add a tiny splash of water before reheating—this steams back to perfection and restores moisture. A quick dip in the oven also helps revive the crisp edges.