High Protein Low Carb Cottage
I was standing in my kitchen, staring at a ruined batch of flatbread that had turned into a soggy, unappetizing mess. The dough had been too wet, the oven too hot, and the result was a sad, greasy slab that even my cat refused to touch. That night, I swore I would find a way to make a low‑carb, high‑protein bread‑stick that could stand up to a cheese dip, a wine glass, and an evening of binge‑watching without turning the table into a disaster zone.
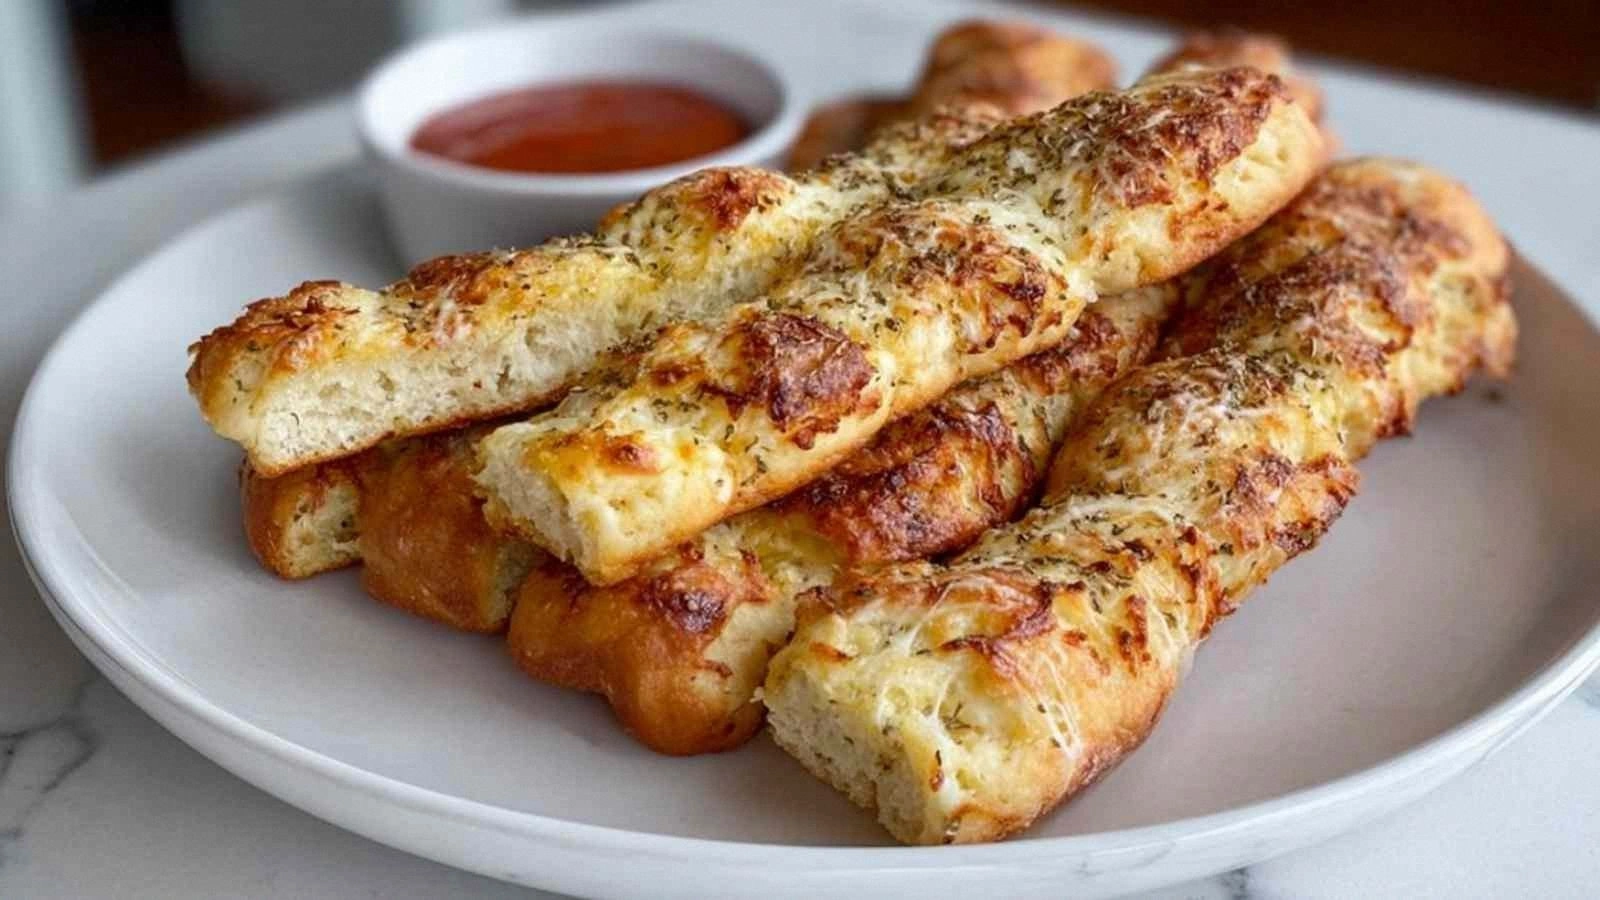
The first time I tasted the final product, I felt the crunch of the exterior, the soft, cheesy core, and the subtle almond undertone that made my mouth water. The aroma was a sweet, nutty perfume that mingled with the faint scent of garlic and oregano, almost like a warm hug from the oven. The sound of the first bite was a satisfying crack that echoed in my ears like a tiny celebration. The texture was a perfect balance between a firm bite and a melt‑in‑your‑mouth finish. The flavor profile was bold yet clean, with a savory depth that made me want to taste every single piece.
What makes this version stand out is that it’s not just a variation of a classic recipe; it’s a whole new experience that redefines what low‑carb can taste like. The secret lies in the combination of low‑fat cottage cheese and shredded mozzarella that creates a creamy, gooey center, the almond flour that adds a nutty crunch, and the oat flour that keeps the dough from becoming too dense. I dare you to taste this and not go back for seconds—once you’ve had the first bite, the rest will feel like a guilty pleasure you can’t resist. This is hands down the best version you’ll ever make at home, and I’ve kept it under lock and key for months.
If you’ve ever struggled with making low‑carb bread‑sticks that actually taste good, you’re not alone—there’s a reason most people abandon the idea. I’ve cracked the code, and I’m going to walk you through every single step. By the end, you’ll wonder how you ever made it any other way.
What Makes This Version Stand Out
- Flavor: The blend of cottage cheese and mozzarella creates a molten center that bursts with savory depth, while the garlic powder or Italian seasoning adds a subtle kick that elevates the entire experience.
- Texture: The almond flour gives a satisfying crunch, and the oat flour keeps the sticks from becoming too dry, resulting in a light, airy interior.
- Simplicity: With only eight ingredients, you can whip up these sticks in under 45 minutes—no complicated doughs, no overnight rising.
- Uniqueness: The low‑carb, high‑protein profile makes them a perfect snack for keto, paleo, or anyone looking to keep calories in check without sacrificing flavor.
- Crowd Reaction: These sticks have become a staple at parties, game nights, and brunches—guests always ask for the recipe, and they’re never disappointed.
- Ingredient Quality: Using low‑fat cottage cheese keeps the protein high while cutting unnecessary fat, and the almond flour adds a subtle nutty aroma that’s hard to beat.
- Cooking Method: The baking technique ensures a golden‑brown exterior while keeping the inside tender and gooey.
- Make‑ahead Potential: You can bake a batch, cool them, and store them in the fridge or freezer for a quick, protein‑packed snack on any day.
Inside the Ingredient List
The Flavor Base
Low‑fat cottage cheese is the star of this recipe. It provides a creamy, tangy foundation that balances the richness of the mozzarella. If you skip it, the sticks will lose their signature moisture and become dry. A good quality cottage cheese—preferably one with a mild, buttery flavor—ensures the sticks remain silky and not overly tangy.
The Texture Crew
Almond flour delivers a nutty flavor and a slightly crumbly texture that mimics the bite of traditional bread. Oat flour adds moisture and helps bind the dough together, preventing it from crumbling. Together, they create a sturdy yet tender crumb that holds up to dips and sauces. If you’re allergic to nuts, you can substitute oat flour with coconut flour, but you’ll need to increase the liquid slightly.
The Unexpected Star
Baking powder is the secret to achieving a light, airy interior. Without it, the sticks would be dense and chewy. The amount is modest—just half a teaspoon—so you won’t notice it in the final taste, but it makes a huge difference in texture. If you don’t have baking powder on hand, a pinch of baking soda plus a splash of lemon juice can work as a replacement.
The Final Flourish
Garlic powder or Italian seasoning adds a layer of savory aroma that complements the cheeses. The sea salt enhances every flavor component without overpowering them. A little bit of mozzarella on top gives the sticks a golden, bubbly crust that is visually appealing and deliciously cheesy. If you prefer a sharper cheese flavor, swap mozzarella for a mild provolone or a touch of sharp cheddar.
Everything's prepped? Good. Let’s get into the real action.
The Method — Step by Step
- Preheat your oven to 400°F (200°C). Line a baking sheet with parchment paper or a silicone mat to prevent sticking. This step is crucial; a properly heated oven ensures even browning and a crisp exterior. If your oven has hot spots, rotate the pan halfway through baking.
- In a large mixing bowl, combine the low‑fat cottage cheese and the eggs. Whisk them together until the mixture is smooth and the eggs are fully incorporated. The mixture should have a thick, custard‑like consistency. This base will hold the dough together and give the sticks their characteristic chew.
- Add the almond flour, oat flour, baking powder, sea salt, and garlic powder (or Italian seasoning). Stir until a sticky dough forms. The dough should not be too dry; if it feels crumbly, add a splash of water or an extra egg. The goal is a pliable dough that can be rolled out.
- Fold in the shredded mozzarella. The cheese should be evenly distributed throughout the dough, creating pockets of gooeyness in the final product. If you prefer a stronger cheese flavor, you can add a bit more mozzarella or a sprinkle of grated Parmesan.
- Transfer the dough onto a lightly floured surface. Roll it out into a rectangle about 1/4 inch thick. This thickness ensures the sticks bake evenly and hold their shape. If the dough is sticky, dust it with a small amount of almond flour to prevent sticking.
- Using a sharp knife or a pizza cutter, cut the dough into sticks about 1.5 inches wide. The sticks should be uniform in size for even cooking. Place them on the prepared baking sheet, spacing them slightly apart to allow heat circulation.
- Bake for 18–20 minutes, or until the tops are golden brown and the sticks feel firm to the touch. If you prefer a crispier exterior, increase the temperature to 425°F (220°C) for the last 3 minutes. Watch closely to avoid burning.
- Remove from the oven and let the sticks cool on a wire rack for 5 minutes. This cooling period allows the cheese to set slightly, making them easier to handle. Serve warm with your favorite low‑carb dip or enjoy them as a protein‑rich snack.
That’s it—you did it. But hold on, I’ve got a few more tricks that will take this to another level. These small adjustments can make the difference between good and unforgettable.
Insider Tricks for Flawless Results
The Temperature Rule Nobody Follows
Many bakers bake at the same temperature for all recipes, but the right temperature for these sticks is 400°F (200°C). Baking at a slightly lower temperature keeps the interior moist and prevents the cheese from leaking out. If you’re using a convection oven, reduce the temperature by 25°F (14°C) to avoid over‑browning.
Why Your Nose Knows Best
The aroma of the baking sticks will change as the cheese melts. When you first open the oven, you’ll smell a buttery, nutty fragrance that signals the dough is almost ready. If the smell becomes overly sharp or burnt, pull them out immediately. Your nose is the best judge of doneness.
The 5‑Minute Rest That Changes Everything
After removing the sticks from the oven, let them rest on a wire rack for five minutes. This rest period allows the cheese to set, making the sticks easier to slice and preventing a gooey mess. It also lets the steam redistribute, giving you that perfect bite.
The Secret to a Golden Crust
Brushing the tops with a lightly beaten egg before baking adds a glossy, golden crust that’s visually appealing. It also helps the cheese adhere to the surface, creating a slightly thicker, richer layer on top. If you’re avoiding dairy, a splash of almond milk works as a substitute.
The Quick Chill Trick
If you need to make the sticks ahead of time, bake them and let them cool completely before placing them in an airtight container. Store them in the fridge for up to three days or freeze for up to a month. When reheating, simply pop them in a preheated oven at 350°F (175°C) for 5 minutes—no need to thaw first.
Creative Twists and Variations
This recipe is a playground. Here are some of my favorite ways to switch things up:
Herb‑Infused Delight
Add a tablespoon of chopped fresh rosemary or thyme to the dough for an aromatic twist. The herbs pair beautifully with the cheeses and add a savory depth that’s perfect for a Mediterranean vibe.
Spicy Kick
Stir in a pinch of cayenne pepper or a splash of hot sauce before baking. The heat will mingle with the cheese, creating a fiery bite that’s great with a cool yogurt dip.
Cheddar‑Crunch Edition
Replace half the mozzarella with shredded sharp cheddar for a sharper, tangier flavor. The cheddar will melt into the cheese base, giving a richer, more complex taste.
Vegan Version
Use a plant‑based cottage cheese substitute and replace the eggs with a flaxseed “egg” (1 tablespoon ground flaxseed mixed with 3 tablespoons water). The result is a dairy‑free, protein‑rich snack that still holds up to dipping.
Salsa Verde Twist
Fold in a handful of chopped spinach and a tablespoon of chopped green chilies. The green color and subtle vegetal flavor add a fresh dimension, especially when paired with a creamy avocado dip.
Storing and Bringing It Back to Life
Fridge Storage
Store baked sticks in an airtight container in the refrigerator for up to three days. The cheese stays moist, and the texture remains firm. Keep them on a paper towel to absorb excess moisture and avoid sogginess.
Freezer Friendly
Place sticks on a parchment‑lined tray and freeze until solid. Then transfer to a freezer bag or container. They can stay frozen for up to one month. When you’re ready to eat, bake them directly from frozen at 400°F (200°C) for 12–15 minutes.
Best Reheating Method
To reheat, preheat your oven to 350°F (175°C). Place the sticks on a baking sheet and heat for 5–7 minutes, or until warmed through. For extra crispiness, finish with a quick 2‑minute blast at 425°F (220°C). Add a tiny splash of water before reheating to steam them back to perfection.