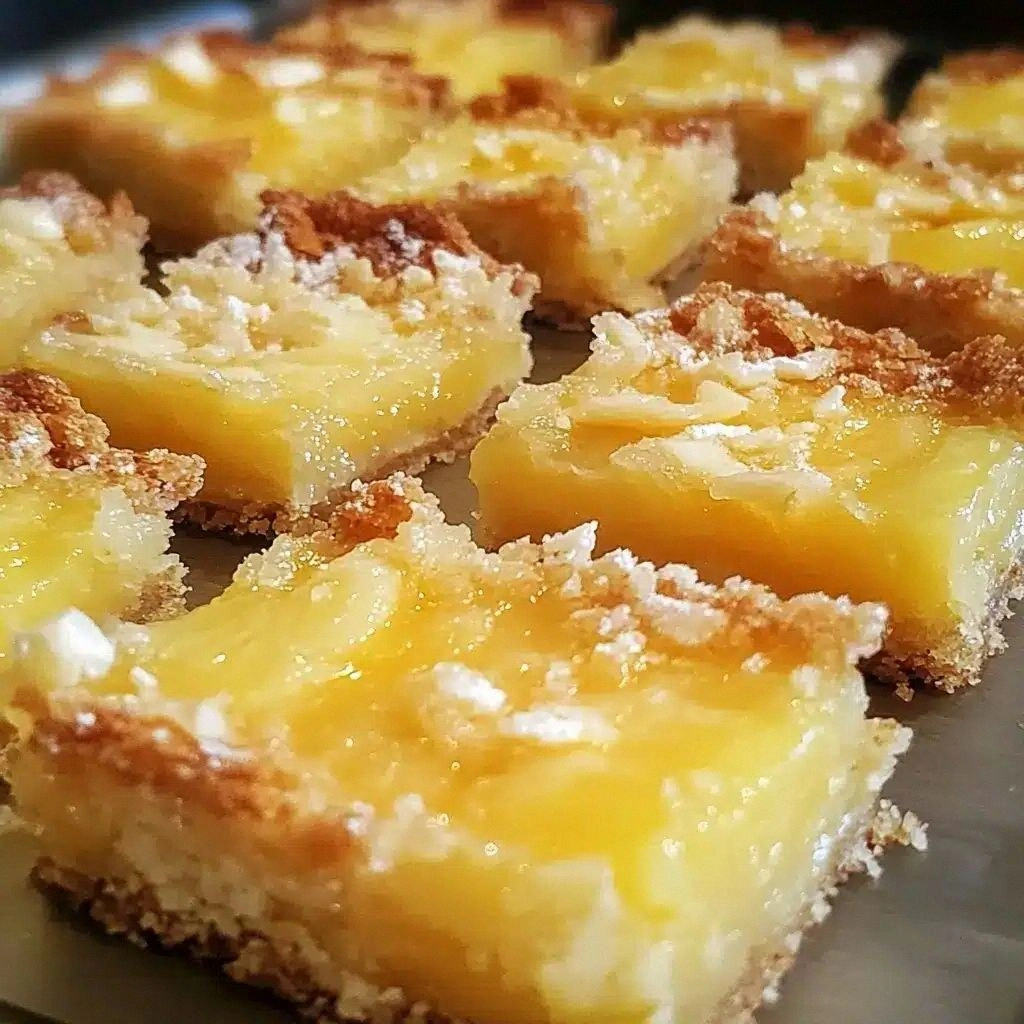
I was in a kitchen crisis, flipping pancakes that had turned into a sticky, brown disaster, when a friend texted me a photo of a pineapple‑filled cookie that looked like sunshine trapped in dough. The scent of caramelized sugar and fresh tropical fruit hit my nose like a sun‑kissed breeze, and I knew I had to make my own version. The moment the first bite hit my tongue, the sweet tang of pineapple met the buttery crunch of toasted coconut, and I realized I’d stumbled onto something that could be turned into an everyday staple. I dare you to taste this and not go back for seconds—you’ll be hooked from the first chew.
Picture yourself pulling these bars out of the oven, the kitchen smelling like a beach resort, with steam curling up like a lazy wave. The sound of the timer ticking, the gentle clink of the baking sheet, the visual of golden edges beginning to separate from the center—everything is a sensory symphony. I’ve been obsessed with finding that perfect balance between sweet and savory, and this recipe delivers a chewy center that practically melts in your mouth while the edges stay crisp enough to crack like thin ice. If you’ve ever struggled with a bar that was either too dry or too gooey, you’re not alone—and I’ve got the fix that will make your taste buds sing.
What makes this version stand out is not just the ingredients but the technique. I’ve tweaked the classic pineapple bar recipe by adding a splash of vanilla, a pinch of cinnamon, and a dash of salt to bring out the natural sweetness of the fruit. I’ve also experimented with the baking temperature, finding that a slightly lower heat allows the bars to set without overcooking the edges, preserving that delightful contrast. And I’ve included a handful of toasted coconut for that extra crunch and a hint of tropical aroma that you won’t find in most versions. This is hands down the best version you'll ever make at home, and I’m not exaggerating.
So, if you’re ready to elevate your snack game, let me walk you through every single step—by the end, you'll wonder how you ever made it any other way. I’ve poured my heart and a little bit of beach vacation into each bar, and I can’t wait to share the secret sauce that makes them truly unforgettable.
What Makes This Version Stand Out
- Taste: The sweet and slightly salty profile is amplified by the subtle addition of cinnamon and a pinch of salt, which unlocks the pineapple’s natural sweetness.
- Texture: The bars have a chewy center that stays moist while the edges develop a crisp, golden crust that shatters like thin ice.
- Ingredient Quality: Using fresh pineapple chunks or high‑quality dried pineapple ensures a bright, authentic tropical flavor.
- Uniqueness: A splash of vanilla and toasted coconut add layers of aroma and depth that set this recipe apart.
- Make‑ahead Potential: These bars keep well for a week in an airtight container, making them a perfect grab‑and‑go snack.
- Crowd Reaction: At potlucks, the bars become the centerpiece, and guests ask for the recipe—proof that they’re a hit.
- Simplicity: With only a handful of pantry staples, you can whip up a batch in under an hour.
- Cooking Method: Baking at a slightly lower temperature preserves moisture while still achieving that desirable caramelized exterior.
Alright, let's break down exactly what goes into this masterpiece...
Inside the Ingredient List
The Flavor Base
All‑purpose flour forms the backbone of the bars, absorbing moisture and giving structure. If you’re watching carbs, swap it for oat flour or a gluten‑free blend; the bars will still hold together but may have a slightly denser crumb. Don’t skip this ingredient—without it, the bars would collapse into a sticky mess.
The Texture Crew
Shredded coconut adds a chewy, tropical bite that complements the pineapple’s juiciness. Toasting the coconut beforehand deepens its nutty flavor and prevents it from becoming soggy. If you’re allergic to coconut, replace it with finely chopped cashews for a subtle nutty twist.
The Unexpected Star
Dried pineapple bits bring a concentrated sweetness that balances the tartness of fresh pineapple. They also provide a chewy texture that contrasts beautifully with the soft interior. If you prefer a fresher taste, use fresh pineapple chunks—just be sure to pat them dry before adding.
The Final Flourish
A dash of vanilla extract and a pinch of cinnamon elevate the flavor profile, adding warmth and depth. The vanilla brings out the fruit’s natural sweetness, while cinnamon adds a subtle spice that lingers on the palate. Salt, though only a half teaspoon, is essential—it cuts through the sugar and highlights the tropical notes.
Everything's prepped? Good. Let's get into the real action...
The Method — Step by Step
- Preheat your oven to 325°F (165°C) and line a 9x13 inch baking pan with parchment paper, leaving a little overhang on the sides for easy removal. This lower temperature allows the bars to bake evenly, preventing the edges from burning while the center stays moist.
- In a large bowl, whisk together the flour, baking powder, salt, and cinnamon until well combined. This dry mix ensures an even distribution of leavening agents and prevents clumping when you add the wet ingredients.
- In a separate saucepan, melt the butter over low heat, then stir in the brown sugar until the mixture is glossy and the sugar has dissolved. The glossy butter‑sugar blend creates a silky base that helps the bars develop a beautiful golden crust.
- Add the melted butter mixture to the dry ingredients and stir until a crumbly dough forms. The dough should feel like a sandy beach—moist but not sticky. If it’s too dry, add a tablespoon of milk or water.
- Fold in the shredded coconut, dried pineapple, and fresh pineapple chunks (if using). The pineapple’s moisture will help bind the dough together, giving the bars a luscious interior.
- Gently press the dough into the prepared pan, using the back of a spoon to create an even surface. This step ensures uniform thickness, so each bar bakes at the same rate.
- Bake for 25–30 minutes, or until the edges are golden brown and the center is set. The bars should emit a caramelized aroma that will make your kitchen feel like a tropical bakery.
- Remove from the oven and let cool in the pan for 10 minutes before lifting them out onto a wire rack. This rest allows the bars to set properly, preventing them from crumbling.
- Once cooled, cut into 12 equal bars and serve. If you like, drizzle a thin ribbon of melted dark chocolate over the top for an extra touch of decadence.
That’s it—you did it! But hold on, I've got a few more tricks that'll take this to another level. These insider secrets will help you achieve the perfect balance of chew and crunch every single time.
Insider Tricks for Flawless Results
The Temperature Rule Nobody Follows
Many bakers default to 350°F, but lowering the temperature to 325°F allows the bars to bake evenly without burning the edges. The slower bake also helps the pineapple release its juices gradually, keeping the interior moist. I once baked at 350°F and ended up with a dry, crumbly texture—lesson learned.
Why Your Nose Knows Best
When the bars start to smell caramelized, that’s the sweet spot. The aroma signals that the sugars are caramelizing just right, giving the bars that deep, buttery flavor. If you’re unsure, taste a tiny crumb; it should be sweet but not overly sugary.
The 5‑Minute Rest That Changes Everything
After removing the bars from the oven, let them rest on the pan for 10 minutes before cutting. This short rest allows the bars to set, preventing them from breaking apart. Think of it as the bars taking a quick vacation before their grand debut.
Add a Splash of Water Before Reheating
When you want to reheat leftover bars, add a splash of water to the pan before microwaving. The steam keeps the bars moist and restores that chewy texture you love. Without the water, they can become dry and rubbery.
Use a Silicone Baking Mat
A silicone mat on the parchment paper prevents sticking and makes cleanup a breeze. It also provides a slightly elevated surface, ensuring even heat distribution. This is especially useful if you’re using a non‑stick pan.
Creative Twists and Variations
This recipe is a playground. Here are some of my favorite ways to switch things up:
Tropical Coconut Crunch
Swap the shredded coconut for toasted coconut flakes and sprinkle a little coconut sugar on top before baking. The result is a sweet, crunchy exterior that pairs beautifully with the tropical fruit inside.
Chocolate‑Infused Bliss
Fold in 1/4 cup dark chocolate chips into the dough. The chocolate melts into pockets of rich flavor that contrast with the pineapple’s brightness. Perfect for chocolate lovers.
Almond & Pineapple Fusion
Replace the shredded coconut with finely chopped almonds for a nutty twist. The almonds add a pleasant crunch and a subtle buttery flavor that complements the pineapple.
Cinnamon‑Spiced Bars
Increase the cinnamon to 1 tsp and add a pinch of nutmeg. This warm spice blend elevates the bars, making them feel like a cozy dessert.
Lemon‑Zest Surprise
Add 1 tsp of lemon zest to the dry mix. The citrus brightness cuts through the sweetness and adds a fresh, bright note that balances the tropical flavors.
Savory Pineapple Bites
Replace the brown sugar with honey and add 1/2 tsp of smoked paprika. The result is a savory, slightly smoky bar that pairs well with cheese platters or charcuterie boards.
Storing and Bringing It Back to Life
Fridge Storage
Store the bars in an airtight container in the refrigerator for up to 5 days. The cool environment keeps the bars fresh and prevents the coconut from becoming too soft. When you’re ready to eat, let them sit at room temperature for 10 minutes to restore their chewy texture.
Freezer Friendly
Wrap each bar individually in parchment paper and place them in a freezer bag. They’ll keep for up to 3 months. Thaw at room temperature for 30 minutes before serving.
Best Reheating Method
Place the bars in a preheated oven at 300°F for 5–7 minutes. Alternatively, microwave on medium power for 20 seconds, then let sit for a minute. Add a tiny splash of water before reheating to keep them moist and restore that chewy interior.