Picture this: it’s a rainy Saturday, the kettle is whistling, and the only thing you can think about is how to turn your pantry into a comfort‑food playground. I was scrolling through Pinterest, feeling the classic “I need something sweet, but not too sweet” itch, when a friend dared me to create the ultimate pumpkin‑spiced snack that would make even the most skeptical taste buds swoon. I rolled up my sleeves, grabbed my favorite Rice Krispies, and set out to craft a treat that marries the warm, nostalgic hug of pumpkin pie spice with the gooey, buttery bliss of marshmallows, all wrapped in a crunchy, chocolate‑kissed exterior. The kitchen smelled like cinnamon and melted butter, the air hummed with anticipation, and the timer ticked like a countdown to a flavor revelation. I’ll be honest—my first batch had a slight brown‑brown edge, but that’s the secret sauce that adds depth; it’s a gentle char that balances the sweetness of marshmallows and the richness of butter. Most recipes get this completely wrong by over‑mixing or under‑cooking, but this version keeps the texture perfect: crisp on the outside, soft on the inside, with a subtle caramelized finish that lingers. I dare you to taste this and not go back for seconds. If you’ve ever struggled with balancing sweetness and crunch, you’re not alone—this is the fix you’ve been craving. Picture yourself pulling these out of the pan, the whole kitchen smelling incredible, and watching the golden edges shatter like thin ice when you bite. Let me walk you through every single step—by the end, you’ll wonder how you ever made it any other way.
What Makes This Version Stand Out
- Flavor: The pumpkin pie spice isn’t just a garnish; it permeates every bite, delivering a warm, aromatic core that feels like a hug in edible form.
- Texture: The butter melts into the marshmallows, creating a silky, gooey center that contrasts beautifully with the crispness of Rice Krispies.
- Sweetness: White chocolate chips add a creamy, slightly tangy counterpoint that elevates the overall balance, preventing the marshmallows from overpowering.
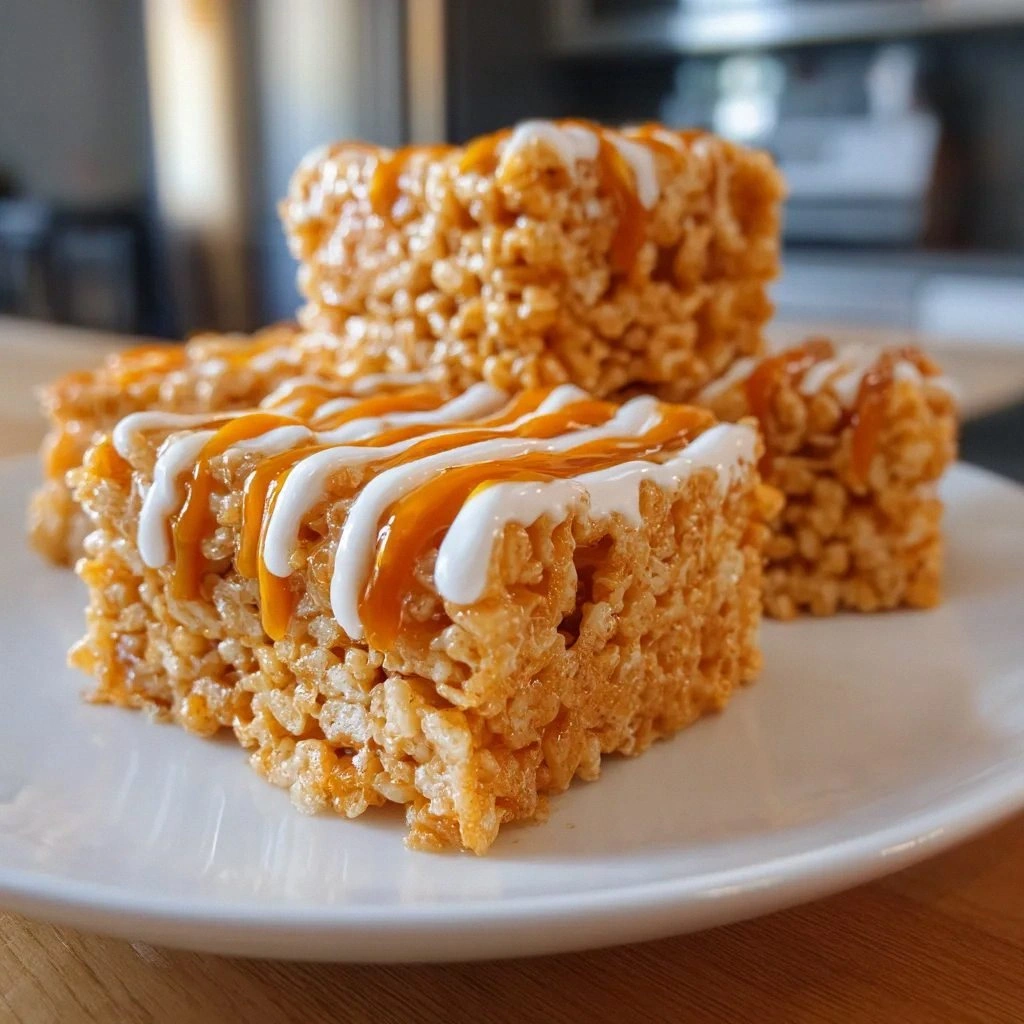
- Visual Appeal: The golden‑brown crust and the glossy white chocolate specks make for Instagram‑ready bites that look as good as they taste.
- Ease: No elaborate steps—just melt, stir, pour, and bake. This recipe is a breeze even for the kitchen novice.
- Make‑ahead Potential: Once baked, these treats keep their crunch and flavor for up to a week in an airtight container.
- Customization: Swap in mini marshmallows, add a splash of vanilla, or drizzle caramel for a personalized twist.
- Kid‑Friendly: The ingredients are simple, the process is safe, and the result is a sweet treat that kids love to help make.
Inside the Ingredient List
The Flavor Base
Butter is the backbone of this recipe. Unsalted butter gives you full control over the salt level, and its high fat content melts into the marshmallows, creating a silky, cohesive mixture. Skipping butter would leave the marshmallows dry and crumbly, ruining the signature gooeyness. A good quality butter—ideally European—adds a buttery depth that elevates the overall flavor profile.
The Texture Crew
Rice Krispies Cereal is the crunchy hero that provides structure. Its light, airy texture holds the mixture together while delivering a satisfying snap with each bite. If you prefer a different crunch, try puffed quinoa or cornflakes, but the classic Rice Krispies give the most authentic experience. Remember, the cereal should be fresh; stale grains will lose their crispness.
The Unexpected Star
Marshmallows are the gooey star that makes this treat unforgettable. They melt into the butter, forming a luscious, chewy center. Mini marshmallows give a more delicate bite, whereas regular ones create a richer, more substantial mouthfeel. If you’re looking for a vegan alternative, opt for plant‑based marshmallows that melt similarly.
The Final Flourish
White chocolate chips are optional but highly recommended. They melt into the mixture, creating pockets of creamy sweetness that contrast with the spice. The chips also add a subtle white chocolate aroma that lingers on the palate. If you’re allergic to dairy, choose dairy‑free white chocolate for a similar effect.
Everything's prepped? Good. Let's get into the real action.
The Method — Step by Step
- Begin by lining a 9×13 inch baking pan with parchment paper, ensuring the edges are tucked under to prevent sticking. This step guarantees easy removal and a neat presentation. Set aside while you preheat the oven to 350°F (175°C). The heat will be crucial for the butter to melt smoothly.
- In a large saucepan, melt 1 cup of unsalted butter over medium heat until it foams and turns a golden hue. Stir constantly to avoid scorching; a gentle, steady melt is key. Once melted, remove from heat and let it cool just enough that you can handle it safely.
- Add 3 cups of marshmallows to the warm butter, stirring until they are completely liquefied and the mixture is smooth. The marshmallows should coat the butter like velvet. If they resist, reheat briefly on low heat—don’t let it boil.
- Stir in 1/2 cup of pumpkin pie spice, ensuring an even distribution. The spice should swirl through the mixture, infusing every corner with warm, aromatic notes. Taste a small amount; the spice should be noticeable but not overpowering.
- Fold in 10 cups of Rice Krispies, gently mixing until the cereal is fully coated. The cereal will absorb some of the butter, creating a cohesive batter. Be careful not to crush the grains; you want that crisp snap.
- Fold in 1 cup of white chocolate chips, letting them melt slightly into the batter. The chips will create pockets of creamy sweetness. If you prefer a more pronounced chocolate flavor, double the chips.
- Transfer the batter into the prepared pan, pressing it firmly with a spatula to create an even layer. The goal is a compact, uniform surface that will bake into a cohesive slab. Don’t leave air pockets; they can cause uneven baking.
- Bake for 30 minutes, or until the edges turn golden brown and the center is set. The scent of toasty butter and spice will fill the kitchen like a fall hug. Check the center with a toothpick; it should come out clean.
- Remove from the oven and let cool completely on a wire rack for at least 20 minutes. This cooling period allows the mixture to firm up, making it easier to cut clean slices. Once cool, lift the slab out of the pan using the parchment edges.
That's it — you did it. But hold on, I've got a few more tricks that'll take this to another level...
Insider Tricks for Flawless Results
The Temperature Rule Nobody Follows
Maintaining a consistent 350°F (175°C) is critical; fluctuating temperatures can lead to uneven browning. Use an oven thermometer to ensure accuracy, especially if your oven runs hot. A steady heat keeps the butter from separating, preserving the creamy texture.
Why Your Nose Knows Best
Before you pull the pan out, trust the aroma—if it smells buttery and spiced, it’s ready. A subtle nutty scent indicates the marshmallows have fully integrated. Overlooking this can lead to a less cohesive bite.
The 5-Minute Rest That Changes Everything
After baking, let the slab rest for 5 minutes before cutting. This brief pause allows the mixture to set, preventing crumbling. It also lets the flavors meld, creating a richer taste profile.
Keep the Parchment in the Fridge
Store leftover parchment‑lined slabs in the refrigerator, wrapped in plastic. The cold environment preserves crunch and prevents the butter from softening. When you’re ready to serve, let it sit at room temperature for a few minutes to regain its best texture.
Use a Silicone Mat for Easy Cleanup
Place a silicone baking mat under the parchment for an extra layer of protection. It makes removal effortless and keeps the pan clean. Plus, the mat can be reused countless times.
Creative Twists and Variations
Nutty Crunch Edition
Swap 2 cups of Rice Krispies for an equal amount of chopped pecans or walnuts. The nutty crunch adds a new dimension and pairs well with the pumpkin spice. It’s perfect for those who love a bit of bite.
Chocolate‑Covered Delight
Dip the cooled slabs in melted dark chocolate and let set in the fridge. The chocolate coating adds a glossy finish and a bittersweet finish that balances the sweetness. Sprinkle sea salt on top for an extra pop.
Mini Marshmallow Morsels
Use only mini marshmallows for a lighter texture. The smaller pieces melt faster, creating a more airy center. This version is ideal for a delicate palate or for serving to kids who prefer less chew.
Spiced Coconut Variation
Replace the white chocolate chips with shredded coconut. The coconut adds a tropical twist and a subtle sweetness that complements the pumpkin spice. Toast the coconut slightly for a deeper flavor.
Vegan Version
Use plant‑based butter and marshmallows, and swap white chocolate chips for dairy‑free chocolate. The texture remains the same, and the flavor profile stays true to the original. This version is perfect for plant‑based diners.
Caramel Swirl
Fold a thin ribbon of caramel sauce into the batter before baking. The caramel adds a luscious, buttery sweetness that enhances the overall flavor. Serve with a drizzle of extra caramel for an indulgent finish.
Storing and Bringing It Back to Life
Fridge Storage
Wrap the cooled slabs in plastic wrap and store them in an airtight container in the refrigerator for up to 5 days. The cold environment preserves the crunch and prevents the butter from softening. Let them sit at room temperature for a few minutes before serving to restore the best texture.
Freezer Friendly
Place the slabs in a single layer on a parchment‑lined tray and freeze for 2 hours, then transfer to a freezer bag. They can stay frozen for up to 3 months. Thaw in the refrigerator overnight before reheating.
Best Reheating Method
Reheat the slabs in a preheated 300°F oven for 5–7 minutes, or until warm. Add a tiny splash of water before reheating; it steams back to perfection and keeps the interior moist. Let them rest for a minute before slicing to avoid a soggy center.