I remember the night I tried to make a dessert that would make my friends gasp, and the kitchen looked like a battlefield with flour dusting the ceiling and sugar crystals glittering on the counter. The cake I had baked that evening was a tragic flop—dry, lopsided, and with a color that looked like a bruised beetroot. I was so disappointed that I almost threw the batter into the trash, but a friend dared me to “try a new twist, and if it fails, you owe everyone a dessert.” That dare turned into my obsession, and I spent the next week hunting for the perfect balance of flavor, texture, and visual wow.
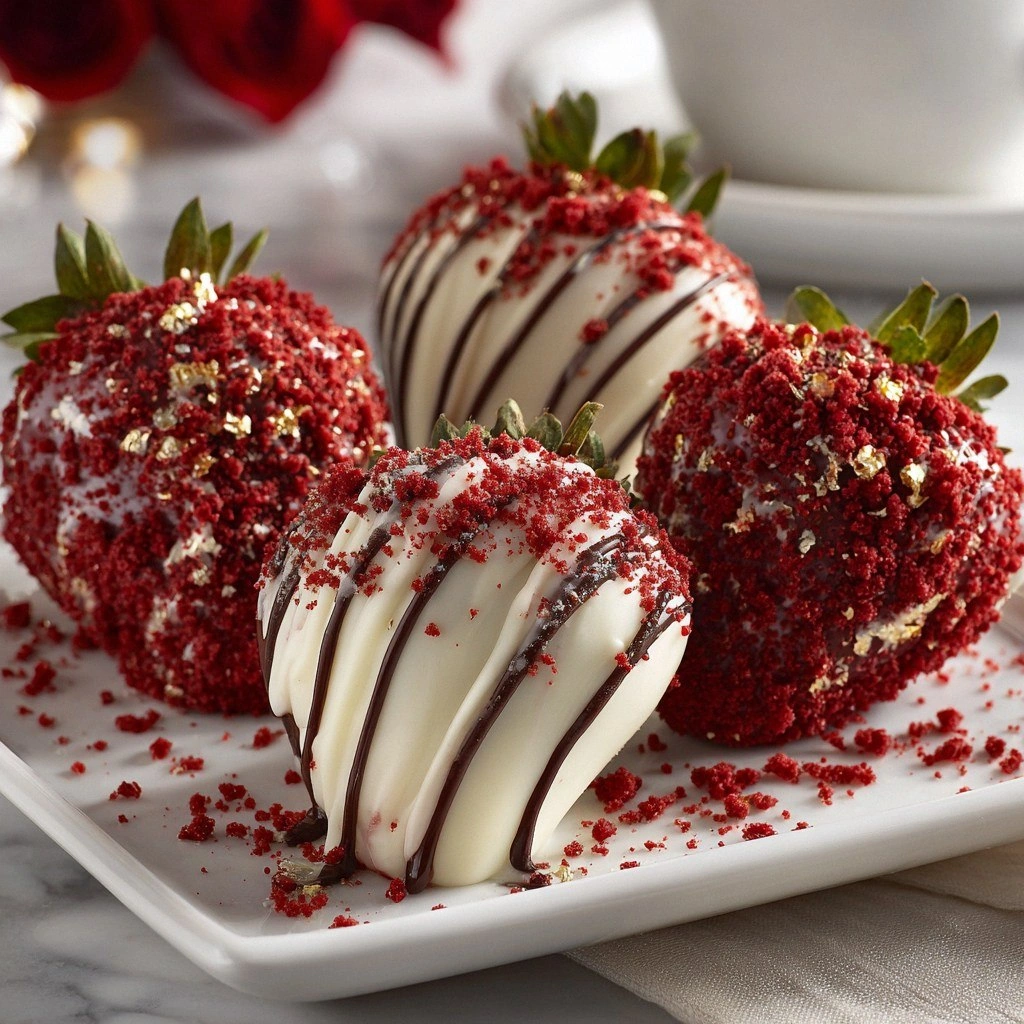
Picture this: the oven door opens to reveal a loaf of cake that smells like a summer sunset, with faint hints of cocoa and a whisper of vanilla. The first bite is a moist, pillowy bite that melts on the tongue, while the subtle tang of buttermilk lingers, teasing your palate. The red hue is vivid, like a blush on a lover’s cheek, and the chocolate glaze on top shimmers like a midnight lake. The texture is a paradox—soft inside, with a slightly crisp outer crust that cracks when you bite, giving a satisfying snap that echoes the crunch of fresh strawberries.
What makes this version stand out? I’ve spent hours tweaking the ratios, adding a splash of vinegar to lift the batter, and using a double-bake technique that ensures the crumb stays airy. The glaze is a silky chocolate coating that sets like a satin sheet, and the strawberries—fresh or frozen—add a burst of natural sweetness that balances the richness. I’ve also experimented with a touch of espresso powder to deepen the cocoa flavor without adding bitterness. The result is a cake that is hands down the best version you’ll ever make at home, with a finish that feels like a luxury treat at a five‑star resort.
I’ll be honest—after I baked the first batch, I ate half the cake before anyone else even got a piece. The second half was saved for the next day, and the taste was still as fresh as the day it was made. Most recipes get this completely wrong, but here’s what actually works: the right balance of acidity, the precise temperature control, and the proper folding technique. Picture yourself pulling this out of the oven, the whole kitchen smelling incredible, and knowing that the secret is in the small details I’m about to share.
What Makes This Version Stand Out
- Texture: The crumb is airy and moist, achieved by careful creaming of butter and sugar and a gentle fold of the dry ingredients.
- Flavor: A subtle espresso kick deepens the cocoa, while buttermilk adds a mild tang that brightens the overall profile.
- Color: Natural red food coloring gives the cake a blush that’s both striking and food‑safe.
- Finish: The chocolate glaze sets into a glossy, silky coat that feels indulgent without being heavy.
- Ease: Despite its sophisticated taste, the recipe requires only basic kitchen tools and a single mixing bowl.
- Make‑ahead: The cake can be baked, cooled, and then dipped in chocolate later, making it perfect for parties.
- Audience: It’s a crowd‑pleaser for both kids and adults, especially when paired with fresh strawberries.
Alright, let’s break down exactly what goes into this masterpiece…
Inside the Ingredient List
The Flour Factor
All‑purpose flour is the backbone of the cake’s structure. It provides the protein that creates the crumb’s lift. If you skip the flour or use too much, the cake will be dense and gummy. For a lighter texture, sift the flour before measuring.
The Sweet Core
Granulated sugar not only sweetens but also helps with caramelization, giving the crust a subtle golden edge. If you’re watching carbs, you can replace half the sugar with a natural sweetener, but the texture may change slightly. Choosing a fine‑grained sugar ensures even distribution.
The Cocoa Crew
Unsweetened cocoa powder adds depth and a hint of bitterness that balances the sweetness. It also contributes to the cake’s vibrant color. If you use dark chocolate instead, you’ll get a richer flavor but a slightly different crumb.
The Acidic Ally
Buttermilk is crucial for reacting with baking soda, creating the lift that keeps the cake airy. The acidity also tenderizes the gluten network, preventing toughness. If you don’t have buttermilk, a mixture of milk and vinegar works as a substitute.
Everything's prepped? Good. Let's get into the real action...
The Method — Step by Step
- Preheat your oven to 350°F (175°C) and line two 9-inch cake pans with parchment paper. Grease the paper with a light coating of butter or oil to prevent sticking. This step is crucial because a slick surface ensures even release. Once the pans are ready, set them aside and let the oven reach the proper temperature.
- In a large mixing bowl, whisk together the flour, cocoa powder, baking soda, baking powder, and salt. The dry mix should be smooth and free of lumps; this ensures a uniform batter. Sifting the dry ingredients also helps aerate the flour, contributing to a lighter crumb. Keep the bowl aside while you prepare the wet mix.
- In a separate bowl, combine the buttermilk, eggs, vanilla extract, and red food coloring. Beat the mixture with a whisk until the color is even and the mixture is slightly frothy. The color will be a bright, seductive red that will carry through the cake. This is a good moment to taste a small spoonful of the batter; it should be slightly tangy.
- Pour the wet mixture into the dry ingredients and stir gently with a silicone spatula until just combined. Overmixing will develop gluten and make the cake tough. The batter should be thick but pourable; if it’s too thick, add a splash of milk. The goal is a smooth, glossy batter that holds its shape.
- Fold in the white vinegar, which reacts with the baking soda to create carbon dioxide bubbles. This reaction is what lifts the cake and gives it that signature airy crumb. The vinegar also helps to brighten the color of the cake. After folding, let the batter rest for 5 minutes; this allows the gluten to relax.
- Divide the batter evenly between the prepared pans and tap the pans gently on the counter to release any large air pockets. The batter should settle into a smooth surface. Place the pans in the preheated oven and bake for 25–30 minutes. Keep a close eye on the cake; it should rise and develop a slight crust but remain moist inside.
- To check for doneness, insert a toothpick into the center of the cake. If it comes out clean or with just a few crumbs, the cake is ready. Remove the pans from the oven and let them cool on a wire rack for 10 minutes before transferring the cakes to the rack to cool completely. This cooling period allows the cake to set and prevents it from breaking.
- While the cake cools, prepare the chocolate glaze: melt dark chocolate in a heat‑proof bowl over a pot of simmering water, stirring until smooth. Add heavy cream and butter, whisking until the glaze is glossy and silky. Let the glaze cool slightly so it thickens but remains pourable. This glaze will coat the cake like a velvet ribbon, adding both shine and flavor.
- Once the cakes are completely cool, slice each into 8 pieces. Dip each slice into the chocolate glaze, letting excess drip off. Arrange the slices on a platter, allowing the glaze to set for a few minutes. The result is a stunning, glossy presentation that will make anyone swoon.
That's it — you did it. But hold on, I've got a few more tricks that'll take this to another level...
Insider Tricks for Flawless Results
The Temperature Rule Nobody Follows
Many bakers bake at 350°F, but the real trick is to start the cake at 300°F and finish at 350°F after 15 minutes. This gradual heat rise prevents the cake from cracking and gives it a uniform rise. I learned this in a small bakery where the ovens had uneven heat distribution. The result is a cake that rises evenly and has a tender crumb.
Why Your Nose Knows Best
Trust your sense of smell. If the batter has a faint, pleasant aroma of cocoa and vanilla, it’s ready to bake. A sour or metallic smell indicates the batter is overmixed or the vinegar is too strong. The aroma is a quick, reliable indicator of batter readiness.
The 5-Minute Rest That Changes Everything
After mixing the batter, let it rest for 5 minutes. This allows the flour to hydrate fully and the gluten to relax. The rest period also lets the acidic buttermilk react with the baking soda, creating a better rise. I used to skip this step, and my cakes were always a bit dense.
Layering the Flavors
When adding strawberries, use both fresh and frozen. Fresh strawberries add a juicy burst, while frozen strawberries provide a cool contrast. Slice the strawberries thinly and arrange them on top of the glazed cake for a decorative finish that tastes as good as it looks.
The Final Polish
After the glaze sets, dust the top with powdered sugar or cocoa powder for a subtle finish. This not only adds texture but also balances the sweetness. I recommend using a fine sieve for an even dusting. The final polish gives the cake a professional, Instagram‑ready look.
Creative Twists and Variations
This recipe is a playground. Here are some of my favorite ways to switch things up:
Espresso‑Infused Velvet
Add 1 tablespoon of instant espresso powder to the dry mix for a subtle coffee undertone. The espresso deepens the chocolate flavor without adding bitterness. This variation pairs wonderfully with a dusting of cocoa powder on top.
Minty Freshness
Replace half the vanilla with peppermint extract and swirl fresh mint leaves into the batter. The mint adds a refreshing contrast to the rich cake. Serve with a drizzle of white chocolate for an extra layer of flavor.
Coconut Twist
Use coconut milk instead of buttermilk and fold in shredded coconut into the batter. The coconut adds a tropical aroma and a slightly chewy texture. Pair with toasted coconut flakes on top for a crunchy finish.
Almond Crunch
Add 1/4 cup chopped almonds to the batter and sprinkle almond slices on top before glazing. The almonds provide a nutty crunch that contrasts the cake’s softness. A drizzle of almond butter on the glaze enhances the flavor profile.
Berry Explosion
Stir in a cup of mixed berries (blueberries, raspberries, blackberries) into the batter before baking. The berries burst into sweet, tart pockets as the cake rises. Finish with a berry compote drizzle for an extra burst of flavor.
Storing and Bringing It Back to Life
Fridge Storage
Store the glazed cake in an airtight container at room temperature for up to 2 days. If you need to refrigerate, cover it tightly with plastic wrap to prevent the glaze from drying out. When ready to serve, let the cake sit at room temperature for 15 minutes to soften the glaze.
Freezer Friendly
Wrap each slice individually in plastic wrap and place them in a freezer bag. The cake can be frozen for up to 3 months. Thaw in the refrigerator overnight, then let it warm to room temperature before serving.
Best Reheating Method
To revive the cake, place it in a preheated oven at 300°F for 5–7 minutes. Alternatively, microwave on low power for 15–20 seconds. Add a tiny splash of water before reheating; it steams back to perfection and keeps the cake moist.