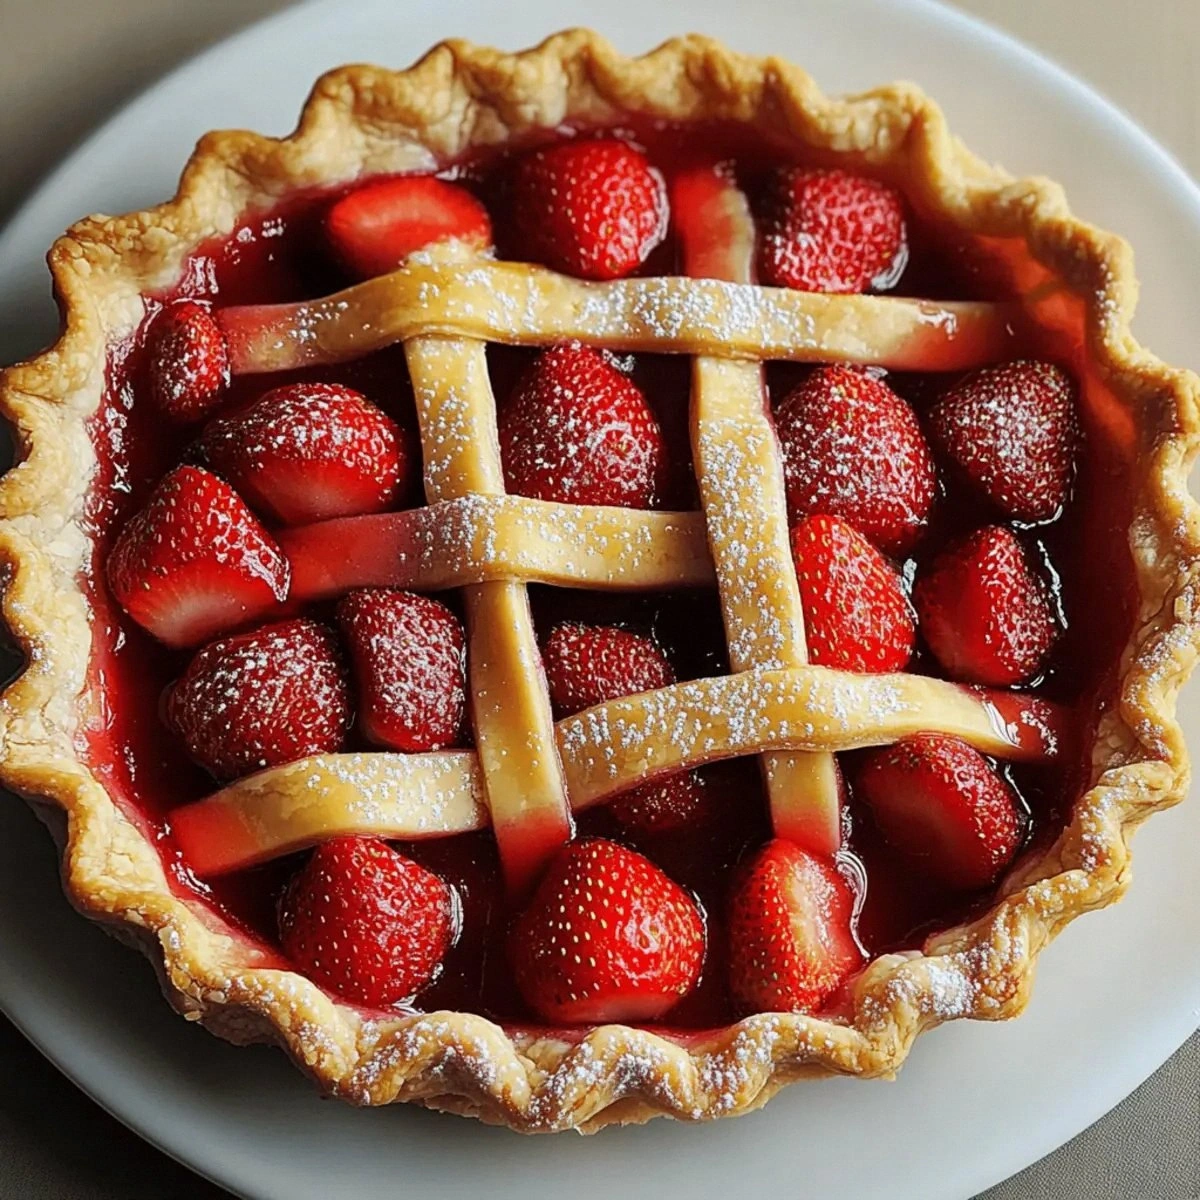
I still remember the day I swore off strawberry pie forever. It was a humid July afternoon, and I'd just pulled what looked like a crimson crime scene from my oven — filling that had erupted like Mount Vesuvius, crust blacker than charcoal, and the whole kitchen smelled like burnt sugar and broken dreams. My neighbor politely took a bite, made that face people make when they're trying not to hurt your feelings, and suggested I stick to store-bought. That stung. But here's the thing about failure — it teaches you exactly what not to do.
Fast forward three summers, and I'm standing in my kitchen again, flour dusting my countertops like fresh snow, strawberries so ripe they're practically singing. This time, I'm armed with secrets I learned the hard way: why most recipes turn your filling into strawberry soup, how to keep your crust from becoming a soggy cardboard replica, and the single technique that transforms ordinary pie into something that makes grown adults close their eyes and sigh. That first bite? It's like summer exploded on your tongue — bright, sweet, with just enough tartness to keep things interesting.
Picture yourself pulling this beauty from the oven. The crust is golden and crackly, with sugar crystals that catch the light like tiny diamonds. Steam rises in lazy spirals, carrying the scent of sun-warmed berries and buttery pastry. You hear that satisfying crack as your knife breaks through the top, revealing filling that holds its shape but yields like a dream, glossy and ruby-red. The first taste is pure summer — not the cloying sweetness of grocery store pies, but something honest and vibrant that tastes like June and July and everything you've been missing the rest of the year.
What I'm about to share isn't just another recipe — it's the accumulation of three years of obsessive testing, dozens of failed attempts, and one memorable incident involving a smoke alarm and a very angry cat. But the result is worth every single disaster. This pie has converted self-proclaimed pie-haters into die-hard fans. It's made an appearance at weddings, funerals, and everything in between. Let me walk you through every single step — by the end, you'll wonder how you ever made it any other way.
What Makes This Version Stand Out
Flavor Balance: Most strawberry pies taste like you're eating strawberry jam on cardboard. This version layers sweetness with brightness, using just enough sugar to enhance the fruit without drowning it. A whisper of lemon juice and vanilla creates depth that makes people ask "what's in this?" in the best way possible.
Texture Revolution: Say goodbye to watery fillings that turn your crust into a soggy mess. My technique creates a filling that's sliceable but tender, with whole berry pieces that burst when you bite them. The crust stays crisp for days — yes, days — thanks to a secret barrier technique that sounds fancy but takes thirty seconds.
No-Fail Crust: If you've ever wrestled with pie dough that tears, shrinks, or tastes like cardboard, you're not alone. This crust comes together in the food processor, rolls out like a dream, and forgives every beginner mistake. Plus, it tastes like buttery, flaky heaven instead of flour paste.
Make-Ahead Magic: This pie actually improves after a day in the fridge. The filling sets perfectly, the flavors meld into something deeper and more complex, and you can serve it cold or at room temperature. Make it Sunday, serve it Tuesday, and watch your guests swear you bought it from a boutique bakery.
Summer in Every Bite: Using fresh, peak-season strawberries isn't just a suggestion — it's the soul of this pie. When berries are at their prime, this dessert captures everything wonderful about summer and concentrates it into six perfect slices. It's like bottling sunshine, but better because you can eat it with ice cream.
Beginner-Friendly: No lattice work, no decorative edges that require architectural degrees, no blind baking or pie weights. This rustic beauty embraces imperfection, which means even if your crust looks like abstract art, it will taste incredible. My nine-year-old nephew nailed this on his first try.
Crowd Psychology: Bring this to any gathering and watch what happens. People hover. They take pictures. They ask for the recipe before they've finished their first slice. I've seen this pie disappear in under five minutes at potlucks, with people fighting over the last piece like it's the last lifeboat on the Titanic.
Alright, let's break down exactly what goes into this masterpiece...
Inside the Ingredient List
The Flavor Foundation
All-purpose flour forms the backbone of our crust, but not all flours are created equal. Look for one with moderate protein content — too much protein makes tough crust, too little and your pie falls apart like my first attempt at online dating. The flour's job here is simple: provide structure while staying tender enough to shatter under your fork. If you only have cake flour, you can use it, but expect a more delicate, cookie-like texture that might require a gentler touch when rolling.
Butter is where the magic happens, and I refuse to compromise on this point. Use the good European stuff if you can find it — higher butterfat content means more flavor and better flakiness. Keep it cold, cold, cold. I cube mine and stick it back in the freezer while I measure everything else. Some people swear by shortening for flakiness, but to me, it tastes like disappointment and childhood trauma. Butter gives you flavor plus texture, which is why we're using a full cup of it.
The Sweet Science
Granulated sugar does double duty here — it sweetens both crust and filling while helping create that gorgeous golden-brown color. In the crust, just two tablespoons enhance the butter's flavor without making things cloying. For the filling, we're using restraint: only half a cup to let the strawberries' natural sweetness shine. If your berries are particularly tart, you can bump it up by two tablespoons, but resist the urge to dump in more sugar than that or you'll mask everything wonderful about summer fruit.
Cornstarch is my thickener of choice, and here's why: it creates a crystal-clear, glossy filling that lets those ruby berries sparkle. Flour makes things cloudy and tastes pasty. Tapioca works but can get gummy if you overdo it. Two tablespoons is the sweet spot for four cups of berries — enough to set the filling but not so much that it tastes like pudding. Mix it with your sugar first to prevent clumps that look like strawberry freckles.
The Brightness Brigade
Lemon juice isn't just for tartness — it's the secret weapon that makes strawberries taste more like themselves. Just one tablespoon heightens every berry note while preventing that dull, cooked-fruit flavor that ruins most fruit pies. Fresh juice is non-negotiable; that bottled stuff tastes like furniture polish and will haunt your dessert. Zest the lemon first, then juice it — the zest goes into the crust for extra perfume.
Vanilla extract rounds everything out, adding warmth and complexity that makes people ask for your secret ingredient. Use the real thing, not imitation, or you'll end up with pie that tastes like a scratch-and-sniff sticker. A full teaspoon might seem like a lot, but most of it bakes off, leaving behind just enough essence to make everything taste more expensive than it is.
The Unexpected Stars
Egg wash is what separates amateur pies from professional ones. That beaten egg brushed over the crust creates a lacquered, golden-brown finish that looks like it came from a French bakery. Don't skip the turbinado sugar on top — those crunchy crystals provide textural contrast and catch the light like tiny jewels. If you don't have turbinado, demerara works, or even coarse sugar in a pinch. Just don't use regular granulated sugar, which melts into a weird, glassy mess.
Ice water is the final ingredient that brings it all together, and yes, the ice part matters. Cold water keeps the butter from melting into the flour, which means distinct pockets of fat that steam during baking and create layers. Add it gradually — six tablespoons might be enough, or you might need the full eight depending on your flour and humidity. The dough should just come together, like slightly damp sand that holds when squeezed.
Everything's prepped? Good. Let's get into the real action...
The Method — Step by Step
- Start with your crust because it needs time to chill — and trust me, patience here is everything. In your food processor, pulse together the flour, salt, and two tablespoons of sugar until combined, about three quick pulses. Add your ice-cold butter cubes and pulse until the mixture looks like coarse breadcrumbs with some pea-sized pieces remaining. This should take ten to twelve pulses — don't overdo it or your crust will be tough as shoe leather. Now comes the part where most people panic: add ice water one tablespoon at a time, pulsing after each addition, just until the dough starts to clump together.
- Dump the shaggy mess onto your counter and resist every urge to knead it smooth. Instead, use the heel of your hand to smear portions of dough away from you — this technique, called fraisage, creates flaky layers that'll make you famous. Gather it all together, divide into two portions (one slightly larger than the other), flatten into disks, wrap in plastic, and refrigerate for at least an hour. This resting period lets the gluten relax, preventing shrinkage so dramatic your pie looks like it went through a car wash. While it chills, your kitchen fills with anticipation, and you can practically taste summer.
- While your dough chills, prep those strawberries like your dessert depends on it — because it does. Hull and halve them, unless they're massive, then quarter them. You want pieces that'll fit nicely on a fork but won't turn to mush. Measure out four cups and try not to eat them all — I once had to make an emergency grocery run because "taste testing" eliminated half my fruit. In a large bowl, gently toss the berries with sugar, cornstarch, lemon juice, and vanilla. Let this mixture sit for about twenty minutes — the sugar draws out juices that create a natural syrup, and the cornstarch starts its thickening magic.
- Roll out your larger piece of dough on a well-floured surface, working from the center outward and rotating the dough quarter-turns. You're aiming for a 12-inch circle, but don't stress if it's more abstract art than geometry — rustic is our middle name here. Transfer it to your 9-inch pie plate by rolling it loosely around your rolling pin, then unrolling it over the dish. Gently press it into the corners, leaving about an inch overhang. Don't stretch the dough or it'll shrink like cotton in hot water. Pop this in the fridge while you roll the top crust.
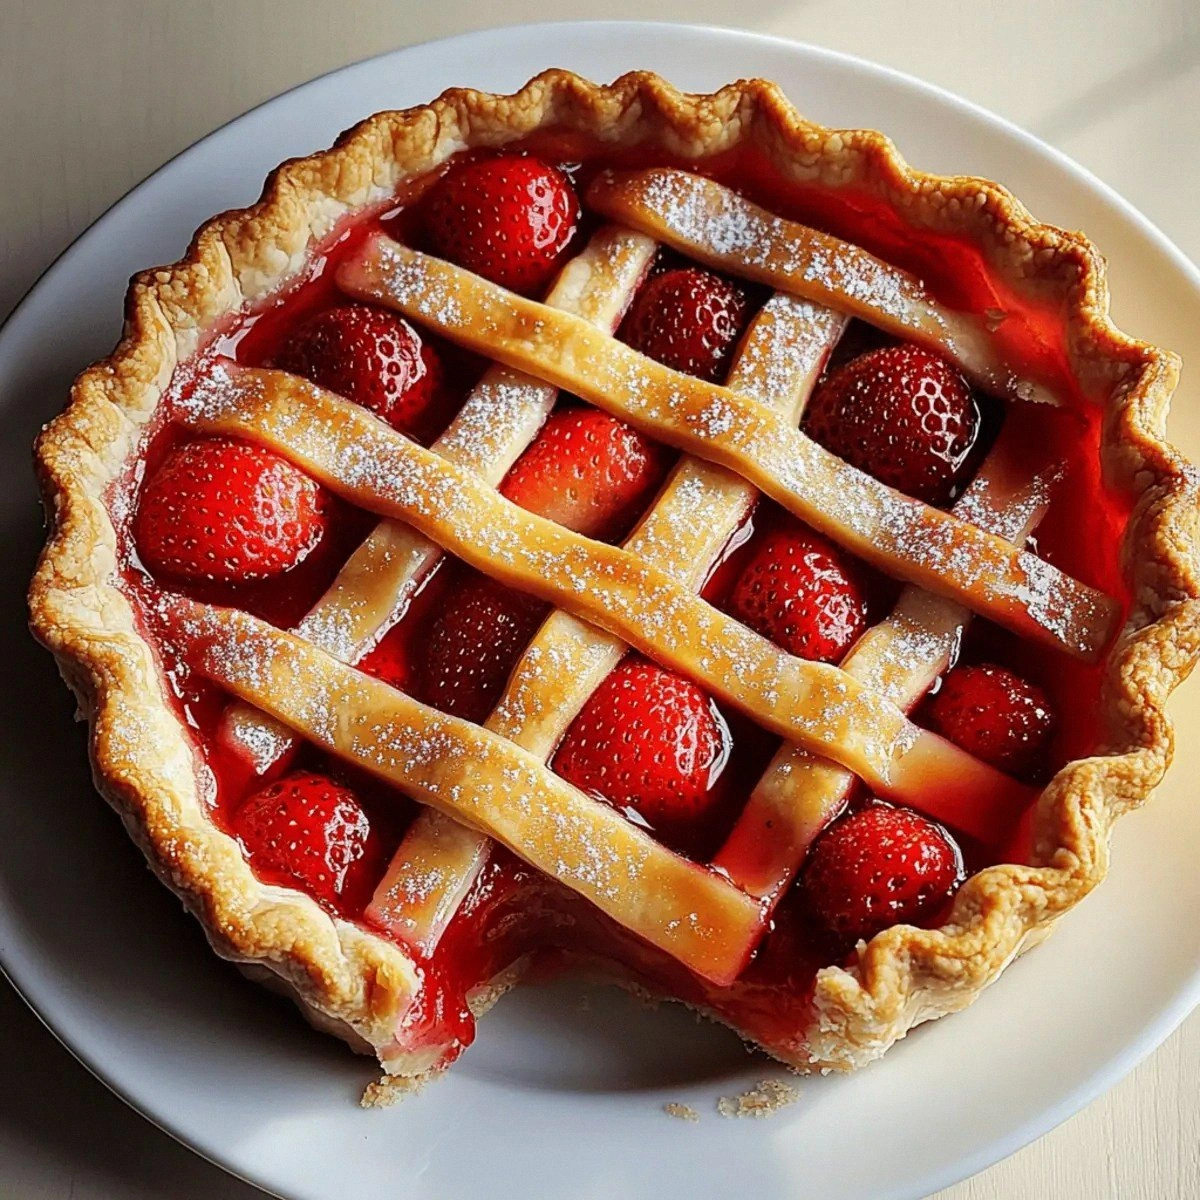
- Now for the fun part — assembling this summer masterpiece. Pour your strawberry filling into the chilled bottom crust, scraping every last drop of ruby syrup from the bowl. Dot the top with small pieces of butter — this creates little pockets of richness throughout the filling. Roll out your second piece of dough, and here's where you can get creative. Cut it into strips for a rustic lattice, or simply place the whole thing on top and cut a few steam vents. Either way, trim the overhang to about an inch, fold it under itself, and crimp however you like — fork marks, finger pinches, or my favorite, the "whatever looks charmingly homemade" method.
- Brush the entire top with your beaten egg wash — this is what creates that professional-looking golden sheen. Be thorough but gentle; you want every surface covered but not swimming. Sprinkle generously with turbinado sugar for crunch and sparkle. Place the pie on a foil-lined baking sheet (trust me on this — you will thank me when cleanup takes thirty seconds instead of thirty minutes). Into a 400°F oven it goes for twenty minutes, then reduce to 375°F and continue baking for another thirty-five to forty minutes. Your kitchen will start smelling like summer camp and happiness.
- The moment of truth comes when you peek through the oven window and see the filling bubbling thickly through the vents, the crust is deep golden-brown, and your smoke alarm isn't screaming. If the edges brown too quickly, tent them with foil, but resist opening the oven door too often — you're letting all that beautiful heat escape. When it's done, the filling should be set but still slightly jiggly in the center, like a relaxed custard. Cool on a wire rack for at least three hours — I know, torture, but this step is crucial. The filling needs time to set up properly, and cutting too soon means strawberry soup all over your plate.
- Slice with a sharp knife dipped in hot water for clean cuts that show off those perfect berry layers. Serve with a dollop of whipped cream or a scoop of vanilla ice cream that melts into the warm filling and creates rivers of creamy contrast. The first bite is always the best — the crackle of sugar-crusted crust giving way to tender berries in glossy syrup, the way summer should taste but rarely does unless you make it yourself. Watch faces light up, conversation pause, and people reach for seconds before they've finished their first piece.
That's it — you did it. But hold on, I've got a few more tricks that'll take this to another level...
Insider Tricks for Flawless Results
The Temperature Rule Nobody Follows
Here's the thing about pie dough: temperature matters more than your relationship status on Facebook. Everything needs to be cold — not cool, not room temperature, but properly chilled. Your butter should feel like little ice cubes, your water should have actual ice in it, and if your kitchen feels like a sauna, turn on the AC or wait for a cooler day. Warm dough equals melted butter equals tough, greasy crust that'll make you cry into your apron. I've made this mistake so you don't have to — learn from my pain and keep things frosty.
Why Your Nose Knows Best
Forget timers — your nose is the most reliable kitchen tool you own. When this pie is nearly done, your house will start smelling like a strawberry field got together with a French bakery and had a beautiful baby. The scent changes from raw dough and uncooked fruit to something deeper, more caramelized, with hints of vanilla and butter. When you open the oven door and that smell hits you like a warm hug, you're close. If you smell something burning, you've gone too far — better to pull it a few minutes early than risk a charcoal crust.
The 5-Minute Rest That Changes Everything
After you mix your filling, let it sit for five minutes before assembling the pie. This isn't laziness — it's strategy. The sugar starts dissolving, the cornstarch begins hydrating, and the strawberries start releasing just enough juice to create a natural syrup. This pre-hydration means no dry cornstarch pockets in your finished pie and a filling that's perfectly glossy, not gummy. Plus, it gives you time to roll out your bottom crust without rushing, which means fewer tears and less swearing.
The Crimping Secret That Makes You Look Like a Pro
Here's my confession: I can't do those perfect Pinterest-worthy crimps to save my life. But I've learned that messy crimps look intentional and rustic, while perfect ones look like you're trying too hard. Embrace the imperfection. Use your thumb and forefinger to create little peaks all around the edge, or simply press with a fork. The key is consistency — whatever crimp you choose, do it the same way all around. Uneven crimping looks sloppy, but consistent imperfection looks like charming farmhouse style.
The Cooling Hack That Prevents Disasters
Resist every urge to cut into that pie while it's still warm. I know it's torture — the smell is driving you crazy, your family is hovering, and Instagram is calling. But cutting a warm fruit pie is like trying to slice a water balloon. The filling needs to cool and set, which takes about three hours at room temperature. If you absolutely must serve it warm, wait at least an hour and a half, then reheat individual slices in a 350°F oven for five minutes. Your patience will be rewarded with clean slices that hold their shape instead of collapsing into a puddle.
Creative Twists and Variations
This recipe is a playground. Here are some of my favorite ways to switch things up:
The Blackberry-Strawberry Mashup
Replace half the strawberries with fresh blackberries for a pie that's like summer's greatest hits album. The blackberries add depth and a wine-like complexity that makes this feel sophisticated enough for dinner parties. Reduce the sugar by two tablespoons since blackberries can be sweeter than strawberries. The purple-black juices create gorgeous marbling throughout the filling that looks like edible art.
The Basil-Infused Garden Party
Add two tablespoons of finely chopped fresh basil to your filling for a pie that tastes like you bottled up an Italian summer. The herbal notes make the strawberries taste brighter, more alive somehow. It's subtle — people won't necessarily identify the basil, but they'll notice something special that keeps them coming back for more. Garnish with a few basil leaves on top for that "I know what I'm doing" look.
The Almond-Lovers Dream
Replace two tablespoons of flour with almond flour in your crust, and add half a teaspoon of almond extract to the filling. The result tastes like strawberry shortcake met a French bakery and had a beautiful baby. Top with sliced almonds before baking for extra crunch. This version pairs ridiculously well with coffee and makes an excellent breakfast pie — yes, that's totally a thing.
The Bourbon-Spiked Adult Version
Add two tablespoons of good bourbon to your filling along with the vanilla. The alcohol cooks off, leaving behind notes of caramel and oak that make this taste like it came from a Southern kitchen. Use a smoky bourbon for complexity, or a sweeter one if you like things on the dessert-forward side. Serve this version at adult gatherings and watch people suddenly become very interested in your baking secrets.
The Citrus Burst Remix
Swap the lemon juice for lime juice and add a teaspoon of finely grated orange zest to your filling. The citrus medley creates a tropical vibe that makes this perfect for pool parties and backyard barbecues. It's like strawberry pie got a vacation in the Florida Keys and came back with stories to tell. Garnish with candied orange peel if you're feeling fancy.
The Spiced Winter Warmer
Even though this is a summer recipe, sometimes you need sunshine in February. Add half a teaspoon of cinnamon and a quarter teaspoon of cardamom to your filling. The spices warm everything up, making this taste like strawberry pie got cozy by the fire. It's comfort food that happens to use frozen strawberries when fresh ones taste like disappointment.
Storing and Bringing It Back to Life
Fridge Storage
Once completely cooled, cover your pie loosely with foil or plastic wrap and refrigerate for up to four days. Don't wrap it while warm — condensation will turn your crust soggy faster than you can say "tragic." If you notice the crust softening, you can revive it by placing individual slices on a baking sheet in a 350°F oven for five minutes. The crust will crisp right back up, and the filling warms slightly without turning to soup.
Freezer Friendly
This pie freezes beautifully, which is dangerous because now you can have strawberry pie whenever the craving hits. Wrap the completely cooled pie tightly in plastic wrap, then in foil, and freeze for up to three months. Thaw overnight in the refrigerator, then warm at 350°F for ten minutes to refresh the crust. You can also freeze individual slices — perfect for those "I need pie right now" emergencies that strike at midnight.
Best Reheating Method
While this pie is excellent cold, sometimes you want that warm filling contrasted with cold ice cream. The key is gentle reheating — a 300°F oven for ten minutes does the trick without turning your crust into cardboard. Avoid the microwave unless you enjoy rubbery crust and uneven heating. If you're reheating a slice, place it on a piece of foil to catch any rogue juices that might escape.