Picture this: I’m standing in my kitchen, the timer on the oven has just pinged, and I’ve burned the last batch of store‑bought noodles I ever ordered. The smoke alarm is doing its own little dance, and I’m half‑laughing, half‑cursing my own culinary misfortune. That moment of panic turned into a dare from my roommate—\"Make something that sticks to the noodles better than my last relationship!\"—and that’s exactly how the quest for the ultimate sticky garlic chicken noodles began. I tossed a handful of garlic into a sizzling pan, heard that glorious sizzle that makes your heart skip a beat, and the rest? Well, it unfolded like a deliciously chaotic love story, complete with sweet honey kisses, a salty soy serenade, and a hint of fiery chili that whispers, \"I’m here if you need me.\"
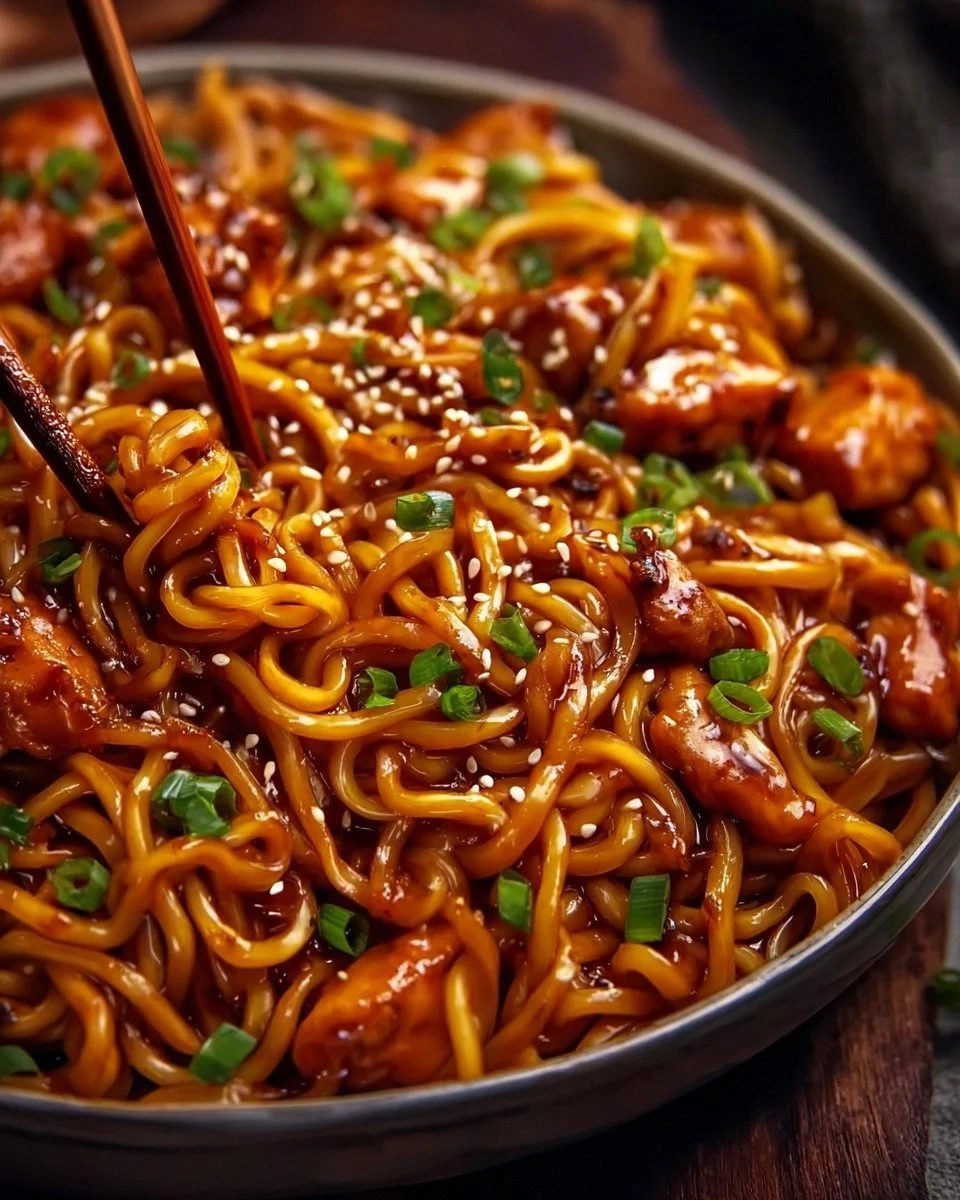
From the first bite, you’ll notice the sauce coating each noodle strand like velvet, hugging the chicken pieces with a glossy, caramelized sheen that practically glistens under any kitchen light. The aroma? Imagine a bustling street market in Bangkok at dusk, where the sweet scent of honey mingles with the sharp bite of garlic and ginger, all while the subtle umami of soy sauce lingers like a secret promise. The texture is a symphony—crispy edges on the chicken that shatter like thin ice, chewy noodles that give just enough resistance, and a final crunch from green onions that adds a fresh pop. I dare you to taste this and not go back for seconds; it’s a culinary trap you’ll happily fall into.
What makes this version truly stand out is the marriage of technique and ingredient respect. Most recipes get the sauce wrong—either it’s too watery, too sweet, or it slides off the noodles like a bad date. Here, we use a cornstarch coating on the chicken that creates a light, crispy crust, allowing the sauce to cling like a loyal sidekick. The honey isn’t just a sweetener; it’s the secret binder that gives the dish its signature sticky sheen. And let’s not forget the optional red chili flakes, the subtle heat that keeps you guessing and coming back for more. Most importantly, this dish is built for everyday heroes—busy families, college students, or anyone who wants restaurant‑quality comfort without the hassle.
Now, I’ll be honest — I ate half the batch before anyone else got to try it, because when something smells this good, self‑control takes a vacation. But don’t worry, there’s plenty left for you, and I’m about to walk you through every single step — by the end, you’ll wonder how you ever made it any other way. Okay, ready for the game‑changer? Let’s dive in.
What Makes This Version Stand Out
- Flavor Explosion: The combination of soy, honey, garlic, and ginger creates a balanced sweet‑savory profile that dances on the palate, leaving you craving that next bite.
- Texture Triumph: Cornstarch‑coated chicken gives you a crisp exterior while the interior stays juicy, and the noodles stay perfectly al dente, never soggy.
- Simplicity Meets Sophistication: You only need a handful of pantry staples, yet the result feels like it belongs on a five‑star menu.
- Sticky Perfection: The honey‑soy glaze thickens just enough to cling to every noodle strand, delivering that coveted “sticky” experience.
- Crowd‑Pleaser Factor: Whether it’s a family dinner or a potluck, this dish consistently earns rave reviews and empty plates.
- Ingredient Quality: Using fresh garlic and ginger, plus a good quality soy sauce, elevates the dish from ordinary to unforgettable.
- One‑Pan Efficiency: Most of the magic happens in a single skillet, cutting down on cleanup and keeping the flavor locked in.
- Make‑Ahead Friendly: The sauce can be pre‑made, and the noodles reheat beautifully, making leftovers a delight rather than a disappointment.
Inside the Ingredient List
The Flavor Base
Chicken breast or thighs: Bite‑sized pieces of chicken serve as the star protein here, soaking up the sticky sauce beautifully. I recommend a mix of both; thighs add richness while breast keeps it lean. If you skip this, you lose the hearty backbone that makes the dish feel satisfying. Look for meat that’s pink and firm—avoid any that’s grayish or has a strong odor.
Soy sauce: This salty delight is the backbone of your sauce, providing a savory umami kick that balances the sweetness of the honey. Opt for a low‑sodium version if you’re watching salt, or go full‑flavor with a naturally brewed soy. Tamari works just as well for gluten‑free diners. Skipping soy means the sauce loses depth, turning it into a one‑note sweet glaze.
Honey: The sweet essence that brings a touch of nature’s nectar to the dish, harmonizing the flavors perfectly. It also contributes to the glossy, sticky texture we all love. If you’re allergic to honey, maple syrup can substitute, though the flavor will shift slightly toward caramel.
The Aroma Arsenal
Garlic: Freshly minced garlic is a game changer. It delivers a robust flavor, filling your kitchen with warmth and deliciousness as it cooks. If you use pre‑minced garlic in a jar, you’ll miss out on that fresh bite and may get a slightly bitter note.
Ginger: Grated ginger adds a zesty, peppery touch that brightens the overall taste, making it more complex and satisfying. A good tip is to peel and grate it right before use; the aromatics fade quickly once exposed to air.
Red chili flakes (optional): If you like a bit of heat, throw in some chili flakes! Adjust the quantity based on your spice preference. Omit them entirely for a kid‑friendly version, but remember the heat is what gives the dish that extra “kick” without overwhelming the palate.
The Texture Crew
Cornstarch: A must‑have for coating the chicken, ensuring a lovely crispiness and helping the sauce cling beautifully. It also acts as a thickener for the glaze, preventing it from turning watery. If you’re out of cornstarch, use rice flour for a similar effect.
Vegetable oil: For cooking the chicken, it provides a nice sear and keeps things from sticking in your skillet. Choose a neutral oil with a high smoke point; olive oil works but can impart a distinct flavor.
Noodles: Choose between rice noodles or egg noodles, depending on your family’s preference. They’ll soak up all that glorious sauce and add a chewy texture. If you use rice noodles, soak them in hot water first; egg noodles can be boiled briefly.
The Final Flourish
Green onions: Chopped green onions are the finishing touch! They lend a fresh crunch and a pop of color to elevate the presentation. Add them at the very end to preserve their bright flavor and crispness.
Sesame seeds (optional): If you’re feeling fancy, sprinkle sesame seeds right before serving for added flavor and a little visual flair! Toast them lightly for a nutty aroma that rounds out the dish.
Everything's prepped? Good. Let’s get into the real action...
The Method — Step by Step
Start by gathering all your ingredients and giving the chicken a quick pat dry with paper towels. This step is crucial because moisture on the surface prevents the cornstarch from adhering properly. Toss the chicken pieces in a bowl with 2 tbsp of cornstarch, ensuring each piece is evenly coated. The coating should feel slightly powdery, not clumpy. Power transition: Okay, ready for the game‑changer?
Heat 2 tbsp of vegetable oil in a large skillet over medium‑high heat. When the oil shimmers, add the chicken in a single layer, making sure not to crowd the pan. Let the pieces sizzle undisturbed for about 3‑4 minutes; you’ll hear a satisfying crack that signals a perfect sear. Flip the chicken once the edges turn golden brown and crisp, then cook another 3‑4 minutes until the interior reaches 165°F (74°C). That sizzle when it hits the pan? Absolute perfection.
While the chicken cooks, whisk together 1/4 cup soy sauce, 2 tbsp honey, 4 minced garlic cloves, 1 tbsp grated ginger, and 1/2 tsp red chili flakes in a small bowl. This mixture is the heart of the dish, so taste it now—if you prefer it sweeter, add another half‑tablespoon of honey; if you want more salt, splash in a bit more soy. Set the sauce aside; it will thicken quickly once it meets the hot pan.
When the chicken is done, remove it from the skillet onto a plate lined with paper towels. Keep the pan on the stove; you’ll use the leftover oil and browned bits (fond) as the flavor base for the sauce. This is where the magic truly begins, as the fond adds depth that plain sauce can’t achieve.
Return the skillet to medium heat and pour the sauce mixture in, scraping the bottom with a wooden spoon to release the caramelized bits. Let the sauce simmer for 2‑3 minutes, stirring constantly. You’ll notice it thickening and becoming glossy—this is the sticky stage. If it looks too thick, add a tablespoon of water; if too thin, let it reduce a bit longer.
Meanwhile, cook your noodles according to package directions until they’re al dente. Drain them, but reserve ¼ cup of the noodle cooking water. This starchy water helps the sauce cling later on, acting like a secret binding agent.
Add the cooked noodles to the skillet, tossing them gently to coat every strand with the sticky glaze. Pour in the reserved noodle water a little at a time, just enough to loosen the sauce without making it soupy. The noodles should look lacquered, each piece shimmering like a polished gem.
Finally, return the chicken to the pan, mixing everything together until the pieces are fully enveloped in the sauce. Sprinkle the sliced green onions and, if you like, toasted sesame seeds over the top. Give it one last quick toss, then turn off the heat. This is the moment of truth. Serve immediately while the sauce is still glossy and the chicken retains its crisp edge.
That's it — you did it. But hold on, I've got a few more tricks that'll take this to another level...
Insider Tricks for Flawless Results
The Temperature Rule Nobody Follows
Most home cooks start with high heat and then lower it, but the secret is to keep the skillet at a steady medium‑high temperature throughout the searing stage. This ensures the cornstarch forms a crisp crust without burning. I once tried a “low‑and‑slow” approach and ended up with soggy chicken that fell apart in the sauce. Trust the heat, and you’ll get that perfect crunch every time.
Why Your Nose Knows Best
Never rely solely on visual cues. The aroma tells you when the garlic has reached the perfect golden stage—too little and it’s raw, too much and it turns bitter. When you smell that sweet, caramelized scent, you know the sauce is ready to cling. I’ve saved countless batches by trusting my nose over a timer.
The 5‑Minute Rest That Changes Everything
After tossing the chicken and noodles together, let the pan sit off the heat for five minutes. This short rest allows the sauce to settle and the flavors to meld, giving you a more cohesive bite. Skipping this step leaves the dish feeling disjointed, like a conversation where nobody’s listening.
Prep‑Ahead Sauce Strategy
Make the sauce a day ahead and store it in a sealed jar in the fridge. The flavors deepen as the garlic, ginger, and soy mingle, and you’ll cut the cooking time in half on the day you serve. Just give it a good whisk before using; the honey may have settled at the bottom.
Final Toss Technique
When you add the green onions, do a gentle toss rather than a vigorous stir. This preserves the fresh crunch and bright color, preventing the onions from wilting. A quick flick of the wrist does the trick—think of it as a graceful dance rather than a wrestling match.
Creative Twists and Variations
This recipe is a playground. Here are some of my favorite ways to switch things up:
Spicy Peanut Fusion
Swap half the honey for creamy peanut butter and add a dash of sriracha. The result is a nutty, spicy coating that pairs beautifully with the chicken. Garnish with chopped peanuts for extra crunch.
Citrus‑Infused Delight
Replace the soy sauce with a mix of orange juice and a splash of rice vinegar. The citrus brightens the dish, making it perfect for summer picnics. Add a sprinkle of zest just before serving.
Veggie‑Boosted Version
Throw in sliced bell peppers, snap peas, or shredded carrots during the noodle toss. The vegetables add color, texture, and a nutritional punch without overwhelming the core flavors.
Thai‑Style Coconut Twist
Swap the chicken broth (if used) for coconut milk, and finish with a handful of fresh basil leaves. The coconut adds a silky richness that transforms the dish into a tropical escape.
Gluten‑Free Adaptation
Use tamari instead of soy sauce and rice noodles instead of egg noodles. The flavor profile remains intact, and those with gluten sensitivities can indulge without compromise.
Low‑Sugar Light
Replace honey with a sugar‑free maple syrup or a splash of agave. The sauce stays sticky, but the overall sugar content drops, making it friendlier for those watching their intake.
Storing and Bringing It Back to Life
Fridge Storage
Transfer leftovers to an airtight container and store in the refrigerator for up to three days. The sauce may thicken as it cools; simply reheat gently and stir in a splash of water to restore its glossy sheen.
Freezer Friendly
Separate the chicken and noodles from the sauce before freezing. Store each component in zip‑top bags for up to two months. When ready to eat, thaw overnight in the fridge, reheat the sauce, then combine everything in a hot skillet for a fresh‑out‑of‑the‑freezer feel.
Best Reheating Method
For the ultimate texture, reheat in a skillet over medium heat, adding a tiny splash of water or broth to steam the noodles back to life. Avoid microwaving alone; it can make the noodles gummy and the chicken soggy.