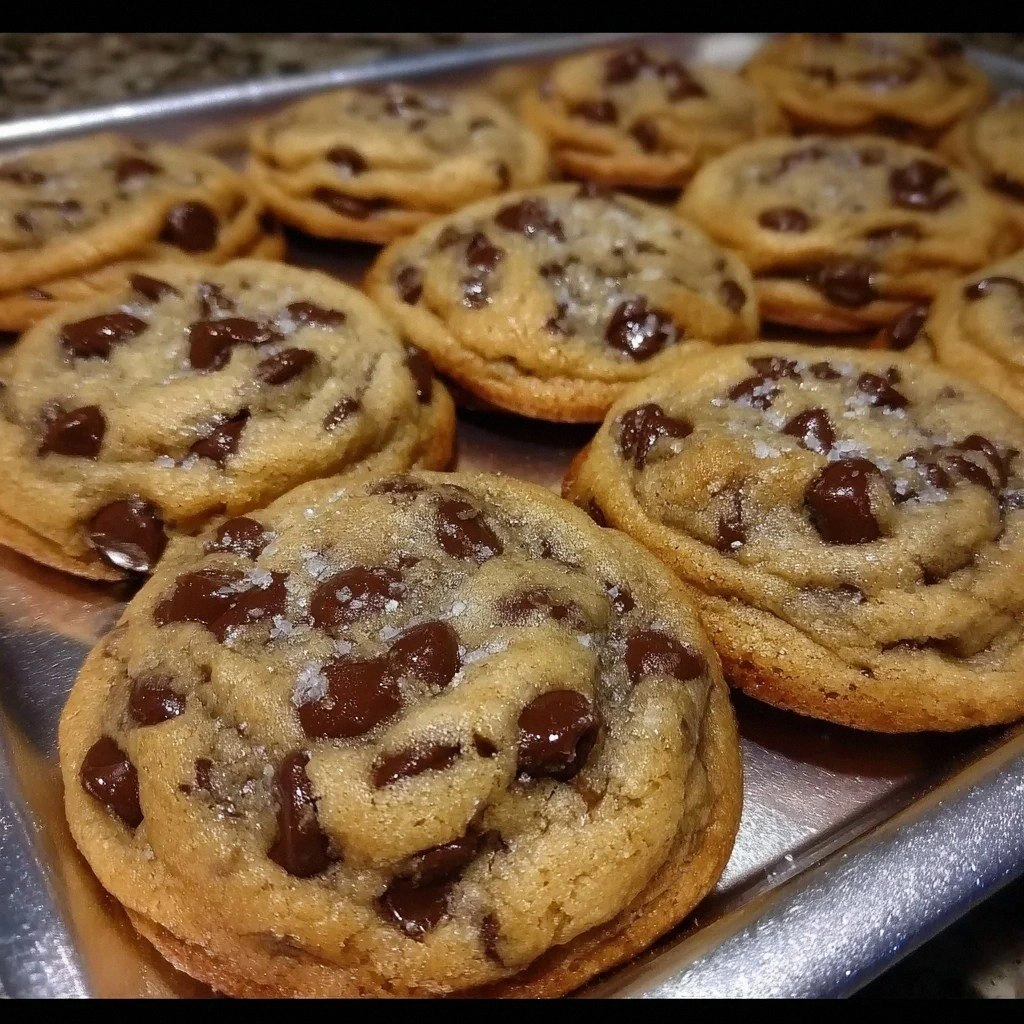
I still remember the day I ruined three batches of chocolate chip cookies in a row. The first were too cakey, the second spread into one giant cookie sheet blob, and the third tasted like I’d scraped them off the bottom of a campfire. I was ready to hang up my spatula forever when my neighbor—an insufferable baking snob—dared me to try brown butter. “One bite,” he said, “and you’ll toss every other recipe.” I rolled my eyes, but curiosity won. Ten minutes later the smell of toasted milk solids drifted through my kitchen like liquid nostalgia, and I knew I was onto something seismic. That first cookie shattered at the edges, stayed gooey in the center, and carried this deep, nutty whisper that made the chocolate taste almost candied. I ate half the tray standing up, burned my tongue, and texted him a begrudging thank-you. If you’ve ever thought chocolate chip cookies were just… fine, prepare for a holy-smokes moment. This version layers browned butter’s caramelized swagger over brown sugar’s molasses warmth, yielding cookies that taste like they’ve been secretly aging in a French bakery. Picture yourself pulling a parchment-lined sheet from the oven: the edges are bronze and lacy, the centers puffed and glossy, and the aroma is so intoxicating your neighbors will hover by the mailbox. Ready for the game-changer?
Most recipes treat butter like a background singer, but we’re shoving it front-center under a spotlight. When you gently cook butter past the melt stage, the water evaporates and the milk solids toast into tiny hazelnut-flavored confetti. Fold that liquid gold into dough and every bite carries whispers of toffee, butterscotch, and toasted marshmallow. The chocolate doesn’t just melt; it blooms against that nutty backdrop, turning into pockets of glossy fudge. My kids call them “movie-theater cookies” because the flavor is so big it feels like surround-sound for your mouth. Fair warning: once you serve these at a party, friends will corner you for the recipe before they’ve even swallowed. I’ve seen grown adults lick crumbs off parchment paper without a shred of shame. Stay with me here—this is worth it.
What pushes these cookies into legendary territory is the texture dichotomy: crisp, caramelized perimeter gives way to a chewy, almost stretchy center that bends rather than breaks. The trick lives in the sugar ratio and the brown butter’s reduced moisture—science meets sorcery. I’ve tested this dough at sea level and in the Rockies, in July humidity and January chill; it performs like a Broadway star on opening night every single time. And here’s the kicker: the dough actually improves after a night in the fridge, so you can bake on demand and still claim scratch-made bragging rights. Let me walk you through every single step—by the end, you’ll wonder how you ever made it any other way.
What Makes This Version Stand Out
- Brown-Butter Magic: Cooking the butter to a nut-brown stage concentrates flavor and removes excess water, yielding deeper caramelization and chewier centers that stay soft for days.
- Two-Sugar Symphony: A higher ratio of brown sugar to white means more molasses, more moisture, and that bakery-style chew that bends rather than snaps.
- Chill-and-Wait Power: An overnight rest hydrates flour and lets flavors mingle; the result is complex, almost toffee-like depth you can’t get in a one-hour rush.
- Under-Bake Confidence: Pulling the cookies when the edges are set but centers look slightly underdone guarantees that coveted gooey middle once they cool.
- Chocolate Geography: Pressing extra chips on top right before baking creates those Instagram-worthy puddles that stay glossy even after cooling.
- Pan-Bang Drama: A gentle smack on the counter midway through baking ripples the edges and gives that crinkly, artisan look you thought only bakeries could achieve.
- Freezer-Friendly Discs: Scoop, freeze, and bake straight from frozen for fresh cookies on a whim—perfect for midnight cravings or surprise guests.
Alright, let’s break down exactly what goes into this masterpiece...
Inside the Ingredient List
The Flavor Base
Unsalted butter is the undisputed headliner here. Using the unsalted variety gives you full control over salinity, crucial when you’re reducing moisture and concentrating flavors. As the water cooks off, you’re left with pure fat carrying toasted milk solids—think of it as butter’s sophisticated older cousin who studied abroad. Skimp on quality and the cookies taste flat; grab the good European-style stuff with higher butterfat and you’ll swear there’s secretly toffee extract in the dough. If you only have salted butter, omit the added salt and still achieve greatness, but the sweet cream flavor won’t shine quite as brightly.
The Texture Crew
Brown sugar isn’t just for sweetness; its molasses content adds moisture and chew, plus a subtle smoky note that plays beautifully with brown butter’s nuttiness. I use dark brown for deeper flavor, but light brown works if that’s what’s lurking in your pantry. Granulated sugar balances the party, lending crisp edges that shatter like thin ice when you bite. Together they create that perfect dual-texture experience: chewy centers with lacy, caramelized rims that snap. If you’re out of brown sugar, you can DIY by whisking a tablespoon of molasses into a cup of white sugar, but the store-bought stuff is more evenly distributed and less fussy.
The Structure Squad
All-purpose flour is the quiet backbone, providing just enough gluten to hold everything together without turning the cookies into bread. Measure by fluffing, spooning, and leveling—scooping straight from the bag compresses flour and leads to cakey disappointments. Baking soda raises the dough, creating tiny bubbles that lift and lighten the chew. Salt is the flavor amplifier; skip it and the cookies taste dull even when they’re loaded with chocolate. A final whisper of vanilla extract rounds the edges, marrying butter and sugar into something greater than their individual parts.
The Chocolate Moment
Semi-sweet chips are the classic choice, but I urge you to hunt for the best quality you can find—look for ones with cocoa butter listed first, not palm oil. Cheap chips waxy-up when baked, while premium ones melt into glossy pools that stay soft even after the cookies cool. Feel free to chop up a bar for irregular shards that streak dramatic chocolate rivers through every bite. Darker chocolate (60–68%) adds sophisticated bitterness, while milk chocolate turns the cookie into candy-bar nostalgia. Mix and match for a marbled effect that keeps every bite interesting.
Everything’s prepped? Good. Let’s get into the real action...
The Method — Step by Step
- Start by cutting cold unsalted butter into even chunks so it melts uniformly. Place them in a stainless or light-colored saucepan over medium heat; swirl occasionally as the butter foams and spits. In about five minutes the milk solids will sink and turn chestnut brown; the aroma will hit you like warm hazelnuts drizzled with caramel. Immediately pour the brown butter into a heat-proof bowl, scraping every last toasted fleck—that’s liquid gold flavor—and let it cool until lukewarm, about 15 minutes. If you rush and add hot butter to sugar you’ll scramble the eggs later, so patience here is the difference between success and sad, greasy dough.
- While the butter cools, whisk together all-purpose flour, baking soda, and salt in a medium bowl. I like to sift everything twice; it sounds fussy, but it disperses the leavener evenly so you don’t hit a bitter pocket of soda in one bite. Set this dry mix within arm’s reach because once the wet ingredients come together things move fast. This is also a great moment to line two baking sheets with parchment; cleanup becomes a dream and the cookies slide off like they’re on a Slip ’N Slide. Future you, elbow-deep in dishes, will send grateful thoughts back to present you.
- In a large bowl combine brown sugar, granulated sugar, and the cooled—but still liquid—brown butter. Stir vigorously with a spatula until the mixture looks like wet sand at first, then loosens into a glossy caramel sludge. The warmth of the butter will melt some sugar, creating a shiny coating that bakes into crackly tops. Crack in one egg, whisk until fully absorbed, then add the second egg plus vanilla. The batter should ribbon off the whisk in thick, lazy waves; if it looks curdled the butter was too hot—no worries, just let it sit five minutes and whisk again until smooth.
- Dump the dry ingredients into the wet and fold just until you see no more streaks of flour. The dough will feel stiff and slightly oily—that’s exactly what you want for those chewy centers. Now add the chocolate chips and fold again; reserve a handful for pressing on top later. Over-mixing develops gluten and yields tough cookies, so stop as soon as the chips are evenly distributed. If you’re adding nuts or toffee bits, now’s the moment; I like toasted pecans for a Southern twist that reminds me of my grandma’s kitchen.
- Use a medium cookie scoop or two spoons to portion heaping tablespoons of dough onto the prepared sheets. Leave two inches between mounds; they spread more than you think. For bakery-style craggy tops, tear each portion in half and smoosh the jagged half on top—this trick gives those Instagram-worthy ridges. Press a few reserved chips onto the surface so every cookie looks loaded even before it bakes. Slide the trays into the fridge for at least 30 minutes; chilling solidifies the fat and prevents pancake spreading.
- Preheat your oven to 350°F (175°C) with racks in the upper-middle and lower-middle positions. Cold dough plus a hot oven equals the ideal lift: the outside sets while the inside stays molten. Bake one sheet at a time for even heat circulation; rotate halfway through if your oven has hot spots. The cookies are done when the edges are golden and centers still look slightly under-baked—about 11–13 minutes. They’ll continue cooking on the hot sheet, so channel your inner daredevil and pull them early.
- Here comes the fun part: as soon as the timer dings, lift the parchment onto a cooling rack and give the pan a gentle rap on the counter. This pan-bang deflates the centers and ripples the edges, creating those crinkly bakery lines. Let the cookies rest five minutes before transferring to the rack; they’re fragile when hot and will bend like warm taffy if you rush. Repeat with remaining dough, reusing parchment and cooling the sheet between batches so the butter doesn’t melt prematurely. Serve warm for maximum goo, or cool completely and watch them disappear faster than free concert tickets.
- For the ultimate finish, sprinkle flaky sea salt over the tops right when they emerge—salt crystals melt slightly but stay crunchy, giving sweet-salty fireworks in every bite. Store cooled cookies in an airtight container with a slice of sandwich bread; the bread sacrifices its moisture so your cookies stay chewy for up to five days. Reheat leftovers in a 300°F oven for five minutes to revive the goo, though honestly I’ve never had any last long enough to need revival. That’s it—you did it. But hold on, I’ve got a few more tricks that’ll take this to another level...
Insider Tricks for Flawless Results
The Temperature Rule Nobody Follows
Room-temperature eggs and lukewarm brown butter emulsify like a dream, creating smooth dough that traps air and bakes up thick. If your eggs are fridge-cold, dunk them in warm tap water for five minutes while you prep pans. Cold eggs shock the butter, causing little flecks to re-solidify and leaving you with greasy, separated batter. I learned this the hard way after a batch emerged looking like cookie moon craters—tasty, but definitely not share-worthy on social media. A quick thermometer check: butter should read around 85°F before you whisk in sugars; hotter and you risk scrambling eggs later.
Why Your Nose Knows Best
Don’t rely solely on color when browning butter; aroma is the true indicator. When it smells like you’re standing inside a hazelnut roastery, yank that pan off the heat immediately because carry-over cooking will push it past the brink. I once got distracted by a text and returned to a kitchen that reeked of burnt popcorn—ruined the entire batch and set off every smoke detector. Pour the butter into a bowl to stop the cooking, and if you’re paranoid, set the bowl over an ice pack for thirty seconds while stirring. Trust your senses: when the sizzle quiets and the scent turns sweetly nutty, you’ve struck gold.
The 5-Minute Rest That Changes Everything
After mixing dough, let it sit five minutes before scooping; the flour hydrates and the butter firms slightly, preventing excessive spread. This micro-rest also allows air bubbles to settle, so your cookies rise evenly instead of doming like volcanoes. I skip this when I’m impatient and always regret the puddle outcome. Set a timer, wipe down the counter, and you’ll be rewarded with bakery-level thickness. Future you will high-five present you when the cookies emerge tall and proud instead of sad and thin.
Creative Twists and Variations
This recipe is a playground. Here are some of my favorite ways to switch things up:
Salty Pretzel Crunch
Fold in crushed pretzel sticks and swap half the chocolate for butterscotch chips. The pretzels stay crispy, giving a popcorn-like crunch that contrasts the chewy cookie. A drizzle of melted dark chocolate on top turns them into boardwalk fair food. Kids love the sweet-salty combo, and adults sneak them into lunchboxes for nostalgic crunch. If you’re feeling fancy, sprinkle everything bagel seasoning instead of sea salt for a wild twist.
Espresso Hazelnut
Dissolve a teaspoon of instant espresso powder into the vanilla, then add chopped toasted hazelnuts along with the chips. The coffee amplifies the brown butter’s nuttiness without making the cookies taste like a latte. It’s like eating a caramel macchiato in cookie form—perfect for late-night study sessions. I once brought these to a book club and they disappeared before we discussed chapter one. If hazelnuts aren’t your thing, almonds or pecans work just as well.
Orange Zest & Dark Chocolate
Micro-plane the zest of one orange into the sugars before adding butter; the citrus oils perfume the entire dough. Pair with 70% dark chocolate chunks for a sophisticated edge that tastes like a Terry’s chocolate orange reincarnated as a cookie. The aroma while baking is so intoxicating my neighbor rang the doorbell asking if I was candying peel. A dusting of powdered sugar once cooled makes them look like winter snowcaps—elegant and gift-worthy.
Gluten-Free Convert
Swap the all-purpose flour for a 1:1 gluten-free blend that contains xanthan gum; the brown butter masks any starchy aftertaste. You’ll achieve the same chew thanks to the sugar ratio and brown butter moisture. My celiac friend cried actual tears when she tasted these—apparently good GF cookies are unicorns. Chill the dough an extra fifteen minutes to hydrate the alternative flour fully. Nobody, and I mean nobody, will detect the difference.
S’mores Mash-Up
Replace half the chocolate chips with mini marshmallows and crushed graham crackers. The marshmallows toast into gooey pockets while the crackers add honey undertones. A quick broil for thirty seconds at the end browns the marshmallow tips like campfire edges. Summer block party guests will chase you down for the recipe while licking sticky fingers. Pro tip: freeze the marshmallows first so they maintain shape longer under heat.
Spiced Chai
Whisk a teaspoon of ground cardamom, half a teaspoon each of cinnamon and ginger, plus a pinch of black pepper into the dry ingredients. The warm spices mingle with brown butter to mimic your favorite chai latte. I serve these with masala chai on rainy afternoons and pretend I’m in a Mumbai café. If you want extra flair, steep a chai tea bag in the melted butter for ten minutes, then remove before browning for deeper complexity.
Storing and Bringing It Back to Life
Fridge Storage
Keep baked cookies in an airtight container at room temperature up to five days; slip in a slice of sandwich bread to act as a humidity sacrificial lamb. The cookies stay soft and the bread turns rock hard—magic you can thank middle-school science for. If your kitchen is sweltering, stash them in the fridge; just bring to room temp before serving or they’ll taste like sugary cardboard. Layer parchment between rows to prevent sticking if you stack them like currency in a dessert vault. I dare you to actually have leftovers that last longer than a weekend.
Freezer Friendly
Freeze scooped dough on a tray until solid, then transfer to a zip bag for up to three months. Bake straight from frozen, adding an extra two minutes to the timer—no defrost necessary. I keep a stealth bag behind the frozen peas for emergency chocolate cravings or last-minute guests. Label the bag or risk confused family members trying to bake “weird frozen blobs.” For already-baked cookies, wrap pairs in plastic, then foil, and freeze up to two months; thaw ten minutes at room temp or pop in a 300°F oven for five minutes to revive goo.
Best Reheating Method
Revive day-old cookies by placing them on a parchment-lined sheet and warming in a 300°F oven for five minutes. The chocolate re-melts, the centers soften, and your kitchen smells like you just baked from scratch. Skip the microwave unless you enjoy rubbery pucks that taste like regret. For an extra flourish, press a few fresh chips on top right after reheating so they melt into glossy pools. Serve immediately with cold milk and watch grown adults revert to childhood joy.