I was standing in my kitchen, the timer on the stovetop screaming “ding!” while a half‑baked brownie stared back at me like a smug teenager who just aced a test. I had promised my roommate that I’d whip up something “quick, impressive, and chocolate‑intense” for our impromptu movie night, and the only thing I had on hand was a block of dark chocolate that had been staring at me from the pantry for weeks. The smell of melted butter and sugar from the brownies was already filling the air, but my brain kept drifting to that silky, airy dessert that seemed forever out of reach. I dared myself to create a mousse that would make even the most seasoned pastry chef raise an eyebrow, and guess what? I succeeded.
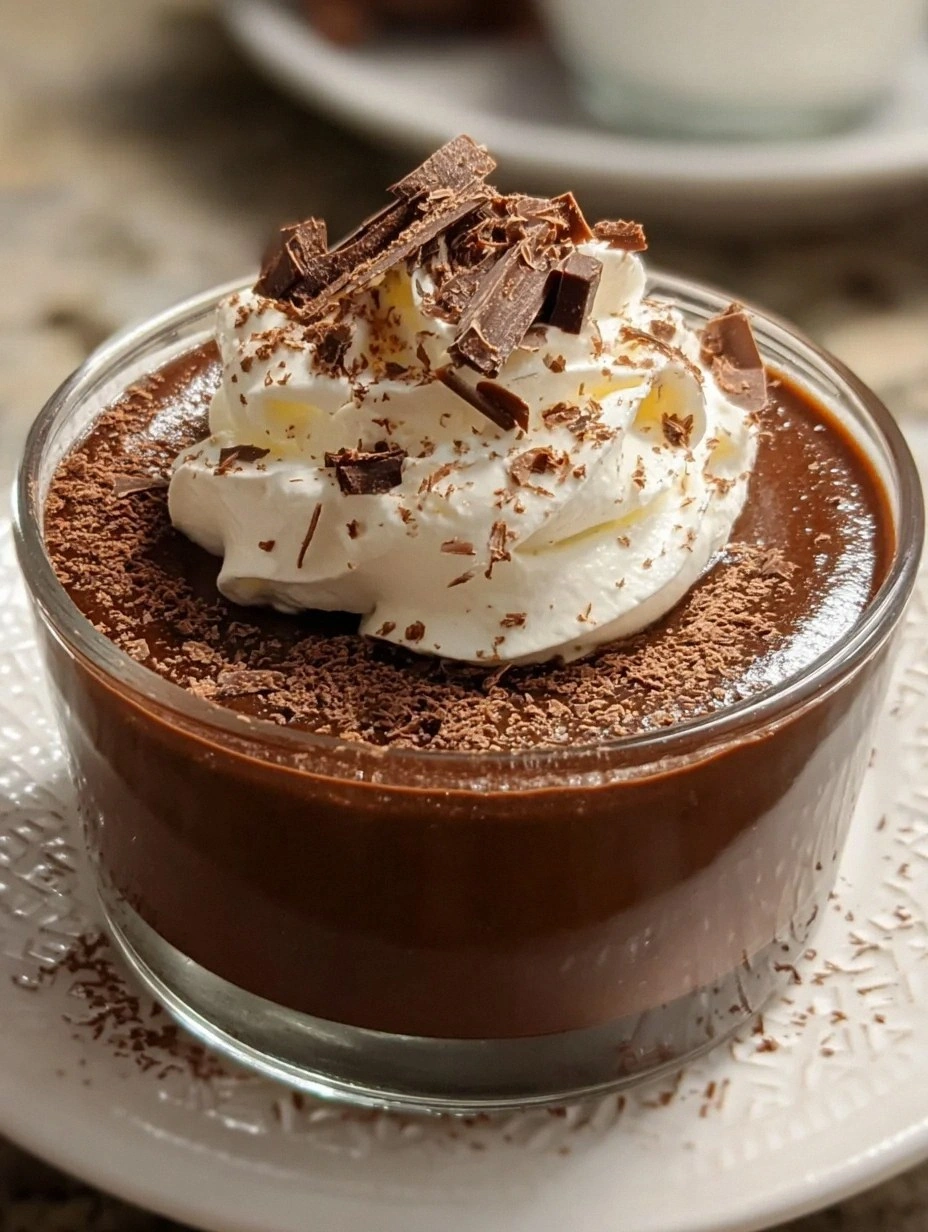
Picture this: a bowl of mousse that shimmers like a midnight lake, each spoonful melting on your tongue with the elegance of a silk scarf sliding over skin. The aroma? A deep, roasted cocoa scent that hugs the nose, accompanied by a faint whisper of vanilla that makes you think of a cozy bakery on a rainy afternoon. You’ll hear the gentle thump of the whisk as it folds the cream, the soft sigh of chocolate as it finally gives way to the spoon, and the faint crackle of the whipped egg whites when they’re perfectly aerated. The texture feels like a cloud that’s been infused with chocolate—light, fluffy, yet decadently rich.
Why does this version stand out from every other mousse you’ve ever seen on the internet? Because it strips away the pretentiousness of “double‑boiling” and “tempering” while keeping the flavor profile as bold as a double espresso shot. Most recipes ask you to spend hours battling a temperamental chocolate temper, but this one uses a simple stovetop melt and a secret ingredient that turns the whole thing into a velvety dream without any risk of graininess. I’m talking about a splash of coffee‑enhanced cream that amplifies the chocolate’s depth without ever tasting like coffee. It’s the kind of hack that makes you wonder why no one ever thought of it before.
And there’s a tiny twist that will make you gasp: a pinch of sea salt added right at the end, which cuts through the sweetness like a well‑placed plot twist in a thriller. I dare you to taste this and not go back for seconds. Let me walk you through every single step — by the end, you’ll wonder how you ever made it any other way.
What Makes This Version Stand Out
- Flavor Explosion: The combination of high‑quality dark chocolate and a splash of espresso‑infused cream creates a taste that’s both intense and nuanced, delivering a cocoa punch that lingers long after the last bite.
- Silky Texture: By folding in whipped egg whites at just the right temperature, the mousse achieves a cloud‑like lightness that feels almost weightless on the palate.
- Unbeatable Simplicity: No tempering, no fancy equipment—just a saucepan, a whisk, and a bowl. If you can melt chocolate, you can master this mousse.
- Ingredient Integrity: We rely on a handful of premium ingredients, each chosen for its role, so you’re never overwhelmed by a grocery list that reads like a novel.
- Crowd‑Pleaser Factor: Whether it’s a fancy dinner party or a casual night in, this mousse consistently earns rave reviews and multiple requests for seconds.
- Make‑Ahead Magic: The mousse holds its structure beautifully for up to 24 hours in the fridge, making it perfect for meal‑prep or last‑minute dessert emergencies.
- Versatile Base: The recipe is a blank canvas that welcomes fruit purées, liqueurs, or spices without compromising its core texture.
- Budget Friendly: By using common pantry staples like sugar and vanilla, the cost stays low while the taste feels luxurious.
Alright, let's break down exactly what goes into this masterpiece...
Inside the Ingredient List
The Flavor Base
Dark chocolate (200 g, at least 70% cacao) is the heart of this mousse. Its bitter notes provide the backbone that prevents the dessert from becoming cloyingly sweet. If you substitute milk chocolate, you’ll lose that deep, almost earthy flavor, and the mousse will feel more like a candy than a sophisticated treat. When selecting chocolate, look for a bar that snaps cleanly when broken; a good snap indicates proper tempering at the factory, which translates into a smoother melt.
The Texture Crew
Heavy whipping cream (1 cup) adds the luxurious silkiness that carries the chocolate’s richness across your tongue. Whipping it to soft peaks creates a stable foam that, when folded with the chocolate, yields that airy cloud‑like consistency. If you’re out of heavy cream, a blend of half‑and‑half with a splash of melted butter can mimic the fat content, though the mousse will be slightly less stable.
The Unexpected Star
Espresso‑infused milk (¼ cup) is the secret weapon. The coffee amplifies the chocolate’s depth without making the mousse taste coffee‑y. It works because coffee contains compounds that enhance the perception of chocolate’s bitterness, balancing the sweetness. If you’re not a coffee fan, you can replace it with a splash of orange liqueur for a citrusy twist, but expect a different flavor profile.
The Final Flourish
Egg yolks (3 large) and egg whites (3 large) serve distinct purposes. Yolks act as an emulsifier, binding the chocolate and cream into a cohesive mixture, while the whites, when whipped to stiff peaks, introduce air that lightens the mousse dramatically. Skipping the yolks will result in a grainy texture, and omitting the whites will make the mousse dense and heavy—more like a pudding than a mousse.
Everything's prepped? Good. Let's get into the real action...
The Method — Step by Step
Start by breaking the dark chocolate into small, uniform pieces and placing them in a medium saucepan. Add the espresso‑infused milk and a tablespoon of butter. Turn the heat to low and stir constantly; you’ll hear a gentle sizzle as the butter melts, and the chocolate will begin to loosen, releasing a fragrant aroma that smells like a boutique chocolate shop. Keep the temperature below 120°F (49°C) to avoid scorching. This is the moment of truth—the chocolate should become a glossy, velvety liquid without any lumps.
Kitchen Hack: Use a silicone spatula to scrape the sides of the pan; the heat retained in the silicone helps melt the last stubborn bits without additional heat.While the chocolate melts, separate the eggs. Transfer the yolks into a small bowl, add the sugar, and whisk until the mixture turns pale and slightly thickened—this should take about 2 minutes of vigorous whisking. The sugar will dissolve, and the yolks will start to feel warm to the touch, indicating that they’re ready to incorporate the chocolate later. Okay, ready for the game‑changer? The yolk‑sugar blend will act as the stabilizer that prevents the mousse from weeping.
Once the chocolate is fully melted, remove the saucepan from the heat and let it cool for about 2 minutes—this is crucial because you don’t want the yolks to scramble when they meet the chocolate. Slowly drizzle the yolk‑sugar mixture into the chocolate while whisking constantly. You’ll notice the mixture thickening and becoming glossy; this is the emulsification stage where the fat from the chocolate binds with the protein from the yolks.
Now, in a separate chilled bowl, pour the heavy cream and whisk until it reaches soft peaks. Soft peaks mean the cream holds a gentle curl when you lift the whisk, but it still flows back into the bowl. And now the fun part: add a splash of vanilla extract and a pinch of sea salt. The vanilla adds a fragrant undertone, while the salt cuts through the sweetness, making the flavor pop.
In a third clean, dry bowl, beat the egg whites until they form stiff peaks. This step is where the mousse gets its airy lift. The bowl must be completely free of any fat; even a tiny droplet of oil will prevent the whites from reaching full volume. When you lift the whisk, the peaks should stand tall and not fold over.
Watch Out: Over‑beating the whites will turn them dry and grainy, making it impossible to fold them smoothly into the chocolate mixture.Gently fold the whipped cream into the chocolate‑yolk mixture. Use a spatula and a gentle “cut and lift” motion; this preserves the air bubbles you’ve just created. The mousse should start to look lighter and more luminous with each fold. If you see streaks of chocolate, keep folding until the color is uniformly deep brown.
Finally, fold in the whipped egg whites in two batches. The first half should be mixed just enough to lighten the base, the second half should be incorporated until the mixture is smooth and glossy. The texture at this point should be airy yet thick enough to hold its shape on a spoon. This next part? Pure magic. The mousse will look slightly glossy, almost like a satin fabric.
Spoon the mousse into individual serving glasses or a large serving bowl. Smooth the tops with the back of a spoon, then cover each container with plastic wrap to prevent a skin from forming. Chill in the refrigerator for at least 2 hours; during this time the mousse will set and the flavors will meld. When you finally dig in, you’ll hear the gentle “plop” of the spoon as it meets the silky surface—pure satisfaction.
That's it — you did it. But hold on, I've got a few more tricks that'll take this to another level...
Insider Tricks for Flawless Results
The Temperature Rule Nobody Follows
Never let the chocolate exceed 120°F (49°C) before adding the yolks. If the chocolate gets too hot, the yolks will scramble, resulting in a grainy texture that’s impossible to fix. Keep a candy thermometer handy; a quick dip into the chocolate will tell you if you’re in the safe zone. I once let the chocolate sit on a hot burner for too long, and the result was a curdled mess—lesson learned.
Why Your Nose Knows Best
When the chocolate is melting, trust your sense of smell more than a timer. The moment you detect that deep, roasted cocoa scent, you know the chocolate is fully melted and ready for the yolks. If you rely solely on visual cues, you might miss the subtle stage where the chocolate is glossy but not yet fully fluid, which can lead to a dull mousse.
The 5‑Minute Rest That Changes Everything
After folding in the egg whites, let the mousse sit at room temperature for five minutes before refrigerating. This short rest allows the air bubbles to stabilize, preventing them from collapsing during the chill. A friend once skipped this step and ended up with a mousse that sank in the middle—definitely not the airy cloud we’re aiming for.
Seal the Deal with a Chill
Cover the mousse tightly with plastic wrap, pressing the wrap directly onto the surface. This prevents a skin from forming, which can ruin the silky texture. If you notice a skin forming, simply give the mousse a quick stir before serving; the flavor won’t be affected, but the texture will be restored.
Garnish Like a Pro
A light dusting of cocoa powder or a few shaved chocolate curls adds visual appeal without overpowering the mousse. For a fresh contrast, top with a spoonful of raspberry coulis; the acidity cuts through the richness and adds a pop of color. I’ve found that a sprinkle of flaky sea salt right before serving elevates the flavor profile to restaurant quality.
The Secret of the Whisk
When whisking the egg whites, use a stainless steel whisk rather than a silicone one. The metal whisk creates more friction, which incorporates air more efficiently, leading to stiffer peaks. Power transition: If you’re in a rush, a hand‑held electric mixer on low speed works fine, but be careful not to over‑beat.
Creative Twists and Variations
This recipe is a playground. Here are some of my favorite ways to switch things up:
Mocha Madness
Add a tablespoon of instant coffee granules to the melted chocolate for an extra punch of coffee flavor. The result is a mousse that feels like a dessert version of your favorite espresso drink—perfect for brunch.
Orange Zest Delight
Stir in the zest of one orange and a splash of Grand Marnier after the chocolate has cooled slightly. The citrus brightens the deep chocolate, creating a sophisticated flavor pairing that’s ideal for holiday gatherings.
Spiced Chili Kick
Mix in a pinch of cayenne pepper and a dash of smoked paprika into the chocolate before folding in the yolks. The subtle heat adds a surprising depth that will make your guests whisper, “What’s that secret ingredient?”
Berry Bliss
Fold in a cup of pureed strawberries or raspberries after the mousse has set but before chilling. The fruit puree adds a natural sweetness and a beautiful pink hue, turning the mousse into a vibrant dessert.
Nutty Crunch
Top each serving with toasted almond slivers or hazelnut crumble just before serving. The crunch contrasts with the mousse’s silkiness, providing a textural surprise that keeps the palate engaged.
Storing and Bringing It Back to Life
Fridge Storage
Cover the mousse tightly with plastic wrap and store in an airtight container. It will keep for up to 3 days, retaining its airy texture. If you notice it becoming a bit firm, let it sit at room temperature for 10 minutes before serving.
Freezer Friendly
Mousse freezes beautifully. Portion it into individual servings, seal each with a layer of parchment paper, then place them in a freezer‑safe bag. They’ll last up to 2 months. To thaw, move them to the fridge overnight; the texture remains largely unchanged.
Best Reheating Method
If you need to warm the mousse slightly (for example, to serve it warm with a sauce), place the portion in a microwave‑safe bowl, add a splash of water, and heat in 10‑second bursts, stirring gently. The added water creates steam that revives the mousse’s fluffiness without melting the chocolate.