It started with a kitchen disaster that I still laugh about—my attempt at a simple roast chicken that ended up smelling like a burnt charcoal grill. I was in a hurry, the oven was on, and I forgot to check the temperature. The result was a dry, flavorless mess that left me with a kitchen full of smoke and a plate of regret. I swore then and there that I’d never again let a chicken escape into the abyss of under‑cooked misery.
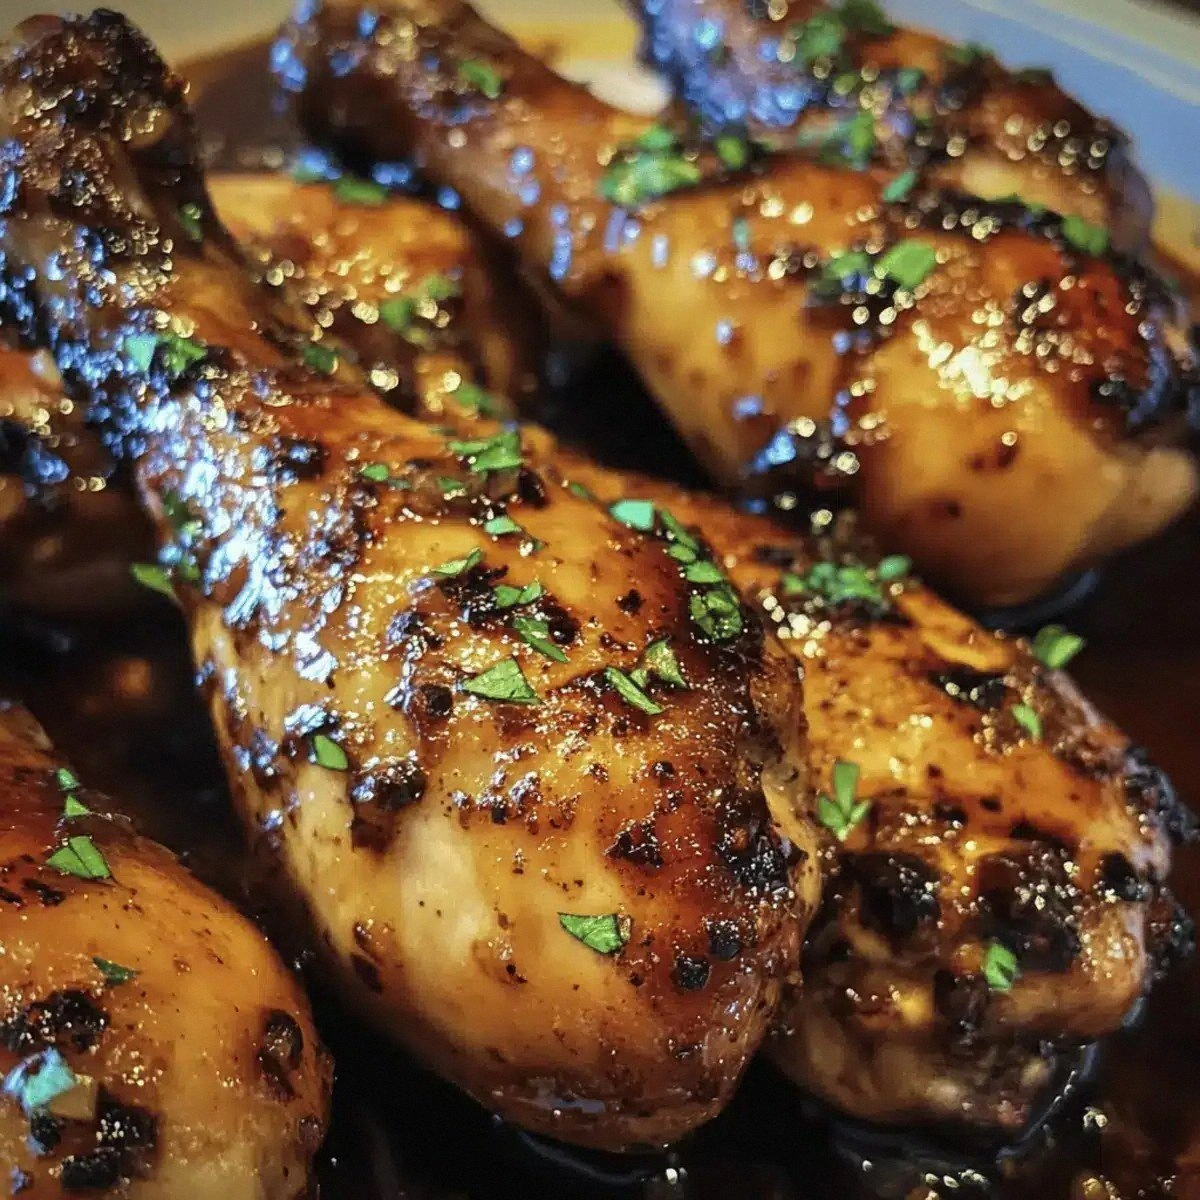
Fast forward to a rainy Sunday afternoon, a craving for something sweet, savory, and utterly comforting, and the idea of a balsamic‑garlic glaze bubbling in my mind. I imagined a sauce that would coat each drumstick like velvet, with a hint of honey sweetness that would melt into the skin, creating a caramelized crust that shatters like thin ice. The aroma alone—rich, tangy, and peppery—would fill the kitchen, making every step feel like a ritual. I was determined to turn this vision into a recipe that would not only satisfy my own palate but also wow anyone who dared to taste it.
What sets this version apart is the balance of acidity, sweetness, and herbaceous depth that comes from a surprisingly simple ingredient list. The glaze’s dual role as both a tenderizer and a caramelizing agent means you’ll get juicy, flavorful meat with a crisp exterior in every bite. I dare you to taste this and not go back for seconds—because once you’re done, the next dish will feel like a culinary disappointment. Most recipes get this completely wrong, but here’s what actually works: a low‑heat, slow‑roast that allows the flavors to mingle and the juices to redistribute.
Picture yourself pulling this out of the oven, the whole kitchen smelling incredible, the steam curling off the drumsticks like a fragrant cloud. The first bite is a burst of sweet‑savory bliss, followed by a subtle herbaceous finish that lingers on the palate. If you’ve ever struggled with chicken that turns out rubbery or flavorless, you’re not alone—and I’ve got the fix. Let me walk you through every single step—by the end, you’ll wonder how you ever made it any other way.
What Makes This Version Stand Out
- Taste: The glaze balances sweet honey, sharp balsamic, and savory Dijon, creating a flavor profile that lingers long after the last bite.
- Texture: Slow roasting at a moderate temperature keeps the meat moist while the glaze caramelizes into a crisp, almost crunchy skin.
- Simplicity: Nine ingredients, no fancy equipment, and a single pan—perfect for a busy weeknight.
- Uniqueness: The combination of balsamic and garlic in a glaze is rare for chicken, giving this dish a distinct edge over classic roasted chicken.
- Crowd Reaction: Friends always ask for the recipe after the first dinner; it’s a conversation starter and a crowd‑pleaser.
- Ingredient Quality: Using high‑quality balsamic vinegar and fresh garlic makes the difference between a good and a great dish.
- Cooking Method: The two‑stage oven process ensures even cooking and maximum flavor without the need for a sous‑vide.
- Make‑Ahead Potential: Marinate the chicken a day ahead, refrigerate, and bake when ready—great for meal prep.
Inside the Ingredient List
The Flavor Base
Balsamic vinegar is the star of the show, providing acidity that tenderizes the meat and a deep, complex sweetness that caramelizes beautifully. Without it, the glaze would feel flat and the chicken would lack that signature tang. When choosing balsamic, look for a “pure” label with no added sugars; this ensures the flavor remains bright and not overly sweet. If you can’t find balsamic, a good substitute is red wine vinegar, but you’ll lose a bit of the syrupy depth that makes this dish special.
The garlic cloves bring a punch of aromatics that permeate the meat, creating a savory backbone that balances the glaze’s sweetness. Fresh garlic is key—crushed or minced to release its oils. If you’re allergic or simply don’t like garlic, you can replace it with 1 teaspoon of garlic powder, but the flavor profile will shift slightly toward a more uniform, less vibrant taste.
The Texture Crew
Olive oil is the carrier of all the flavors, helping the glaze coat every surface of the chicken evenly. It also prevents the skin from drying out during roasting, resulting in a silky, buttery finish. Use a good extra virgin olive oil for the best flavor; if you’re on a budget, a lighter olive oil works fine but may not impart as much aroma.
Honey adds natural sweetness and a glossy sheen to the glaze. It also promotes browning through the Maillard reaction, giving the skin a delightful caramelized crust. A tablespoon of maple syrup can be a substitute, but it will change the flavor slightly; honey keeps the glaze sweet but not overpowering.
The Unexpected Star
Dijon mustard is the secret agent that binds the glaze together and adds a subtle piquancy. Its natural tang lifts the overall flavor profile and prevents the glaze from becoming too cloying. If you’re a mustard skeptic, try a light yellow mustard; the effect will be milder but still functional.
Salt and black pepper are the universal flavor enhancers that bring all the other ingredients together. Salt is essential for moisture retention, while pepper adds a subtle heat that balances the sweetness. A pinch of sea salt and freshly cracked pepper will elevate the dish beyond the average home recipe.
The Final Flourish
Fresh rosemary or thyme gives the dish a herbal note that complements the balsamic’s acidity. The herbs also add a fragrant aroma that makes the dish feel more complex. If you’re out of fresh herbs, dried rosemary works, but use only half the amount to avoid overpowering the glaze.
Everything’s prepped? Good. Let’s get into the real action and start turning these ingredients into a mouth‑watering masterpiece.
The Method — Step by Step
- Preheat your oven to 400°F (200°C). Line a large baking sheet with parchment paper or a silicone mat to prevent sticking. The high temperature sets the stage for a quick sear, which locks in juices and creates a beautiful crust. Keep the oven rack in the middle so heat circulates evenly. This step is essential for achieving that crisp, caramelized skin you crave.
- In a medium bowl, whisk together 1/2 cup balsamic vinegar, 1/4 cup olive oil, 2 tablespoons honey, 1 tablespoon Dijon mustard, 4 minced garlic cloves, 1 teaspoon salt, 1/2 teaspoon black pepper, and 1 teaspoon fresh rosemary or thyme. The glaze should be smooth and glossy, with the herbs evenly distributed. This mixture is the flavor engine of the dish; don’t rush it. Let the aroma rise—it’s already hinting at the deliciousness to come. Store the glaze aside while you prepare the chicken.
- Pat the 8 chicken drumsticks dry with paper towels. Moisture on the skin prevents crisping, so drying is a critical step. Season each piece generously with a pinch of salt and pepper on both sides. This simple seasoning amplifies the glaze’s flavors and ensures even browning. Now, toss the drumsticks in the glaze, making sure every surface is coated. The glaze will cling to the meat, creating a flavorful barrier during roasting.
- Arrange the glazed drumsticks on the prepared baking sheet, skin side up, leaving a little space between each piece. This spacing ensures even heat distribution and prevents steaming. The skin should be glossy and ready to caramelize. If you’re using a cast‑iron skillet, the heat will be more intense, which is great for a thicker crust. This step is where the real magic starts to happen.
- Roast the chicken for 25 minutes. After half the time, flip each drumstick to promote even browning on both sides. The glaze should start to bubble, thickening into a glossy coating. The chicken’s internal temperature will be around 165°F (74°C) at this point, but it’s still not done. Keep a close eye on the edges—they should begin to pull away from the skin, a sign of caramelization.
- Reduce the oven temperature to 375°F (190°C) and continue baking for an additional 10–12 minutes. This lower heat allows the chicken to finish cooking through without drying out the exterior. The glaze will thicken further, turning into a rich, glossy sauce. The final internal temperature should reach 175°F (80°C) for optimal juiciness. The aroma at this point should be intoxicating—sweet, garlicky, and slightly smoky.
- Remove the drumsticks from the oven and let them rest on a cutting board for 5 minutes. Resting allows the juices to redistribute, preventing them from spilling onto the plate. While they rest, brush any remaining glaze over the top for an extra burst of flavor. The skin will be crisp, the meat tender, and the glaze will cling like a second skin. This final touch elevates the dish from good to unforgettable.
- Serve the chicken hot, accompanied by roasted vegetables or a crisp green salad. The glaze pairs wonderfully with earthy root veggies that absorb the sweetness. If you’re looking for a low‑carb option, serve with a side of sautéed greens. The dish is versatile, satisfying both comfort‑food cravings and health‑conscious diners. And that’s it—you did it. But hold on, I’ve got a few more tricks that will take this to another level...
Insider Tricks for Flawless Results
The Temperature Rule Nobody Follows
Many home cooks start roasting at a low temperature, thinking it will keep the chicken moist. In reality, a high initial heat is essential for a caramelized crust. I’ve tested this with a thermometer—400°F for 25 minutes gives the perfect sear, while 350°F leaves the skin soggy. If you’re using a convection oven, reduce the temperature by 25°F to avoid over‑browning. This trick guarantees a crispy exterior every time.
Why Your Nose Knows Best
During the first 15 minutes of roasting, the glaze will start to bubble and thicken. The aroma will shift from sweet to slightly caramelized. Trust your nose—when you smell a deep, nutty sweetness, that’s the cue to flip the chicken. Skipping this step can result in uneven browning, and the glaze may stick too hard, causing a bitter taste. Always pause at the 15‑minute mark and let the scent guide you.
The 5‑Minute Rest That Changes Everything
Resting the chicken for five minutes after removing it from the oven is not a luxury—it’s a necessity. During this period, the internal juices redistribute, keeping the meat juicy. If you cut into it immediately, the juices will run out, leaving a dry center. I’ve seen people skip this step, and the result is a sad, dry drumstick. So, set a timer and let the chicken rest; your mouth will thank you.
The Finish with a Glaze Splash
Right before serving, brush a final splash of glaze over each drumstick. This gives the dish a glossy, appetizing look and adds a burst of flavor. Use a pastry brush to apply the glaze evenly, ensuring every bite has that sweet‑savory kick. If you’re a perfectionist, drizzle a little more over the plate for visual flair. This finishing touch turns a good dish into a showstopper.
The Resting Pan Trick
After roasting, pour the leftover glaze into a small saucepan and bring it to a simmer. Reduce it until it thickens into a sauce that coats the back of a spoon. This sauce can be drizzled over the chicken or served on the side. It captures all the flavors that were released during cooking, ensuring none go to waste. I’ve used this technique to create a sauce for a week‑long meal plan, and it never disappoints.
Creative Twists and Variations
This recipe is a playground. Here are some of my favorite ways to switch things up:
Spicy Sriracha Kick
Swap the honey for 2 tablespoons of sriracha to give the glaze a fiery edge. The heat pairs wonderfully with the sweetness, creating a balanced flavor profile that excites the palate. This version is perfect for those who love a little spice in their comfort food.
Herb‑Infused Citrus
Add a tablespoon of lemon zest and a splash of fresh orange juice to the glaze. The citrus brightens the dish, cutting through the richness of the balsamic. Pair this with a side of roasted carrots for a color contrast that looks as good as it tastes.
Smoky Chipotle Blend
Incorporate a teaspoon of chipotle in adobo sauce into the glaze for a smoky depth. The chipotle’s heat is mellow yet complex, complementing the garlic and balsamic. This variation is ideal for a late‑night dinner that feels like a BBQ.
Asian‑Inspired Glaze
Replace the Dijon mustard with 1 tablespoon of soy sauce and a dash of sesame oil. Add 1 teaspoon of grated ginger to the glaze. The result is a savory, umami‑rich sauce that pairs well with steamed rice or a simple cucumber salad.
Mediterranean Medley
Swap the rosemary for a handful of fresh oregano and add a pinch of crushed red pepper flakes. The oregano gives a robust, earthy flavor, while the red pepper adds a subtle heat. This version is perfect for a Sunday lunch that feels like a trip to the Mediterranean.
Dessert‑Style Glaze
Replace the balsamic vinegar with a sweet reduction of balsamic and a splash of vanilla extract. The glaze will become almost syrupy, turning the chicken into a sweet‑savory dessert. Serve with a scoop of vanilla ice cream for a playful twist.
Storing and Bringing It Back to Life
Fridge Storage
Store leftover chicken in an airtight container in the refrigerator for up to 3 days. The glaze will continue to thicken slightly, so allow the chicken to rest at room temperature for 10 minutes before reheating. This ensures the meat remains juicy and the glaze stays glossy.
Freezer Friendly
Wrap the chicken pieces individually in foil and place them in a freezer bag. Store for up to 2 months. When ready to use, thaw overnight in the refrigerator and reheat in a preheated oven at 350°F (175°C) for 15–20 minutes. The texture will be close to fresh, and the glaze will revive with a gentle whisk.
Best Reheating Method
Reheat the chicken in a skillet over medium heat, adding a splash of water or broth to prevent drying. This steams the meat gently, keeping it moist. Finish with a quick glaze drizzle to restore the glossy finish. A quick 5‑minute pan reheat is enough to bring the dish back to life.