Picture this: a Sunday afternoon, the kitchen humming with the low buzz of the refrigerator, and you’re staring at a bag of flour that feels heavier than it should. I had just finished a week of bland, store‑bought pie crusts that tasted like cardboard and had the texture of a soggy sponge. I was about to give up on homemade pies until a friend dared me to make a crust that was flaky, buttery, and tangy, all in one bite. The challenge was simple: use a sourdough starter that had been fermenting for a month and no more than a handful of pantry staples.
I grabbed my sourdough starter, a chilled block of butter, and a measuring cup that had seen better days. The smell that hit me as the butter melted was that buttery, almost caramelized aroma that makes you forget all the kitchen disasters that came before. The sound of the starter bubbling in the bowl was music, a promise that the dough would rise into something airy and light. The texture of the flour, when sifted into the bowl, felt like a cloud of possibility, and the anticipation of that first bite was almost too much to handle.
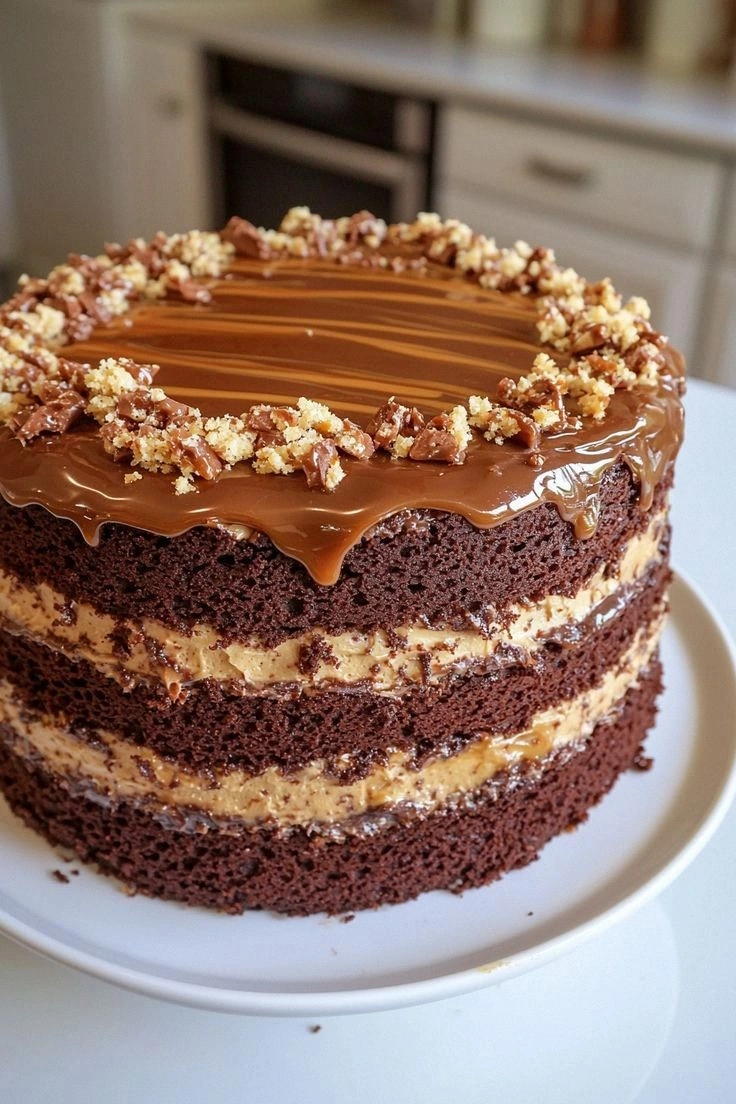
Why am I so obsessed with this version? Because it takes the humble pie crust and turns it into a showstopper that can go with sweet or savory fillings. The sourdough starter adds a depth of flavor that you can’t get from commercial yeast, giving it a subtle tang that balances the richness of the butter. The result is a crust that is crisp on the outside, tender and flaky on the inside, and that crackles just enough when you break into the first bite. I dare you to taste this and not go back for seconds.
Most recipes get this completely wrong, either by over‑mixing the dough or by using too much water. The secret is in the balance of cold ingredients and the timing of the fold‑and‑rest technique, which creates those buttery, flaky layers that shatter like thin ice. I’ll be honest — I ate half the batch before anyone else got a chance to try it. That’s how addictive it is.
If you've ever struggled with pie crusts that either puff up like a souffle or fall flat like a pancake, you're not alone — and I've got the fix. Picture yourself pulling this out of the oven, the whole kitchen smelling incredible, and the first bite sending a wave of buttery, tangy bliss through your mouth. This is hands down the best version you'll ever make at home, and it’s so simple that even a beginner can master it with a few tweaks.
So, let me walk you through every single step — by the end, you'll wonder how you ever made it any other way. The next section breaks down why this crust stands out from the rest, and then we’ll dive into the ingredients, the method, and a ton of insider tricks that will make every batch a triumph.
What Makes This Version Stand Out
- Tang: The sourdough starter introduces a subtle, complex acidity that cuts through the richness of the butter, creating a flavor profile that feels both indulgent and sophisticated. The tang is not overpowering; it’s a gentle reminder of the starter’s natural fermentation.
- Flakiness: By incorporating cold butter in small cubes and folding it into the dough, the butter layers separate during baking, producing those coveted flaky strata. The technique is simple yet effective, and the result is a crust that feels airy and buttery.
- Texture: The dough is never over‑worked; it remains just pliable enough to roll out. This restraint preserves the dough’s integrity, preventing the formation of gluten strands that would otherwise make the crust tough.
- Convenience: The recipe requires no special equipment—just a bowl, a rolling pin, and a sheet pan. That means you can whip up a pie crust in a matter of minutes, even on a busy weeknight.
- Versatility: The crust works beautifully with sweet fillings like apple or pecan, as well as savory options such as quiche or pot pie. Its neutral flavor base allows the filling to shine.
- Make‑Ahead Potential: Once baked, the crust can be stored in the fridge for up to a week or frozen for months. When reheated, it retains its crispness and flaky texture.
- Ingredient Quality: Using a high‑quality sourdough starter, cold butter, and all‑purpose flour that is free from additives ensures a clean, pure flavor that elevates the entire dish.
- Time Efficiency: From prep to bake, the entire process takes less than an hour, making it an excellent choice for last‑minute gatherings.
Inside the Ingredient List
The Flour
All‑purpose flour is the backbone of this crust. It provides the structure without adding too much protein, which could lead to toughness. If you’re aiming for a lighter crumb, consider using a blend of all‑purpose and pastry flour. Skipping the flour entirely would result in a dough that collapses under its own weight.
The Fat
Unsalted butter is essential for flavor and texture. Cold butter, cut into cubes, creates steam pockets during baking, producing flaky layers. If you’re allergic to dairy, a small amount of coconut oil can mimic the fat content, but the flavor profile will shift toward a subtle coconut note.
The Starter
Active sourdough starter is the star of this crust. It brings a natural leavening power and a subtle tang that balances the richness. Using a starter that’s at peak activity ensures the dough rises properly; a dormant starter will leave the crust dense. If you don’t have a starter, you can substitute a teaspoon of baking powder for lift, but you’ll lose the signature sourdough flavor.
The Liquid
Cold water is the only liquid needed. It hydrates the flour without activating the butter prematurely. A pinch of salt is added to enhance flavor, and a teaspoon of sugar can help caramelize the crust slightly. Too much liquid will make the dough sticky and hard to handle.
The Flavor Boosters
A teaspoon of baking powder ensures a light lift, while a tablespoon of olive oil adds a subtle sheen and helps keep the crust from drying out. A pinch of cayenne pepper can give a gentle heat that pairs well with sweet fillings. If you prefer a more neutral flavor, simply omit the pepper.
Everything’s prepped? Good. Let’s get into the real action, where the magic happens and the crust starts to take shape.
The Method — Step by Step
- Begin by sifting the flour into a large, dry bowl. The goal is to remove any lumps and to aerate the flour, which helps the dough stay light. This step also makes it easier to incorporate the cold butter later. The sound of the flour falling into the bowl is almost soothing, like a gentle snowfall.
- Add the salt, sugar, baking powder, and a pinch of cayenne pepper to the flour. Stir these dry ingredients together until they’re evenly distributed. The aroma of the spices mingles with the flour, creating a subtle perfume that hints at the flavor to come. This is the first time you’ll notice the sourdough starter’s tang will be the star of the show.
- Introduce the cold butter cubes to the dry mix. Using a pastry cutter or your fingertips, cut the butter into the flour until the mixture resembles coarse crumbs. The butter should be visible in small flecks, indicating it’s not yet melted. This process is crucial for the flaky layers that will form during baking.
- In a separate bowl, combine the sourdough starter, cold water, and olive oil. Whisk until the mixture is smooth and the starter is fully incorporated. The mixture should have a slightly thick, batter‑like consistency. The olive oil adds a subtle sheen and helps the dough stay pliable.
- Pour the wet mixture into the dry ingredients. Using a wooden spoon, stir until the dough just comes together. It will be shaggy and a little sticky, but that’s expected. Avoid over‑mixing, as that will develop gluten and make the crust tough.
- Turn the dough out onto a lightly floured surface. Gently knead it just enough to bring it together into a cohesive ball. The dough should feel smooth and elastic, not dry or crumbly. At this point, you’ll notice a faint, pleasant sour smell from the starter.
- Shape the dough into a flat disc, wrap it in plastic wrap, and refrigerate it for at least 30 minutes. This rest allows the gluten to relax and the butter to firm up again, which is essential for the final flakiness. The cold dough will be easier to roll out and less likely to shrink during baking.
- Preheat your oven to 375°F (190°C). While the oven heats, lightly oil a 9‑inch pie pan to prevent sticking. The oil also adds a subtle crispness to the bottom of the crust.
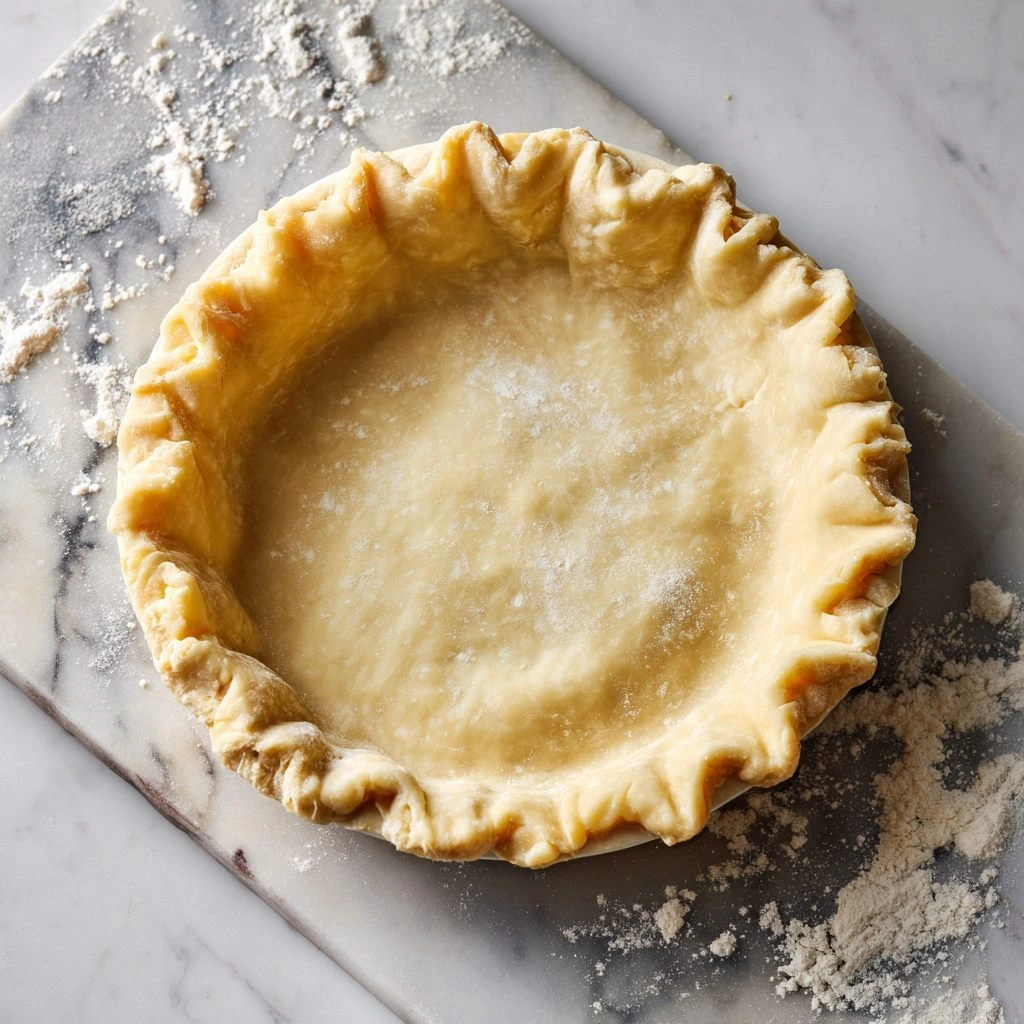
- On a lightly floured surface, roll out the dough to a diameter of about 12 inches, leaving a 1‑inch overhang. The dough should feel pliable but not overly stretchable. This size will fit a standard pie pan perfectly.
- Transfer the rolled dough to the prepared pie pan. Gently press it into the bottom and up the sides, ensuring no air pockets remain. Trim any excess dough from the edges with a knife, leaving a neat 1‑inch border.
- Use a fork to prick the bottom of the crust several times. This prevents the crust from puffing up during baking. The sound of the fork puncturing the dough is oddly satisfying.
- Place the crust in the preheated oven and bake for 12–15 minutes, or until the edges turn a light golden brown. The crust should emit a buttery aroma and have a firm, slightly crisp texture. If the edges brown too quickly, cover them with foil.
- Remove the crust from the oven and let it cool on a wire rack for 5 minutes before filling. This brief cooling period prevents the crust from becoming soggy when you add the filling. The crust should feel warm to the touch but not hot.
That’s it — you did it. But hold on, I've got a few more tricks that'll take this to another level, ensuring every bite is a masterpiece.
Insider Tricks for Flawless Results
The Temperature Rule Nobody Follows
Many bakers assume room‑temperature ingredients are fine for pie crusts, but the truth is that temperature is king. Using cold butter and cold water keeps the dough from becoming sticky and ensures the butter layers stay intact. I’ve tried baking with warm butter, and the result was a dense, chewy crust that never flaked. The trick is to chill everything for at least 10 minutes before you start.
Why Your Nose Knows Best
Your sense of smell is your best ally during baking. If the crust starts to smell like toasted nuts, it’s almost ready. If it still smells raw or like flour, it needs a few more minutes. Trust your nose, and you’ll avoid over‑baking or under‑baking.
The 5‑Minute Rest That Changes Everything
After you roll out the dough, let it rest for five minutes before placing it in the pan. This short pause relaxes the gluten, making the dough easier to shape and preventing it from shrinking in the oven. I’ve seen crusts that didn’t rest and ended up crumbling when I tried to transfer them.
Use a Baking Sheet for Even Heat
Placing the pie pan on a baking sheet distributes heat more evenly and reduces the chance of hot spots. This is especially helpful if you’re using a glass or ceramic pie dish that can retain heat unevenly.
Seal the Edges with Egg Wash
For a golden, glossy finish, brush the edges with a beaten egg before baking. This not only adds shine but also creates a subtle barrier that keeps moisture from seeping into the crust. I use a light brushstroke; too much egg can make the crust soggy.
Don’t Skip the Fork Prick
Some bakers skip the fork prick step because they think it’s unnecessary. I’ve seen crusts puff up so much that they burst the crust. Pricking the bottom keeps the crust flat and gives you a clean, even surface for your filling.
Keep the Oven Temperature Accurate
An oven that runs 10–15 degrees off can ruin your crust. A thermometer is a worthwhile investment, especially if you’re baking delicate pastries. I’ve used a cheap oven thermometer to keep my baking temperatures within ±5 degrees, which has made a noticeable difference.
Creative Twists and Variations
This recipe is a playground. Here are some of my favorite ways to switch things up:
Herbed Crust
Add finely chopped rosemary, thyme, or sage to the dry mix. The herbs infuse the crust with aromatic flavors that pair wonderfully with roasted chicken or mushroom fillings. The result is a savory crust that’s almost a side dish on its own.
Cheesy Crust
Grate a cup of sharp cheddar or parmesan into the flour before adding the butter. The cheese melts into the layers, giving a savory, slightly crunchy texture. This variation works great for quiches or even a savory pie with a cheese filling.
Nutty Crust
Pulse a handful of walnuts or pecans into the flour for a nutty crunch. The nuts add a subtle sweetness and a satisfying crunch when you bite into the crust. It’s a perfect base for apple or pecan pies.
Gluten‑Free Crust
Swap the all‑purpose flour for a gluten‑free blend that contains xanthan gum. The dough will be slightly stickier, so use extra flour on your work surface. This version retains the flaky texture while accommodating gluten sensitivities.
Sweet Crust
Replace the salt with a teaspoon of brown sugar and add a pinch of cinnamon. The crust will have a subtle sweetness that complements fruit fillings like peach or cherry. The caramelized edges add a beautiful depth of flavor.
Chocolate Crust
Add a tablespoon of cocoa powder to the dry mix. The chocolate flavor is subtle but adds a rich undertone that pairs well with chocolate or caramel fillings. The crust also takes on a deeper, almost espresso‑like color.
Spicy Crust
Incorporate a pinch of smoked paprika or chipotle powder into the flour. The subtle heat adds a kick that works well with spicy sausage or jalapeño‑filled pies. The crust’s color deepens, giving a rustic look.
Low‑Calorie Crust
Use a mixture of oat flour and almond flour to reduce calorie count. The crust will be slightly denser but still flaky, and the nutty flavor pairs well with lighter fillings. This version is perfect for health‑conscious bakers.
Storing and Bringing It Back to Life
Fridge Storage
Wrap the baked crust tightly in plastic wrap and store it in the refrigerator for up to seven days. When you’re ready to use it, let it sit at room temperature for 10 minutes before adding your filling. The crust will stay crisp and flaky.
Freezer Friendly
Place the crust in a freezer‑safe bag, removing as much air as possible. Freeze for up to three months. To thaw, let it sit overnight in the fridge, then bring to room temperature. A quick brush of water before reheating will keep it moist.
Best Reheating Method
Preheat your oven to 350°F (175°C). Place the crust on a baking sheet and bake for 8–10 minutes, or until heated through. If you’re reheating a filled pie, bake it at 350°F for 20–25 minutes, covering the edges with foil if they brown too quickly.