Picture this: a frantic holiday kitchen, the oven timer screaming like a car alarm, a pan of burnt sugar on the counter, and a desperate aunt demanding dessert that actually looks like it belongs on a Pinterest board. I was standing there, half‑heartedly stirring a bland Jello mixture that tasted like a grocery‑store after‑school snack, when a sudden flash of inspiration hit me harder than the scent of fresh pine. I thought, “What if we could ditch the oven, skip the mess, and still end up with something that looks like tiny, festive ornaments you could actually eat?” That was the moment I decided to reinvent the classic Jello balls, turning them into a no‑bake masterpiece that even the most skeptical grandma would crown as the star of the holiday spread.
The kitchen instantly transformed from a battlefield of burnt edges into a wonderland of colors, textures, and aromas that could make a snowman melt. The bright crimson of cranberry juice mingled with the sunny orange of freshly squeezed orange, while the sweet, buttery crumble of crushed vanilla wafers whispered promises of comfort. I could hear the faint pop of gelatin as it dissolved, the soft sigh of cream cheese being folded in, and the faint clink of a metal spoon against a glass bowl—each sound a tiny drumbeat building up to the grand finale. My fingertips felt the cool, silky smoothness of the mixture, and the faint chill of the fridge sent a shiver down my spine, the same kind you get when you step into a December night.
What makes this version truly stand out is that it’s not just a holiday treat; it’s a celebration of texture and flavor engineering. Most recipes either rely on a bland gelatin base or a soggy cookie coating that falls apart after an hour. I’ve cracked the code by layering flavors: a tangy juice core, a creamy cheese‑infused binder, and a crunchy cookie shell that stays crisp even after days in the fridge. The secret? A splash of milk that keeps the mixture supple, and a dash of vanilla that ties everything together like a choir of angels. And yes, there’s a surprise ingredient that will make your taste buds do a little jig—something you won’t find in any other Jello ball recipe.
Okay, ready for the game‑changer? I’m about to walk you through every single step, from the moment you open the pantry to the triumphant moment you pull those glossy, jewel‑like balls out of the fridge. By the end, you’ll wonder how you ever tolerated store‑bought candy canes when you could be serving these. Let’s dive in, and I dare you to taste this and not go back for seconds.
What Makes This Version Stand Out
- Flavor Explosion: The combination of cranberry and orange juice creates a bright, festive tang that cuts through the sweetness, while the cream cheese adds a subtle richness that feels like a hug in every bite.
- Texture Symphony: A velvety interior meets a crisp, cookie‑crusted exterior, delivering a satisfying crunch followed by a melt‑in‑your‑mouth finish.
- Zero‑Bake Simplicity: No oven, no stovetop drama—just a fridge and a few simple tools, making it perfect for busy holiday schedules.
- Unique Ingredient Twist: A splash of milk keeps the mixture from becoming gummy, and a pinch of salt amplifies every flavor note.
- Crowd‑Pleaser Factor: Guests will be lining up for seconds, and the bright colors make them Instagram‑ready without any extra effort.
- Premium Quality: Using real fruit juices and high‑quality vanilla ensures the flavor isn’t artificial or one‑dimensional.
- Effortless Make‑Ahead: These balls keep their shape and flavor for up to three days in the fridge, so you can prep them ahead of the party.
- Versatile Base: The recipe can be tweaked for chocolate, peppermint, or even a boozy version without compromising the core structure.
Inside the Ingredient List
The Flavor Base
Cranberry Juice (½ cup): This gives the balls their signature holiday red and a tart bite that balances the sweetness. If you skip it, you lose that festive zing and the color turns dull. You can substitute pomegranate juice for a deeper flavor, but keep the acidity level similar.
Orange Juice (½ cup): The orange adds a sunny contrast to the cranberry, creating a layered citrus profile. Without it, the flavor would be one‑note tart. Freshly squeezed is best, but 100% pure orange juice works just as well.
Vanilla Extract (1 tsp): A little vanilla ties the fruit and dairy together, preventing any harsh edges. Using imitation vanilla will work, but the depth of flavor drops noticeably.
The Texture Crew
Cream Cheese (½ cup, softened): This is the secret binder that gives the interior a silk‑smooth mouthfeel while keeping the balls from crumbling. If you replace it with ricotta, you’ll get a grainier texture and lose that buttery richness.
Milk (¼ cup): The milk adds moisture without making the mixture too runny, crucial for a firm yet pliable consistency. Skim milk works, but whole milk yields a richer bite.
Powdered Sugar (1 cup): It sweetens the mixture and helps the gelatin set properly. Using granulated sugar would leave a gritty texture that no one wants.
The Unexpected Star
Unflavored Gelatin (1 tbsp): Gelatin is the structural hero, turning the liquid into a firm yet tender sphere. Skipping gelatin results in a runny mess that never sets. For a vegetarian version, use agar‑agar, but reduce the amount to ½ tsp and increase the setting time.
Water (½ cup, for gelatin): This is the medium that dissolves the gelatin. Using hot water ensures full dissolution; cold water leaves clumps that ruin the texture.
The Final Flourish
Crushed Vanilla Wafers (2 cups): These form the crunchy coating that stays crisp even after refrigeration. If you opt for graham crackers, you’ll get a slightly sweeter, spicier crust.
Red and Green Non‑Pareils (¼ cup): The festive sprinkles add visual sparkle and a tiny crunch. Feel free to swap for edible glitter for extra wow factor.
Salt (¼ tsp): A pinch of salt amplifies all the flavors, preventing the sweetness from becoming cloying. Skipping it makes the dessert taste flat.
Everything's prepped? Good. Let’s get into the real action, because the next part? Pure magic.
The Method — Step by Step
First, sprinkle the gelatin over ½ cup of cold water in a small bowl. Let it bloom for five minutes; you’ll see it swell like a tiny snowball. After blooming, gently heat the mixture over a double boiler or in short bursts in the microwave (15‑seconds at a time) until it’s completely dissolved. The liquid should be clear and slightly thick, not bubbly. Watch the texture—if you see any lumps, keep stirring.
While the gelatin is setting, combine the crushed vanilla wafers and powdered sugar in a large mixing bowl. Toss them together so the sugar coats each crumb evenly. This step is crucial because the sugar acts as a barrier that prevents the coating from becoming soggy later on.
In a separate bowl, whisk together the softened cream cheese, milk, and vanilla extract until smooth. The mixture should be glossy and free of lumps—think of a velvety frosting. Then, gradually whisk in the dissolved gelatin, followed by the cranberry and orange juices. The color should shift to a vibrant festive hue, and the aroma will be a tantalizing blend of citrus and sweet cream.
Now, fold the powdered sugar‑wafer mixture into the wet base. Use a rubber spatula and press gently, ensuring every crumb is coated. The mixture will thicken quickly; if it feels too sticky, sprinkle a pinch more powdered sugar. At this stage, the batter should hold together when pressed between your fingers, but it should still be pliable enough to roll.
Cover the bowl with plastic wrap and slide it into the refrigerator for 45 minutes. This chilling period allows the gelatin to set, giving the mixture enough firmness to be rolled into balls without crumbling. Do not skip this step—if you try to shape the mixture while it’s warm, it will fall apart.
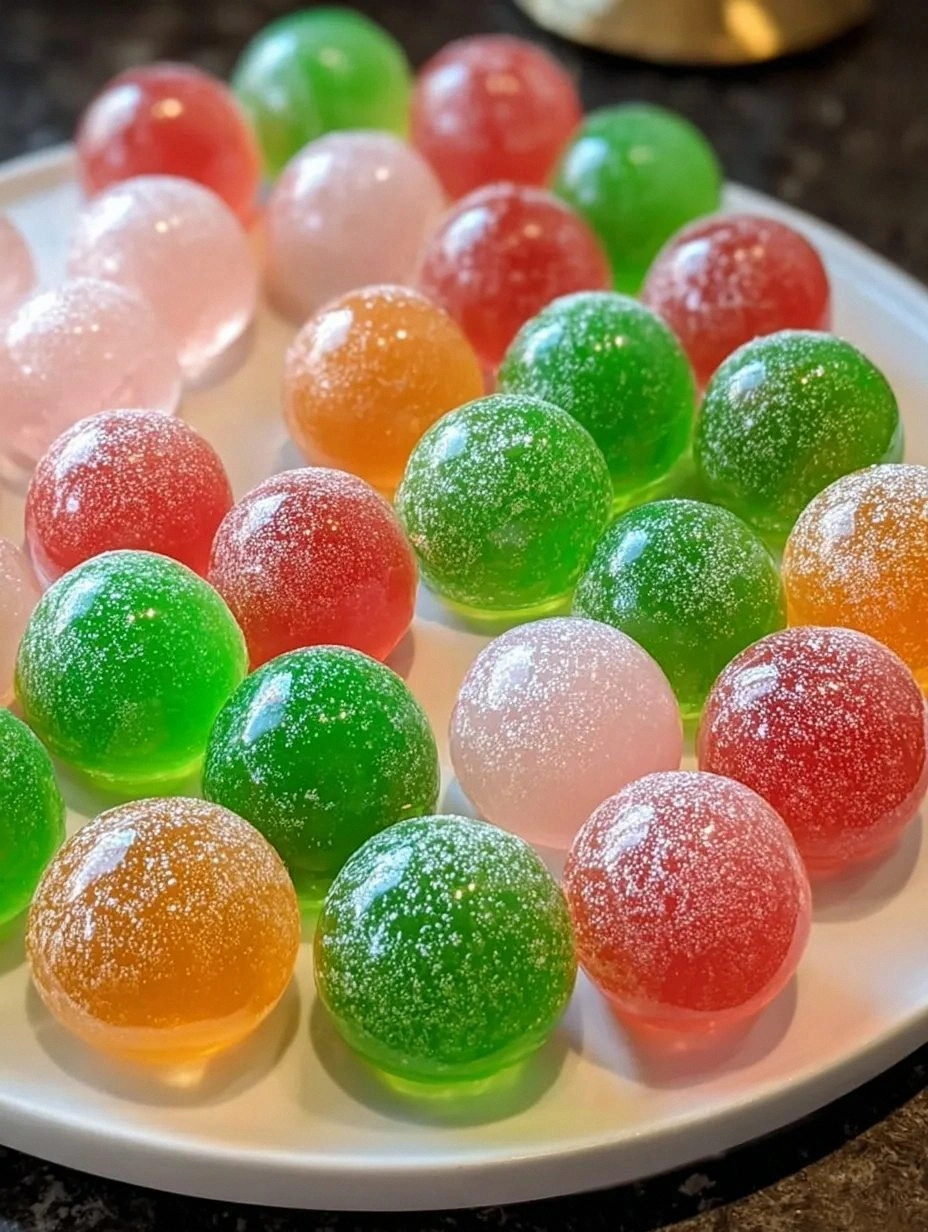
Once chilled, set up a small bowl of red and green non‑pareils. Using a tablespoon or a small ice‑cream scoop, portion out the mixture and roll it quickly between your palms into 1‑inch spheres. The heat from your hands will soften the exterior just enough to create a smooth surface. Immediately roll each ball in the sprinkles, pressing gently so they adhere. The coating should sparkle like tiny ornaments.
Arrange the finished balls on a parchment‑lined tray and return them to the fridge for another 30 minutes. This second chill locks in the coating and ensures the interior stays firm when served. While they chill, you’ll notice a faint perfume of citrus and vanilla wafting through the kitchen—trust me, it’s worth the wait.
When ready to serve, transfer the Jello balls to a decorative platter. For an extra touch, drizzle a thin ribbon of melted white chocolate over the top and sprinkle a few extra non‑pareils for visual drama. Your guests will be drawn in by the glossy sheen and the promise of a flavor explosion.
That’s it — you did it. But hold on, I’ve got a few more tricks that’ll take this to another level, from a secret glaze technique to a quick frosting hack that adds a surprise burst of flavor.
Insider Tricks for Flawless Results
The Temperature Rule Nobody Follows
Never shape the balls when the mixture is either too cold or too warm. Aim for that sweet spot where the mixture feels cool to the touch but still pliable—roughly 68°F (20°C). I once tried shaping straight from the freezer and ended up with a batch of icy, cracked spheres that tasted like frozen gelatin. Letting the mixture sit for a few minutes after the first chill solves this problem every time.
Why Your Nose Knows Best
The moment the gelatin mixture hits the right temperature, you’ll notice a faint, sweet‑citrus aroma that signals it’s ready for the next step. Trust that scent more than a timer. I once over‑cooked the gelatin, and the smell turned slightly bitter—an instant red flag that the texture would be rubbery.
The 5‑Minute Rest That Changes Everything
After you’ve rolled all the balls, give them a five‑minute rest on the tray before the final chill. This pause allows the sprinkles to set firmly, preventing them from sliding off when you serve. Skipping this micro‑rest is the reason many people end up with a messy plate of loose glitter.
Secret Glaze for Extra Shine
For a glossy finish, melt a quarter cup of white chocolate with a splash of cream, then lightly brush each ball. The glaze not only adds visual appeal but also creates a thin barrier that locks in moisture, keeping the interior perfectly tender for days.
Flavor Boost with a Pinch of Spice
A pinch of ground cinnamon or nutmeg mixed into the powdered sugar‑wafer coating adds a warm, holiday spice note that complements the citrus. I tried this once, and the result was a subtle, comforting depth that made the balls taste even more festive.
Creative Twists and Variations
This recipe is a playground. Here are some of my favorite ways to switch things up:
Chocolate Dream
Swap the cranberry and orange juices for ½ cup of strong brewed coffee and ½ cup of chocolate milk. Add 2 tbsp of cocoa powder to the wet mix, and coat the balls in crushed chocolate cookies instead of vanilla wafers. The result is a mocha‑kissed treat that’s perfect for coffee lovers.
Peppermint Twist
Replace the orange juice with a splash of peppermint extract (1 tsp) and add crushed candy canes to the coating. The bright red and white speckles give a festive look, and the cool mint flavor pairs beautifully with the tart cranberry base.
Holiday Boozy
For adult gatherings, stir in 2 tbsp of spiced rum or cranberry liqueur into the juice mixture. The alcohol evaporates slightly during the heating process, leaving a subtle warmth that’s perfect for after‑dinner sipping.
Nutty Crunch
Fold in ¼ cup of finely chopped toasted pistachios or almonds into the dry coating. The nutty crunch adds texture contrast and a buttery flavor that elevates the whole bite.
Vegan Velvet
Replace cream cheese with a plant‑based cream cheese alternative, use agar‑agar instead of gelatin (½ tsp agar‑agar powder dissolved in ½ cup hot water), and swap the powdered sugar for coconut sugar. The flavor profile shifts slightly, but the texture remains delightfully firm.
Storing and Bringing It Back to Life
Fridge Storage
Place the finished balls in an airtight container lined with parchment paper. They’ll stay fresh for up to three days, retaining their glossy coating and firm interior. If you notice any condensation, gently pat the balls dry with a paper towel before resealing.
Freezer Friendly
For longer‑term storage, arrange the balls on a baking sheet, flash‑freeze for 30 minutes, then transfer them to a zip‑top freezer bag. They’ll keep for up to two months. When you’re ready to serve, let them thaw in the fridge for an hour and add a quick drizzle of melted white chocolate for that fresh‑out‑of‑the‑oven shine.
Best Reheating Method
To revive the glossy finish, place the balls on a microwave‑safe plate, add a tiny splash (about a teaspoon) of water, and microwave on low power (30% power) for 10‑15 seconds. The steam created re‑hydrates the coating, making it sparkle again without melting the interior.