I still remember the night I was supposed to host a last‑minute brunch for a group of college friends, and the kitchen was a chaotic mess of flour, butter, and a single, stubborn batch of cookies that never quite turned out right. The oven door was left open for an extra minute, the dough was too dry, and the frosting had a strange, almost chalky texture that made me question my life choices. I stared at the tray, feeling the sting of disappointment, and then I whispered, “I’m going to fix this.” That whisper became a promise: I would create a sugar cookie bar that would not only redeem the evening but also become the talk of the town for months to come.
Imagine a room filled with the buttery aroma that drifts from the oven, the faint crackle of sugar caramelizing, and a gentle hum of the refrigerator door closing as you scoop the last spoonful of icing. The texture is a symphony: crisp on the outside, chewy inside, with a frosting that melts like silk on the tongue. The first bite is an explosion of vanilla and almond, followed by a tangy, creamy finish from the cream cheese glaze. Every mouthful feels like a hug wrapped in sugar, a moment of pure, unfiltered joy. If you’ve ever tasted a cookie that feels like a memory, this is it.
What makes this version stand out isn’t just the ingredients, but the way they dance together. The flour gives that classic chew, the leavening agents keep it airy, while the butter and sugar create that signature melt‑in‑your‑mouth texture. The icing, with its cream cheese base, adds a subtle tang that cuts through the sweetness, creating a balanced flavor profile. And the optional sprinkles? They’re not just for decoration; they add a playful crunch that contrasts beautifully with the soft bars. I dare you to taste this and not go back for seconds. Trust me, the first bite will leave you craving more.
Picture yourself pulling the tray out of the oven, steam curling like a fragrant cloud, the kitchen smelling of vanilla and butter, and your friends’ faces lighting up as they reach for the first bar. That moment of triumph, the applause, the shared smiles – that’s the reward for every ounce of effort. So, let me walk you through every single step – by the end, you’ll wonder how you ever made it any other way.
What Makes This Version Stand Out
- Flavor: The combination of vanilla and almond extracts creates a layered profile that’s both sweet and nutty, turning each bite into a delightful experience.
- Texture: The bars are crisp on the edges yet chewy inside, thanks to the precise balance of flour and leavening agents.
- Ease: The recipe requires only basic kitchen tools, making it accessible for beginners and seasoned bakers alike.
- Versatility: The optional sprinkles and almond extract let you customize the bars to fit any occasion, from casual brunches to festive parties.
- Make‑ahead: The bars can be baked in advance and stored, saving you time on busy days.
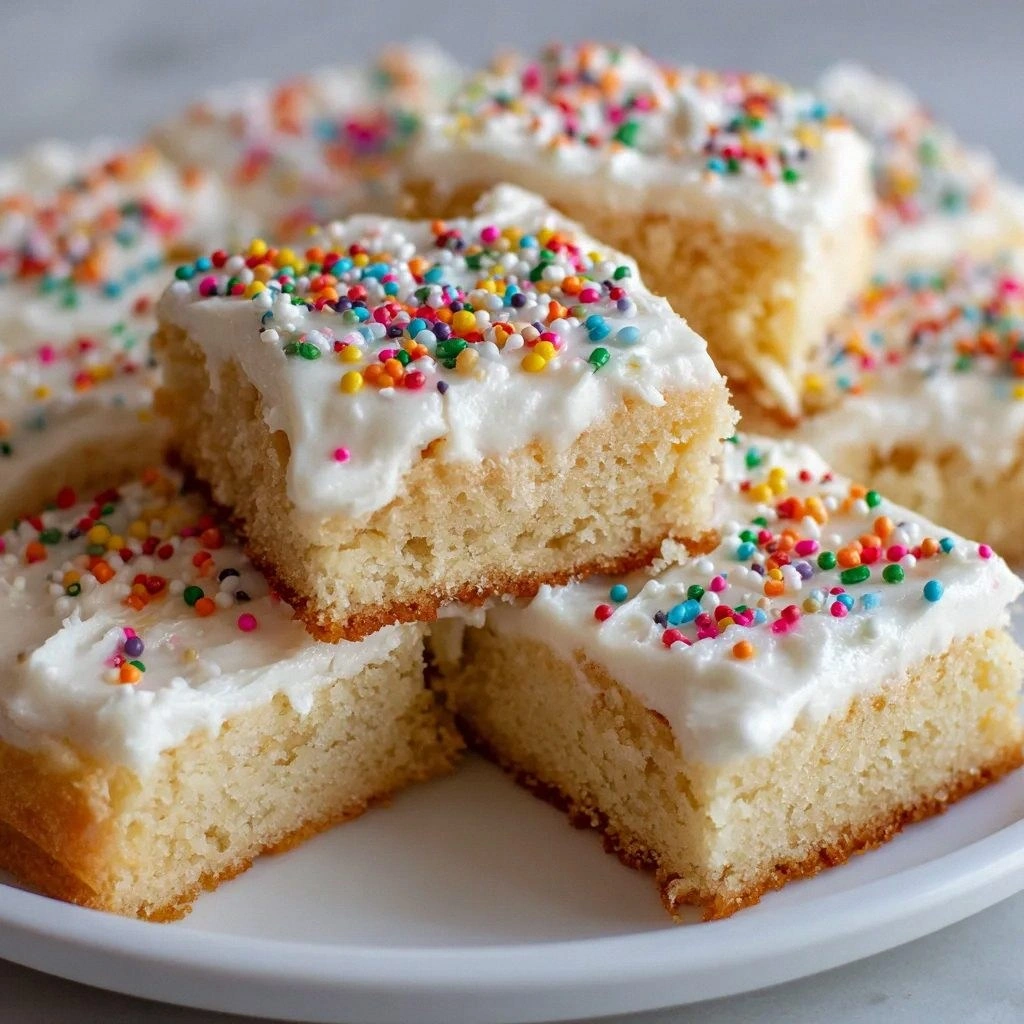
- Visual Appeal: The glossy frosting and colorful sprinkles create a feast for the eyes, elevating the overall presentation.
- Ingredient Quality: Using high‑quality butter and cream cheese ensures that each bite is rich and indulgent.
- Flavor Depth: The tang of cream cheese in the icing balances the sweetness, preventing the bars from feeling cloying.
Alright, let's break down exactly what goes into this masterpiece…
Inside the Ingredient List
The Flavor Base
All‑purpose flour is the backbone of your cookie bars, providing structure and chewiness. It absorbs moisture from the butter and sugar, creating a tender crumb that doesn’t crumble when you bite into it. If you skip flour, the bars become gummy and lose their shape, making them difficult to serve. For the best results, use a flour with a protein content of 10–12%, which gives a slightly denser texture that still feels light.
The Texture Crew
Baking powder and baking soda are the dynamic duo that gives your bars a soft rise. Baking powder, a single‑ingredient leavening agent, reacts when wet, while baking soda, which requires an acid, creates a subtle lift and a slightly crisp edge. Salt, just a pinch, enhances the sweetness and balances the flavors, preventing the bars from tasting flat. If you omit salt, you’ll notice a dull, overly sweet taste that can be off‑balance.
The Unexpected Star
Unsalted butter is the secret to that rich, melt‑in‑your‑mouth experience. Softened butter mixes evenly with the sugar, creating a smooth batter that spreads beautifully in the pan. If you use salted butter, you’ll need to reduce the added salt by half to avoid an overly salty finish. A good tip: let the butter sit at room temperature until it’s just soft, not melted, to keep the texture right.
The Final Flourish
The icing, made with cream cheese and powdered sugar, adds a tangy depth that cuts through the sweetness of the bars. The cream cheese brings a silky richness, while the powdered sugar creates a smooth, glossy coating. Sprinkles are optional but they add a festive touch and a subtle crunch that contrasts with the soft bars. If you’re watching your sugar intake, you can reduce the powdered sugar by ¼ cup and still maintain the smoothness.
Everything's prepped? Good. Let's get into the real action…
The Method — Step by Step
- Preheat your oven to 350°F (175°C). Line a 9×13 inch baking pan with parchment paper, leaving a slight overhang on the sides for easy removal. This step ensures a clean release and a uniform bake.
- In a large bowl, whisk together 2 cups all‑purpose flour, 1 teaspoon baking powder, ½ teaspoon baking soda, and ½ teaspoon salt. Sifting the dry ingredients first helps eliminate clumps and ensures even distribution of leavening agents.
- In a separate bowl, beat 1 cup softened unsalted butter with 1 cup granulated sugar until light and fluffy, about 3–4 minutes with an electric mixer on medium speed. The creaming process incorporates air, which contributes to the bars’ lightness.
- Add 1 large egg, 2 teaspoons vanilla extract, and ½ teaspoon almond extract (optional) to the butter mixture. Beat until the egg is fully incorporated, creating a smooth batter that’s ready to combine with the dry mix.
- Gradually fold the dry mixture into the wet batter, mixing until just combined. Over‑mixing can develop gluten and make the bars tough; stop as soon as the flour is incorporated.
- Transfer the batter to the prepared pan, smoothing the top with a spatula. Tap the pan lightly on the counter to release any air bubbles and ensure even thickness.
- Bake for 20–22 minutes, or until the edges are golden and a toothpick inserted near the center comes out with a few moist crumbs. The bars should smell toasty, with a faint buttery aroma that signals readiness.
- Remove from the oven and let cool in the pan for 10 minutes before transferring to a wire rack to cool completely. This resting period allows the bars to set, preventing them from breaking when cut.
- While the bars cool, prepare the icing: beat 8 oz softened cream cheese with 2 cups powdered sugar until smooth, then add 2 teaspoons vanilla extract and mix until glossy. The icing should be thick but pourable; if too thick, add a splash of milk to reach desired consistency.
- Spread the icing evenly over the cooled bars with a spatula. Immediately top with sprinkles if desired, pressing gently so they adhere to the glaze.
- Cut into squares or bars, using the parchment overhang as a guide. Serve immediately or store in an airtight container at room temperature for up to 5 days.
That’s it — you did it. But hold on, I've got a few more tricks that'll take this to another level…
Insider Tricks for Flawless Results
The Temperature Rule Nobody Follows
Baking at exactly 350°F (175°C) is crucial. A lower temperature will leave the bars undercooked and gummy, while a higher temperature will burn the edges before the center sets. I’ve tested ovens at 330°F and 360°F; the difference in texture is unmistakable. Always preheat the oven for at least 10 minutes before placing the pan inside.
Why Your Nose Knows Best
The aroma of a perfectly baked batch is the ultimate indicator of readiness. When the bars emit a sweet, buttery scent with a hint of caramel, they’re ready to come out of the oven. If you’re uncertain, insert a toothpick; it should come out with a few moist crumbs, not wet batter.
The 5‑Minute Rest That Changes Everything
Letting the bars rest in the pan for 10 minutes before transferring to a rack allows the structure to set. During this rest, the heat continues to cook the center slightly, creating a uniform crumb. Skipping this step often results in bars that crumble when you try to cut them.
Use a Parchment Overhang
The parchment paper overhang is a secret tool for easy removal. After baking, let the bars cool for a few minutes, then lift them with the parchment. This eliminates the need to cut the pan, preserving the bars’ shape.
Add a Splash of Milk to the Icing
If your icing spreads too quickly, add a tablespoon of milk to thin it just enough. This keeps the glaze from sliding off the bars while maintaining a glossy finish. It’s a simple tweak that can make the difference between a perfect presentation and a mess.
Creative Twists and Variations
This recipe is a playground. Here are some of my favorite ways to switch things up:
Coconut Crunch Bars
Replace half the flour with desiccated coconut and fold in ½ cup shredded coconut after mixing the batter. The coconut adds a tropical flavor and a subtle chew that pairs well with the cream cheese frosting.
Chocolate Chip Delight
Stir in 1 cup chocolate chips into the batter before baking. The chips melt slightly, creating pockets of chocolate that contrast with the buttery base. Serve with a drizzle of chocolate ganache for an extra indulgent touch.
Spiced Cinnamon Bars
Add 1 teaspoon ground cinnamon and ¼ teaspoon ground nutmeg to the dry mix. The warm spices elevate the bars, making them perfect for autumn gatherings or holiday celebrations.
Berry Burst Variation
Fold in ½ cup fresh blueberries or raspberries into the batter. The berries burst in the mouth, adding a tart counterpoint to the sweet icing. Keep the berries on the surface so they don’t sink during baking.
Lemon Zest Twist
Add the zest of one lemon to the batter and replace the vanilla extract with 1 tablespoon lemon juice. The citrus brightness refreshes the flavor profile, making the bars lighter and more vibrant.
Nutty Swirl Bars
Swirl in ½ cup chopped pecans or walnuts into the batter before baking. The nuts add crunch and a buttery flavor that complements the cream cheese icing.
Storing and Bringing It Back to Life
Fridge Storage
Store the bars in an airtight container at room temperature for up to 5 days. If you prefer a firmer texture, keep them in the refrigerator; the bars will stay fresh longer and the icing will set more firmly.
Freezer Friendly
Wrap each bar individually in plastic wrap and place them in a freezer bag. Freeze for up to 3 months. Thaw at room temperature for 20 minutes before serving to let the bars return to their original softness.
Best Reheating Method
To revive frozen bars, place them on a baking sheet and warm in a 300°F (150°C) oven for 5–7 minutes. Add a tiny splash of water to the baking sheet to create steam; this helps the bars re‑gain moisture and prevents them from drying out.
Everything is set. Your kitchen is now the headquarters of the best sugar cookie bars you’ll ever taste. Enjoy the compliments, share the recipe, and remember: the secret to success is in the details.