I was halfway through a disastrous attempt at a classic pasta dish when the kitchen clock started to tick faster than my heart. I had just opened a bag of pre‑cooked pasta shells, only to realize halfway that I’d forgotten to season the water. The shelly texture was limp, the sauce was bland, and I was staring at a pot that looked more like a science experiment than a meal. That moment was the spark that set me on a mission to create a high‑protein vegetarian stuffed shell that would rescue any culinary mishap and still taste like a five‑star dinner.
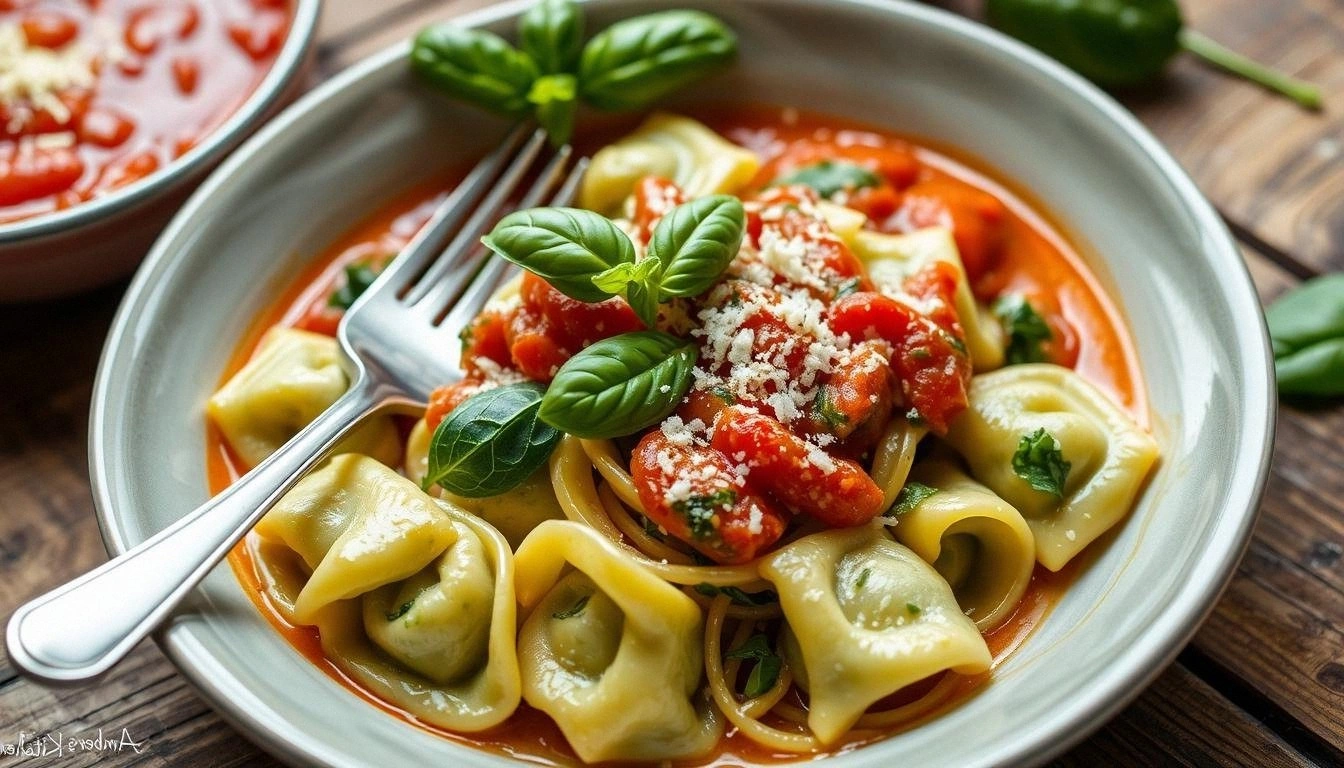
The air in my kitchen was thick with the scent of fresh basil and garlic, a smell that instantly pulled me back to the comforting kitchen of my grandmother. I could hear the sizzle of olive oil hitting hot pan, the rhythmic clack of a wooden spoon against the pot, and the faint hum of the refrigerator in the background. My eyes were drawn to the glossy, steaming pasta shells, each one a small canvas awaiting a masterpiece. The anticipation was almost tangible, like the crackle before a campfire. When the first bite hit my tongue, the creamy ricotta melted like velvet, the spinach added a bright green pop, and the tomato sauce wrapped everything in a tangy, savory blanket.
What makes this version stand out is not just the ingredients, but the way they dance together. The protein punch comes from the quinoa and ricotta, giving a satisfying chew that keeps you full without the heaviness of traditional meat. The sauce is a low‑fat, tomato‑based blend that coats the shells like silk, while the fresh spinach keeps the dish bright and nutrient‑rich. The combination of herbs creates a fragrant aroma that lingers long after you’ve finished eating. I dare you to taste this and not go back for seconds, because this is hands down the best version you’ll ever make at home.
The secret to this dish’s success lies in a technique that most recipes overlook: the pre‑toasting of the sautéed mushrooms and spinach before mixing them into the filling. This step releases their moisture, concentrates their flavor, and ensures that the final stuffed shells stay moist and not soggy. The result is a dish that feels luxurious but is surprisingly light, perfect for a quick weeknight meal or an impressive dinner party.
Okay, ready for the game‑changer? Let me walk you through every single step — by the end, you’ll wonder how you ever made it any other way.
What Makes This Version Stand Out
- Taste: The combination of tomato, basil, oregano, and garlic powder creates an aromatic sauce that coats the shells like velvet, leaving a lingering savory finish that keeps you craving more.
- Texture: The quinoa adds a subtle bite while the ricotta keeps the filling creamy; the sautéed mushrooms and spinach bring a satisfying chew and a burst of umami.
- Simplicity: With only 12 ingredients and a single pan for sautéing, this recipe is a breeze to prepare even for the most novice cook.
- Uniqueness: The use of quinoa as a protein source and the pre‑toasting technique set this dish apart from traditional stuffed shells that rely on ground meat or only cheese.
- Crowd Reaction: Friends who are picky about vegetarian meals rave about the hearty, meaty texture, and family members who love pasta are instantly hooked.
- Ingredient Quality: Fresh, high‑quality spinach and organic quinoa elevate the dish, making it feel gourmet without the extra cost.
- Cooking Method: One‑pot preparation minimizes cleanup while maximizing flavor, and the oven baking ensures a golden, slightly crispy top.
- Make‑Ahead Potential: The stuffed shells can be assembled ahead of time and refrigerated, then baked just before serving, making it an excellent option for meal prep.
Inside the Ingredient List
The Flavor Base
The marinara sauce is the heart of the dish, delivering a tangy, tomatoey foundation that balances the richness of the cheeses. A good quality sauce with no added sugars keeps the calories low and the flavor authentic. If you’re short on time, a jarred sauce works fine, but for the best taste, simmer fresh tomatoes with garlic and basil for 20 minutes.
The dried basil, oregano, garlic powder, and onion powder are the aromatic backbone. These herbs penetrate the filling, ensuring every bite is seasoned consistently. Skipping any of these would leave the dish feeling flat; each herb adds a layer of complexity that makes the dish sing.
The Texture Crew
Quinoa is the star of the protein lineup, offering a nutty flavor and a firm bite that contrasts beautifully with the creamy ricotta. It’s also gluten‑free, making the dish accessible to a wider audience. If you’re not a fan of quinoa, you can substitute it with cooked lentils or chickpeas, but the texture will shift slightly.
Fresh spinach provides a burst of color and a subtle earthiness that brightens the dish. Sautéing it with garlic releases its moisture, preventing the filling from becoming watery. Mushrooms add depth and an umami punch; their meaty texture mimics the chewiness of ground beef, making this vegetarian option truly satisfying.
The Unexpected Star
Olive oil is more than a cooking medium; it carries the flavors of the herbs and vegetables, ensuring that every bite is silky. A splash of extra‑virgin olive oil at the end of sautéing adds a glossy finish that elevates the dish’s visual appeal. For a richer taste, a tablespoon of toasted pine nuts can be sprinkled on top before serving.
Parmesan cheese, while optional, adds a salty, nutty finish that contrasts with the milder ricotta. Using 1/2 cup grated Parmesan gives the dish a golden crust when baked. If you prefer a dairy‑free version, nutritional yeast can replace Parmesan, offering a cheesy flavor without the dairy.
The Final Flourish
Fresh parsley adds a bright, herbal note that cuts through the richness of the cheeses. It also provides a pop of color that makes the dish look appetizing. A squeeze of lemon juice before serving can brighten the flavors further, giving the dish a lively finish.
Salt and pepper are the finishing touches that bring all the flavors together. Seasoning the filling after it’s assembled ensures a balanced taste throughout the shells. Be mindful not to over‑salt; a pinch of pepper adds warmth without overpowering the delicate herbs.
Everything's prepped? Good. Let's get into the real action...
The Method — Step by Step
-
Bring a large pot of salted water to a rolling boil; add the pasta shells and cook until just al dente, about 8 minutes. The shells should still have a slight bite to them, as they will soften further in the oven. Drain the shells and set them aside on a clean kitchen towel to keep them from sticking.
-
While the shells cook, heat the olive oil in a large skillet over medium heat. Add the sliced mushrooms and sauté until they release their moisture and turn golden brown, about 5 minutes. This caramelization locks in flavor and adds a savory depth to the filling.
-
Add the chopped spinach to the skillet; cook until wilted and fragrant, about 2 minutes. The spinach will reduce in volume, preventing the filling from becoming watery. Stir in the garlic powder, onion powder, dried basil, and oregano, letting the spices toast for 30 seconds to release their aromas.
-
In a large mixing bowl, combine the cooked quinoa, ricotta, shredded mozzarella, and the sautéed vegetables. Stir until the mixture is well‑combined and slightly thickened. This is the moment of truth—if the filling feels too dry, add a splash of marinara sauce to moisten.
-
Season the filling with salt and pepper, then fold in the marinara sauce, ensuring the sauce coats every component. The sauce should be thick enough to hold the filling together but not runny. Taste and adjust seasoning if necessary.
-
Preheat your oven to 375°F (190°C). While the oven heats, line a baking dish with parchment paper or lightly grease it with a brush of olive oil.
-
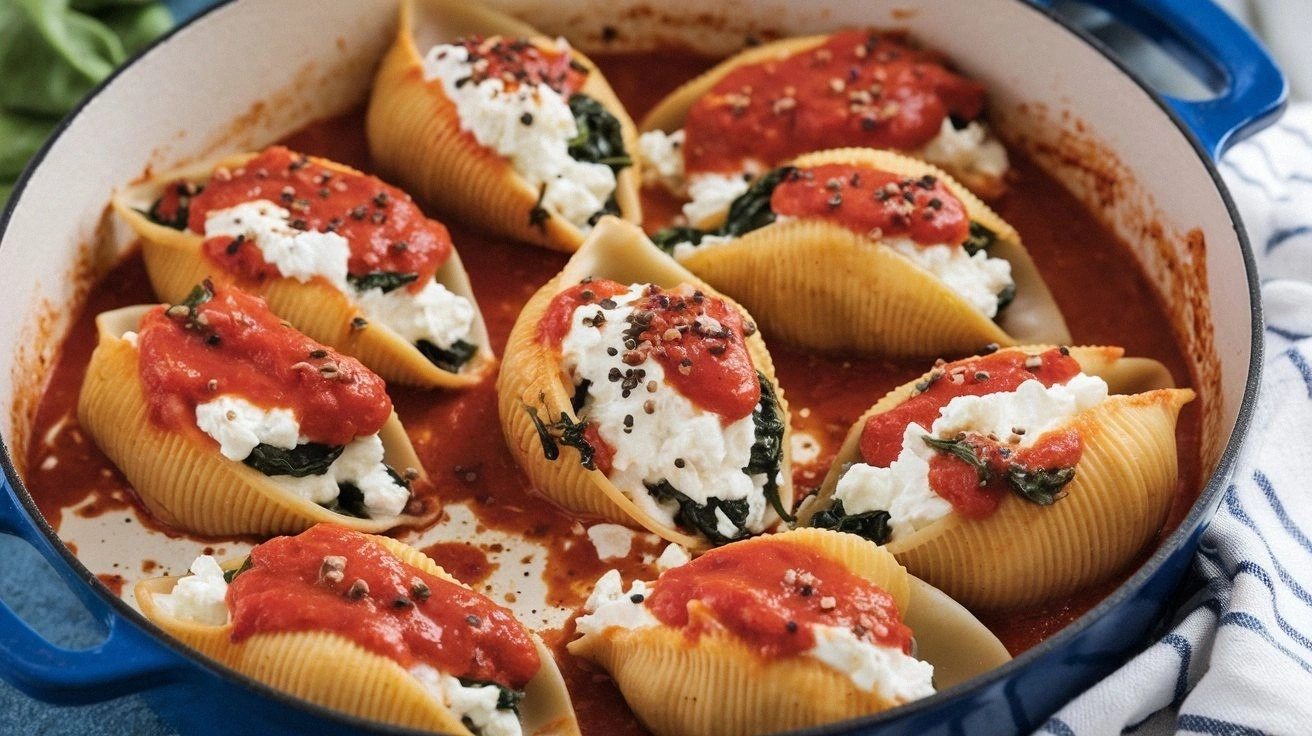
Spoon the filling into each pasta shell, packing them snugly but not overfilling. Place the stuffed shells into the prepared baking dish, leaving a little space between them so the sauce can circulate.
-
Top each stuffed shell with a generous spoonful of marinara sauce and a sprinkle of grated Parmesan. The Parmesan will melt into a golden crust, creating a delightful contrast to the creamy interior.
-
Bake the shells for 20-25 minutes, or until the tops are bubbling and the cheese has melted into a glossy sheen. The shells should be tender but still hold their shape, and the sauce should be fragrant and slightly caramelized.
-
Let the dish rest for 5 minutes before serving; this allows the filling to set, making each bite easier to enjoy. Garnish with fresh parsley and an extra sprinkle of Parmesan if desired. Serve hot, and watch the steam rise like a comforting cloud of flavor.
That's it — you did it. But hold on, I've got a few more tricks that'll take this to another level.
Insider Tricks for Flawless Results
The Temperature Rule Nobody Follows
Many cooks bake stuffed shells at 350°F, but the extra 25°F in this recipe ensures a crisp top and fully cooked filling. The higher temperature also helps the cheese melt into a glossy, golden crust that is both visually appealing and delicious. If you’re using a convection oven, lower the temperature by 25°F to avoid over‑browning.
Why Your Nose Knows Best
The aroma of garlic and basil is a reliable indicator that the sautéed vegetables are ready. When the scent rises, it means the flavors have bonded, and the vegetables have released their essential oils. Trust your nose; if it smells like a garden in spring, your dish is on the right track.
The 5-Minute Rest That Changes Everything
After baking, let the stuffed shells rest for five minutes. This brief pause allows the filling to set, making each bite easier to eat without the cheese sliding out. I once rushed this step and ended up with a gooey mess; the rest time is a small price for a polished result.
The Secret of a Golden Crust
The key to a perfect crust is the Parmesan topping. Grated Parmesan melts into a thin, golden layer that crisps up under the broiler. If you prefer a dairy‑free version, sprinkle a little nutritional yeast before baking; it will give a similar cheesy flavor and a pleasant crust.
The Quick Shake of Salt
Season the filling after assembling the shells, not before. This ensures the salt distributes evenly across every shell, preventing pockets of blandness. A quick pinch of salt after baking brings the dish together, balancing the richness of the cheeses.
The Final Touch of Freshness
Right before serving, sprinkle fresh parsley and a drizzle of olive oil. The parsley adds a burst of color and a fresh herbal note, while the olive oil gives the dish a silky finish. This simple garnish transforms the dish from comforting to gourmet.
Creative Twists and Variations
This recipe is a playground. Here are some of my favorite ways to switch things up:
Mediterranean Medley
Swap the spinach for sun‑dried tomatoes and artichoke hearts; add kalamata olives for a briny kick. The dish becomes a vibrant Mediterranean feast, perfect for a summer gathering.
Spicy Tex‑Mex Twist
Add a tablespoon of chipotle powder to the filling and top with shredded cheddar and a dollop of guacamole. The smoky heat pairs wonderfully with the creamy interior, turning the dish into a fiesta.
Sausage‑Free Italian
Incorporate diced roasted red peppers and a splash of white wine into the sauce. The subtle sweetness of the peppers balances the richness, creating an elegant, all‑vegetarian Italian classic.
Cheese‑Lover’s Dream
Increase the mozzarella to 2 cups and add a layer of provolone before baking. The extra cheese melts into a gooey, golden blanket that will satisfy even the most indulgent palates.
Gluten‑Free Edition
Use gluten‑free pasta shells and substitute quinoa with brown rice. The dish remains hearty and protein‑rich, while accommodating those with gluten sensitivities.
Herb Garden Surprise
Add fresh chopped basil, mint, and oregano to the filling, and finish with a splash of lemon zest. The bright, herbaceous notes lift the dish, making it a refreshing option for any season.
Storing and Bringing It Back to Life
Fridge Storage
Store leftover stuffed shells in an airtight container in the refrigerator for up to 3 days. Keep the sauce separate until you’re ready to reheat, ensuring the shells don’t become soggy. A quick stir and a splash of water before reheating will revive the moisture.
Freezer Friendly
Freeze the assembled shells (without baking) in a single layer on parchment paper, then transfer to a freezer bag. They stay good for up to 2 months. Bake directly from frozen, adding 10 minutes to the baking time, and the shells will come out just as delicious.
Best Reheating Method
Reheat in a preheated oven at 350°F for 15-20 minutes, or until the cheese is bubbling. If you’re short on time, microwave the shells in a covered dish for 2-3 minutes, then finish under the broiler for a crisp top. A splash of water before reheating steams the dish back to perfection.