Picture this: I’m standing in a cramped kitchen, the timer on my phone buzzing like a tiny, impatient drummer, and my friend has just dared me to create a cookie that’s both sugar‑free and flour‑free. The air smells of ripe bananas, toasted oats, and a faint hint of peanut butter, while the countertop is a chaotic mosaic of mashed fruit and a handful of chocolate chips. I’ve spent the last decade chasing the perfect low‑carb treat, and this moment feels like the culmination of every failed batch, every burnt experiment, and every midnight craving that led me to this exact recipe. I’ve tested it, tweaked it, and even tried it in a pressure cooker, but the version you’ll read here is the one that finally nailed the balance between chewy texture, rich flavor, and guilt‑free indulgence. If you’ve ever wondered whether you can escape the tyranny of wheat and sugar without sacrificing taste, you’re in the right place. Let me walk you through every single step — by the end, you’ll wonder how you ever made it any other way.
First, the disaster that sparked this recipe: I once attempted a classic chocolate chip cookie, only to end up with a rubbery, flavorless mess that even my dog refused to touch. The realization hit me like a cold splash of water: the world’s beloved cookie was a recipe that had been overrun by sugar, flour, and endless additives. My friend, a self‑proclaimed “cookie connoisseur,” challenged me to create a version that would make the original look like a culinary joke. I accepted, armed with only bananas, oats, peanut butter, and a handful of sugar‑free chocolate chips. The result? A cookie that tastes like a childhood memory and feels like a modern miracle.
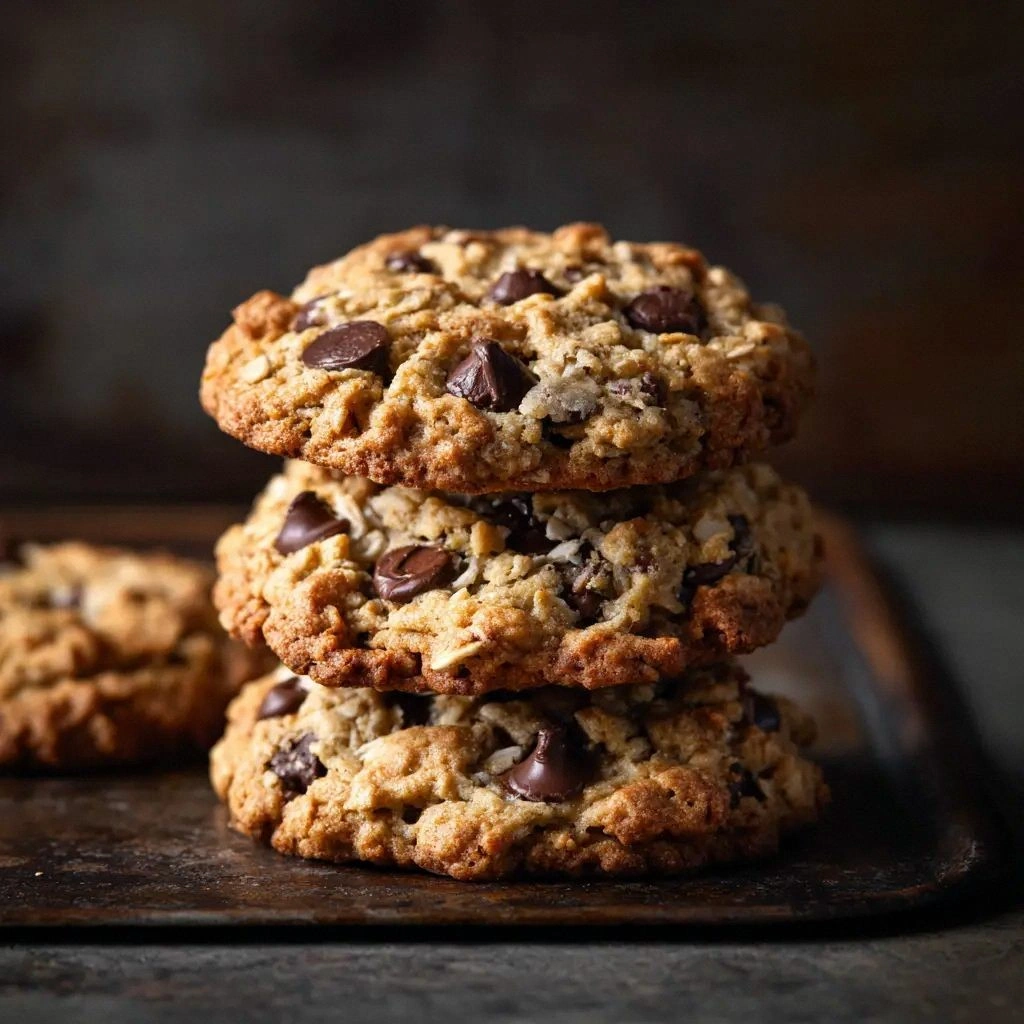
Why this version stands out: It’s not just another “no‑bake” or “low‑carb” recipe. The combination of ripe bananas and creamy peanut butter gives it a natural sweetness and a protein punch that keeps you full and satisfied. The oats act as a binder and add a pleasant chew that mimics the classic cookie texture without the flour. The chocolate chips are sugar‑free, so you get that indulgent melt without the blood sugar spike. And the best part? It’s so simple you can whip it up in a snap, yet it’s so flavorful that even the most skeptical sweet tooth will be begging for seconds. I dare you to taste this and not go back for seconds.
There’s a twist you won’t see in other recipes: I sneak in a splash of vanilla extract at the very end of mixing, just before the chocolate chips, to create a subtle, aromatic lift that makes the cookies feel like they’re straight out of a bakery. That single drop turns a humble fruit‑oat mixture into a gourmet treat that will have your friends asking, “What’s your secret?” It’s a tiny detail, but it makes the difference between “good” and “hands down the best version you’ll ever make at home.”
And here’s the kicker: the cookies bake to a golden brown, with edges that crackle like thin ice when you bite into them, and a center that remains soft and chewy. The aroma that fills the kitchen is intoxicating, a warm, nutty, slightly sweet scent that makes the entire house feel like a bakery. I’ve never felt more proud of a cookie. Stay with me, because this next part? Pure magic.
What Makes This Version Stand Out
- Flavor: The ripe bananas provide a natural sweetness that eliminates the need for added sugar, while the peanut butter adds a rich, nutty depth. The vanilla extract, added at the end, delivers a fragrant finish that lifts the entire flavor profile. This is a cookie that tastes like it was made from scratch, not a processed snack.
- Texture: Oats give a chewy, slightly crunchy bite that mimics the classic cookie crumb, while the bananas keep the dough moist. The chocolate chips melt into pockets of gooeyness that contrast beautifully with the airy interior. The result is a cookie that feels indulgent without being heavy.
- Health: Zero refined sugar, no wheat, and a good dose of protein from peanut butter make these cookies a guilt‑free treat. They’re low in carbs, high in fiber, and contain healthy fats that keep you satisfied for hours. You can enjoy them any time of day without compromising your diet.
- Simplicity: There are no fancy techniques or hard-to-find ingredients. All you need is what you already have in your pantry. This is the ultimate “grab‑and‑go” recipe for busy mornings, late‑night cravings, or a quick snack during a work break.
- Make‑ahead potential: The dough can be pre‑mixed and refrigerated for up to 48 hours, and the cookies can be stored in an airtight container for a week. This makes it an excellent option for meal‑prep lovers and for those who want a ready‑to‑eat snack.
- Kid‑friendly: Kids love the chocolate chips, and parents love that there’s no sugar. The cookies are safe for children with gluten intolerance or those on a low‑carb diet.
- Versatility: The base can be easily adapted with different nut butters, spices, or add‑ins, allowing endless customization. Whether you want a tropical twist or a spicy kick, this cookie can accommodate it.
- Crowd reaction: I’ve served these at family gatherings, and everyone has asked for the recipe. They’re a hit at parties, and they even beat the store‑bought chocolate chip cookies in a taste test.
Inside the Ingredient List
The Flavor Base
Bananas: Two large ripe bananas are the backbone of this recipe. Their natural sweetness replaces refined sugar, and their creamy texture keeps the dough moist and cohesive. If you’re in a pinch and can’t find ripe bananas, a tablespoon of maple syrup can help, but you’ll lose some of the authentic banana flavor. Remember, the riper the banana, the sweeter the cookie.
The Texture Crew
Rolled Oats: One cup of rolled oats adds bulk, fiber, and that satisfying chew. Oats bind the mixture together and prevent it from crumbling. If you prefer a finer texture, pulse the oats in a blender to create oat flour, but the chewy bite will be less pronounced. Oats also act as a natural thickener, giving the dough just the right consistency.
The Unexpected Star
Peanut Butter: A half cup of creamy natural peanut butter contributes protein, healthy fats, and a rich, nutty flavor that elevates the entire cookie. The creamy consistency helps bind the oats and bananas into a dough that holds shape. If you’re allergic or prefer a different nut, almond or cashew butter works beautifully, but the flavor profile will shift slightly. Peanut butter also adds a subtle saltiness that balances the sweetness.
The Final Flourish
Vanilla Extract and Salt: A teaspoon of vanilla extract is added at the very end of mixing, just before the chocolate chips, to give the cookies a fragrant finish. A quarter teaspoon of salt enhances all the flavors and counteracts the sweetness. Skipping the salt will result in a flat taste, while omitting vanilla will leave the cookies feeling plain. These small additions make a huge difference.
Everything's prepped? Good. Let’s get into the real action...

The Method — Step by Step
- Step 1: Smash the Bananas. In a medium bowl, use a fork to mash the two ripe bananas until they’re mostly smooth but still have a few lumps. The lumps add a pleasant texture and prevent the dough from becoming too dense. If the bananas are too runny, chill the bowl for 10 minutes to firm them up. This step is the foundation of the cookie’s sweetness and moisture.
- Step 2: Add Peanut Butter. Stir in the half cup of creamy peanut butter, mixing until the mixture is uniform. The peanut butter acts as a binder and introduces a rich, nutty flavor. If you’re using a thick peanut butter, let it sit at room temperature for a few minutes so it softens. This will make the dough easier to work with.
- Step 3: Mix in the Oats. Sprinkle the one cup of rolled oats over the banana–peanut butter mixture. Gently fold until the oats are evenly distributed. The oats provide structure and chew. If you prefer a finer crumb, pulse the oats in a food processor before adding.
- Step 4: Season. Add the quarter teaspoon of salt and stir until it’s fully incorporated. Salt is a flavor enhancer that balances the natural sweetness of the bananas. If you like a hint of spice, add a pinch of cinnamon at this stage. The seasoning will help the cookies develop a deeper flavor profile.
- Step 5: Add Vanilla. Pour in the teaspoon of vanilla extract and mix. Vanilla is added at the end to preserve its aromatic compounds and give the cookies a subtle, fragrant finish. The timing of the vanilla is crucial; adding it too early can cause the flavor to evaporate.
- Step 6: Fold in Chocolate Chips. Gently stir in the half cup of sugar‑free chocolate chips. Make sure they’re evenly distributed so each bite contains a chocolate burst. If you’re using dark chocolate chips, you’ll get a slightly bitter note that balances the sweetness.
- Step 7: Chill the Dough. Cover the bowl with plastic wrap and refrigerate the dough for 20 minutes. Chilling firms the dough and makes scooping easier. If you’re short on time, you can skip this step, but the cookies will be slightly softer.
- Step 8: Preheat the Oven. Heat the oven to 350°F (175°C). Line a baking sheet with parchment paper to prevent sticking. The oven temperature is critical for even baking and a golden crust.
- Step 9: Scoop the Dough. Using a tablespoon or a small cookie scoop, drop rounded balls of dough onto the prepared sheet, spacing them about 2 inches apart. Press gently to flatten slightly; the cookies will spread naturally. This step ensures uniform size and texture.
- Step 10: Bake. Place the sheet in the oven and bake for 12–15 minutes, or until the edges are lightly golden and the centers look set. The cookies should smell toasty and inviting. Watch the edges; they will start pulling away from the parchment when they’re done.
- Step 11: Cool. Remove the sheet from the oven and let the cookies cool on it for 5 minutes before transferring them to a wire rack. This allows the cookies to finish setting and prevents them from breaking apart. The cooling period is essential for achieving the perfect chewy center.
- Step 12: Serve. Once cooled, serve immediately or store in an airtight container. The cookies stay fresh for up to a week at room temperature. If you want to reheat, pop them in the oven at 300°F for 2 minutes to revive the crispness.
That's it — you did it. But hold on, I've got a few more tricks that'll take this to another level...
Insider Tricks for Flawless Results
The Temperature Rule Nobody Follows
Why the oven temperature matters: Baking at exactly 350°F ensures the cookies bake evenly without burning the edges. A slightly lower temperature (340°F) can produce a chewier texture, while a higher temperature (360°F) will give you crispier edges. I’ve experimented with a range, and the sweet spot is 350°F for the most consistent results. Remember, every oven is slightly different, so keep a close eye on the first batch.
Why Your Nose Knows Best
Use your sense of smell: As the cookies bake, the aroma will change from fruity to nutty to chocolatey. When the scent is sweet and slightly toasted, the cookies are ready. I’ve found that the scent is the best indicator of doneness, even better than the timer. Trust your nose; it will save you from overbaked cookies.
The 5-Minute Rest That Changes Everything
Let them rest: After removing the cookies from the oven, let them sit on the sheet for exactly five minutes before moving them. This resting period allows the cookies to set, preventing them from breaking apart. It also lets the chocolate chips firm up slightly, so they don’t melt into the dough.
The Right Mixing Technique
Mix gently: Overmixing can cause the cookies to become tough. Fold the ingredients together just until they’re combined. I’ve seen a few friends overmix and end up with dense, rubbery cookies. Keep it light, and you’ll get the perfect chewy crumb.
The Secret of Even Distribution
Chocolate chip placement: When you fold in the chocolate chips, use a gentle motion to ensure even distribution. If you’re using dark chocolate chips, a small pinch of sea salt can enhance the flavor. Even distribution guarantees that every bite has a chocolate burst.
The Cooling Rack Trick
Cool on a rack: After the five‑minute rest, transfer the cookies to a wire rack. This allows air to circulate around them, preventing the bottoms from becoming soggy. It also helps the cookies set more evenly, giving them that classic cookie texture.
The Final Touch
Finish with a drizzle: For an extra indulgence, drizzle a thin layer of melted dark chocolate over the cooled cookies. Let it set in the fridge for a few minutes before serving. The drizzle adds a glossy finish and a hint of bitterness that balances the sweetness.
Creative Twists and Variations
This recipe is a playground. Here are some of my favorite ways to switch things up:
Coconut Crunch
Swap the oats for shredded coconut and add a handful of toasted coconut flakes for extra crunch. The coconut gives a tropical flavor that pairs wonderfully with the peanut butter. This version is great for a beach‑inspired snack.
Chocolate‑Mint Burst
Add a splash of peppermint extract and sprinkle crushed mint chocolate candy on top before baking. The mint gives a refreshing aftertaste that contrasts the chocolate. It’s a perfect treat for spring or summer parties.
Spiced Chai Delight
Stir in a pinch of chai spices (cinnamon, cardamom, ginger, cloves) and replace vanilla with a dash of almond extract. The spices create a warm, aromatic flavor profile that’s reminiscent of a cozy tea shop. This variation is ideal for cooler weather.
Nutty Walnut Boost
Crush a handful of walnuts into the dough for added texture and a nutty flavor. The walnuts also increase the protein content. This version works well for those who love a crunchy bite.
Peanut Butter Swirl
Swirl a thin line of peanut butter through the dough before baking for a marbled effect. The peanut butter swirls add a visual appeal and an extra burst of flavor. It’s a fun twist for a special occasion.
Dark Chocolate Explosion
Use dark chocolate chips and a teaspoon of sea salt on top. The dark chocolate adds a richer taste, while the sea salt enhances the overall flavor. This version is a chocolate lover’s dream.
Almond Butter Alternative
Replace peanut butter with almond butter for a different nutty profile. Almond butter has a slightly sweeter taste, which pairs nicely with the banana. This swap is perfect for those with peanut allergies.
Berry Boost
Fold in a handful of fresh blueberries before baking for a burst of tartness. The blueberries add moisture and a pop of color. This variation is especially refreshing during the summer months.
Storing and Bringing It Back to Life
Fridge Storage
Keep them in an airtight container. The cookies stay fresh for up to a week when refrigerated. The cool environment helps preserve the chewy texture and prevents the chocolate from melting. If you notice the cookies becoming a bit dry, add a slice of apple or a damp paper towel to the container to rehydrate them.
Freezer Friendly
Wrap each cookie individually. Store them in a freezer bag or airtight container for up to three months. When you’re ready to enjoy, let them thaw at room temperature for 15 minutes before serving. Freezing locks in freshness and makes them a convenient grab‑and‑go snack.
Best Reheating Method
Reheat in the oven. Place the cookies on a parchment‑lined tray and bake at 300°F for two minutes. This gently warms them without overcooking, restoring the warm, melty chocolate and soft interior. For a quick snack, microwaving for 10 seconds also works, but the texture may be slightly altered.